Quick Start Guide: Issue Your First NFT Credential

 Author:
Artem Grigoriev
Author:
Artem Grigoriev
- Video Guide
- Step 1: Register Your Institution
- Step 2: Log In and Access Your Dashboard
- Step 3: Purchase Project Credits
- Step 4: Set Up Your Institution's Profile Page
- Step 5: Understanding "Projects"
- Step 6: Prepare for Bulk Import - Download Template
- Step 7: Fill in the Import Template
- Step 8: Export Template to .txt or .tsv Format
- Step 9: Import Your Data File
- Step 10: Review and Edit Draft Projects
- Step 11: Resetting Drafts and Re-importing (Optional)
- Step 12: Using Custom Images for Projects (Optional)
- Step 13: Signing Projects to Issue NFTs
- Step 14: Viewing and Managing Issued NFT Credentials
Video Guide
Stay tuned! A step-by-step video instruction for this guide is on its way and will be posted here soon.;)
Step 1: Register Your Institution
Goal: Obtain your login credentials (username and password) to access the platform.
Procedure:
-
Navigate to the Website: Go to https://credly.study/

-
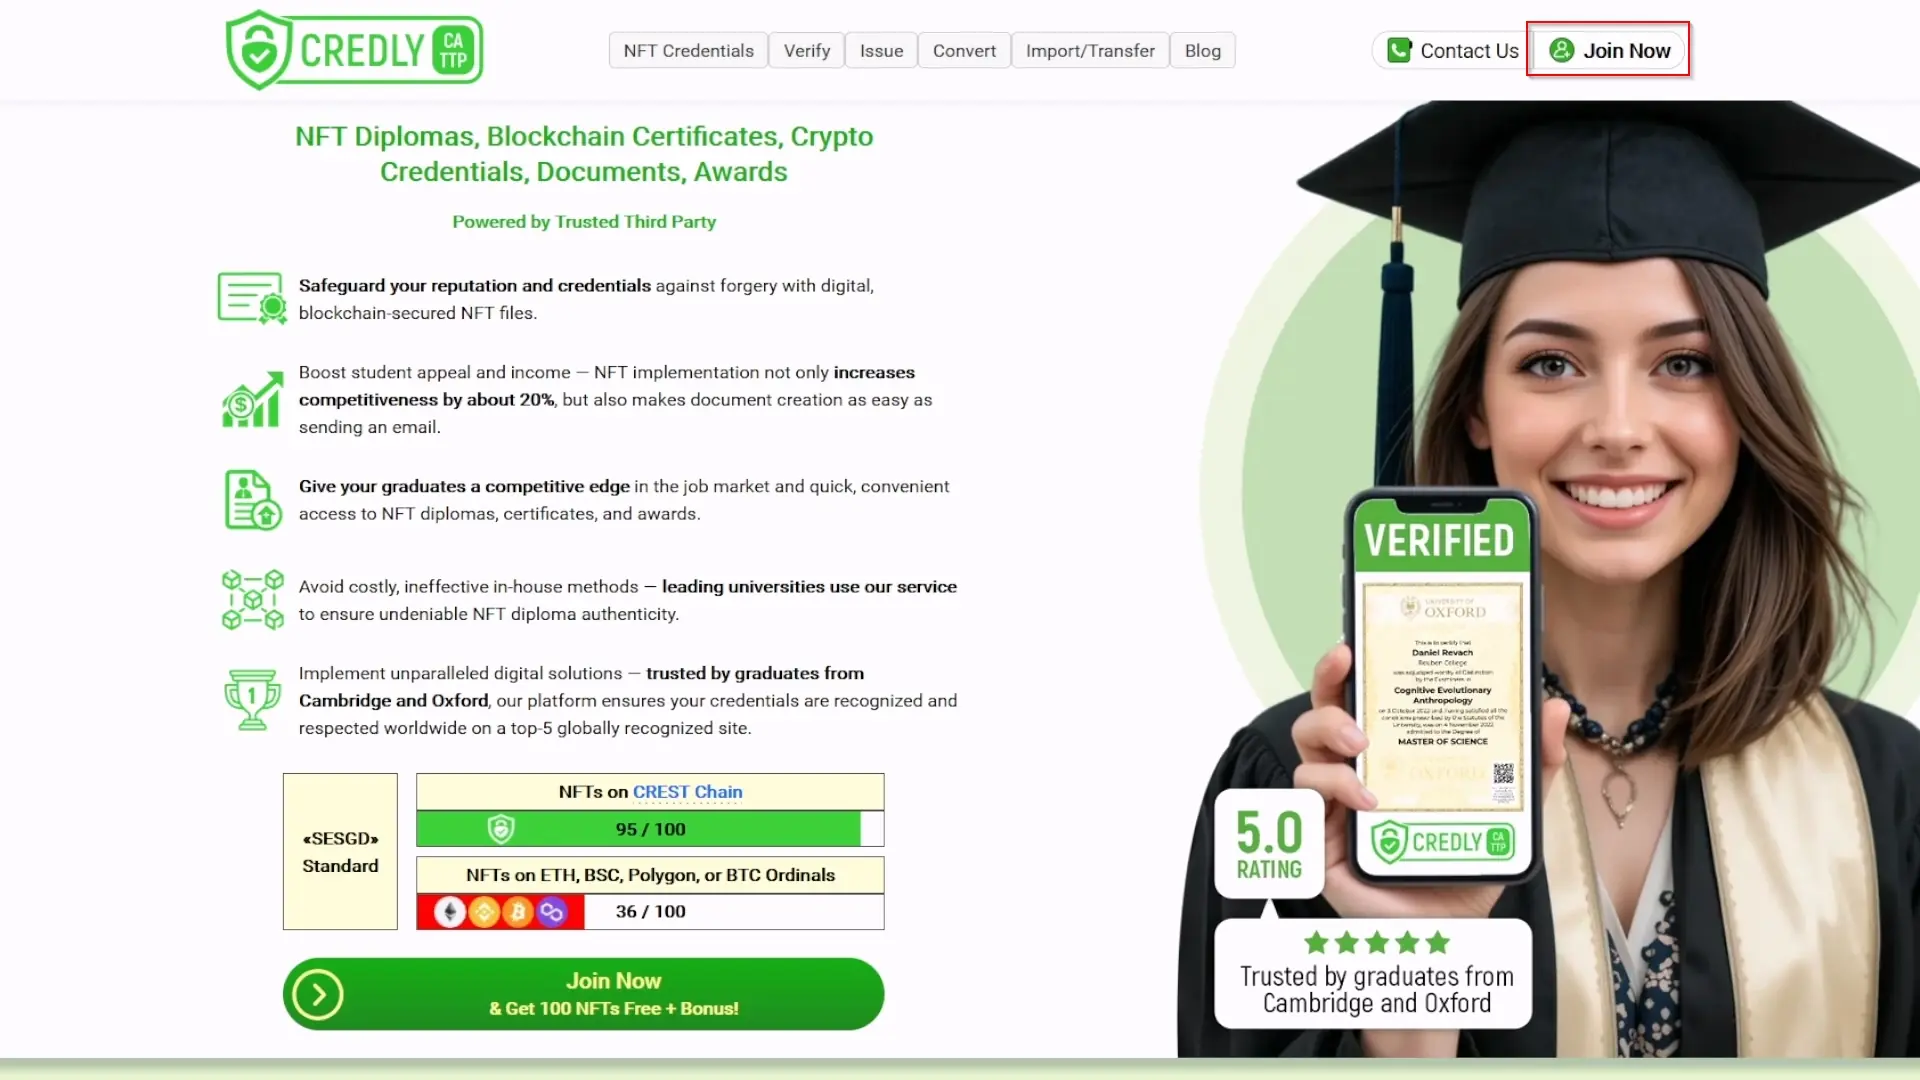
Initiate Registration: In the top-right corner of the site, click the "Join Now" button.
-
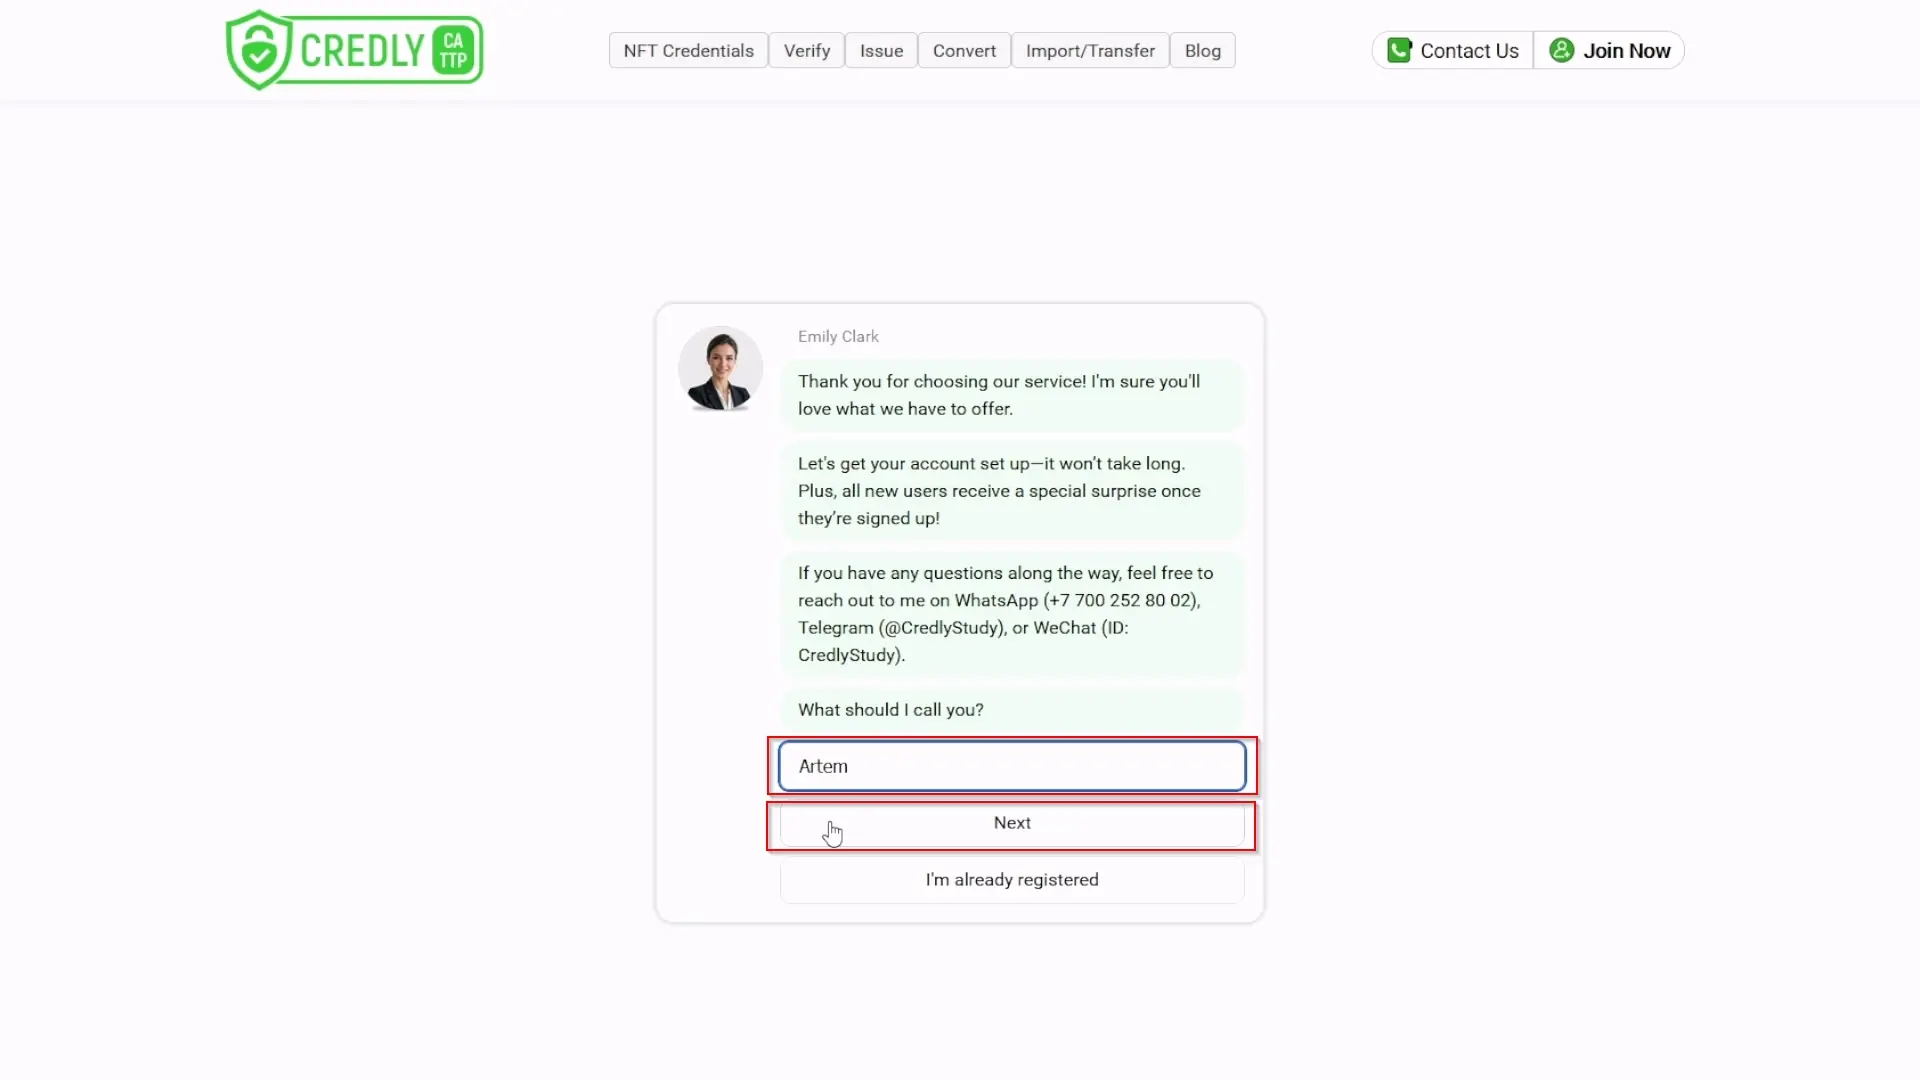
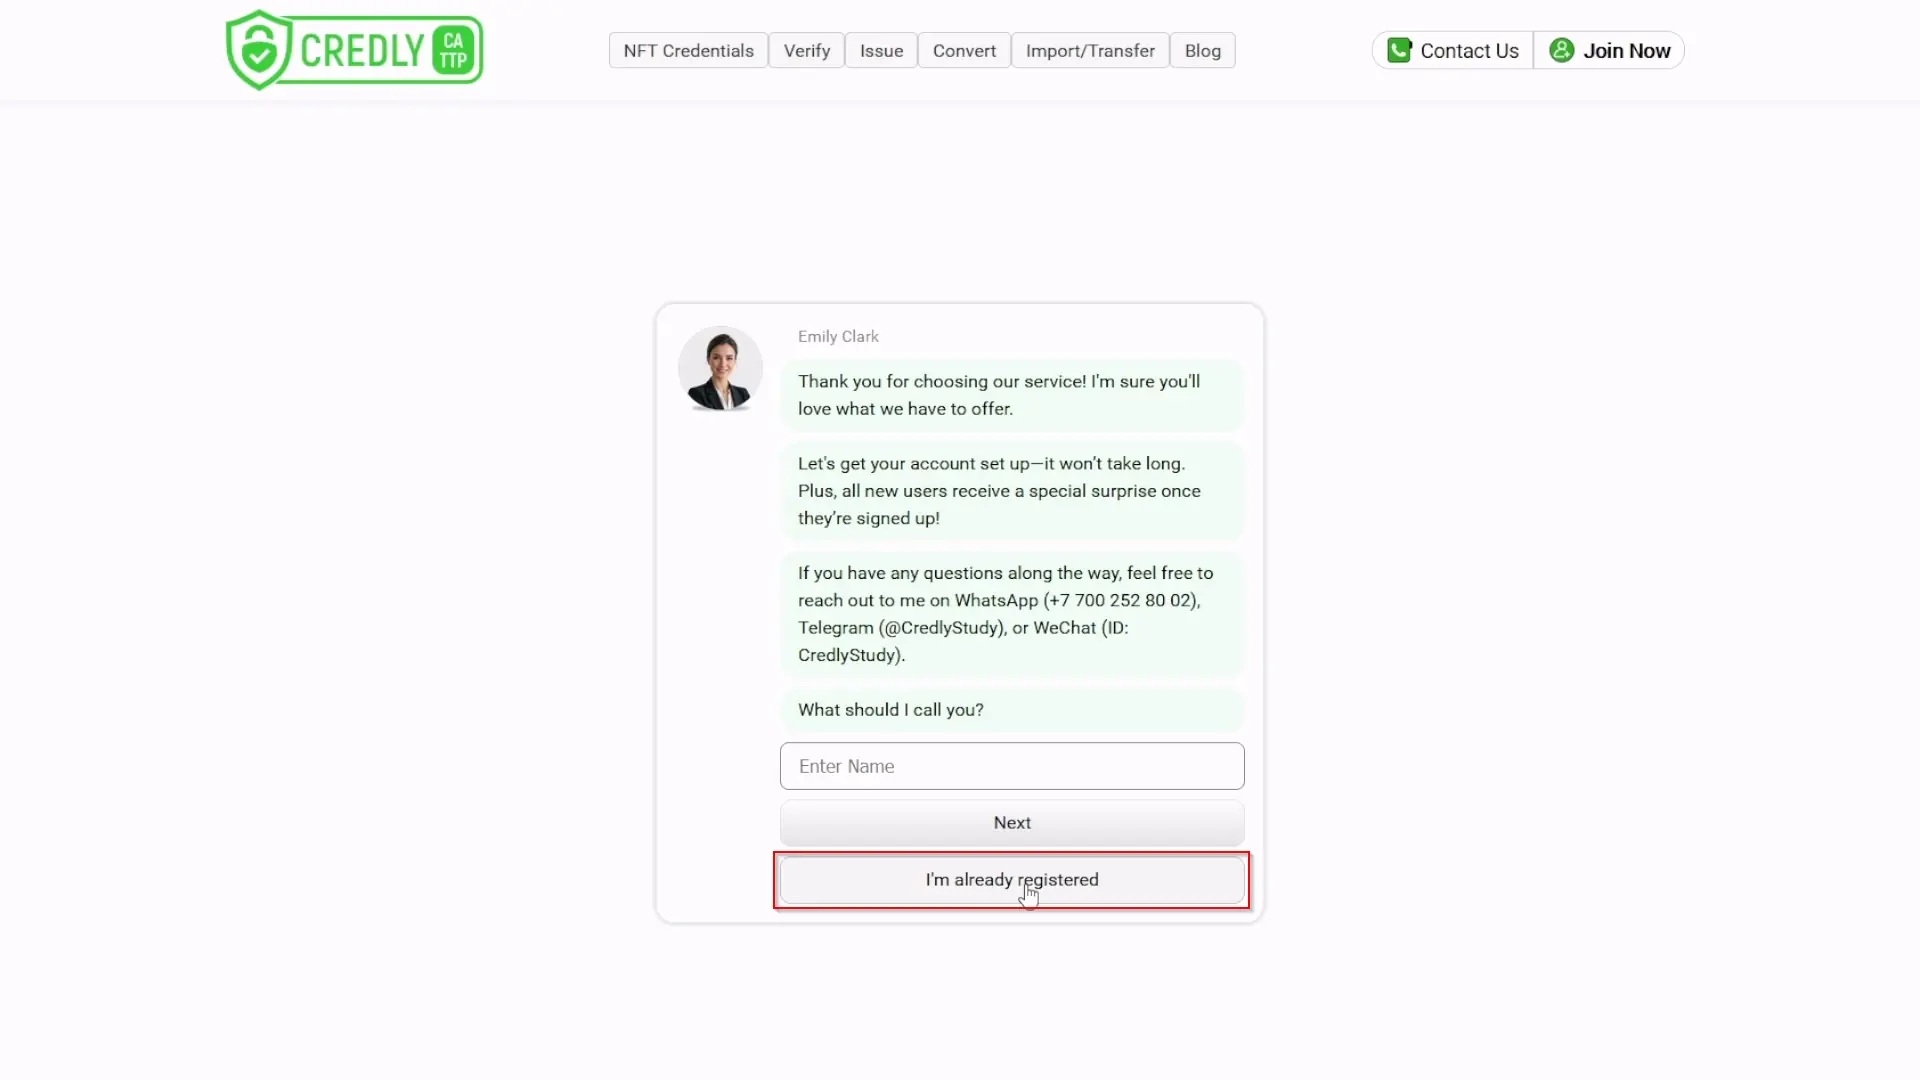
Enter Your Name: Type in your name and click "Next".
-
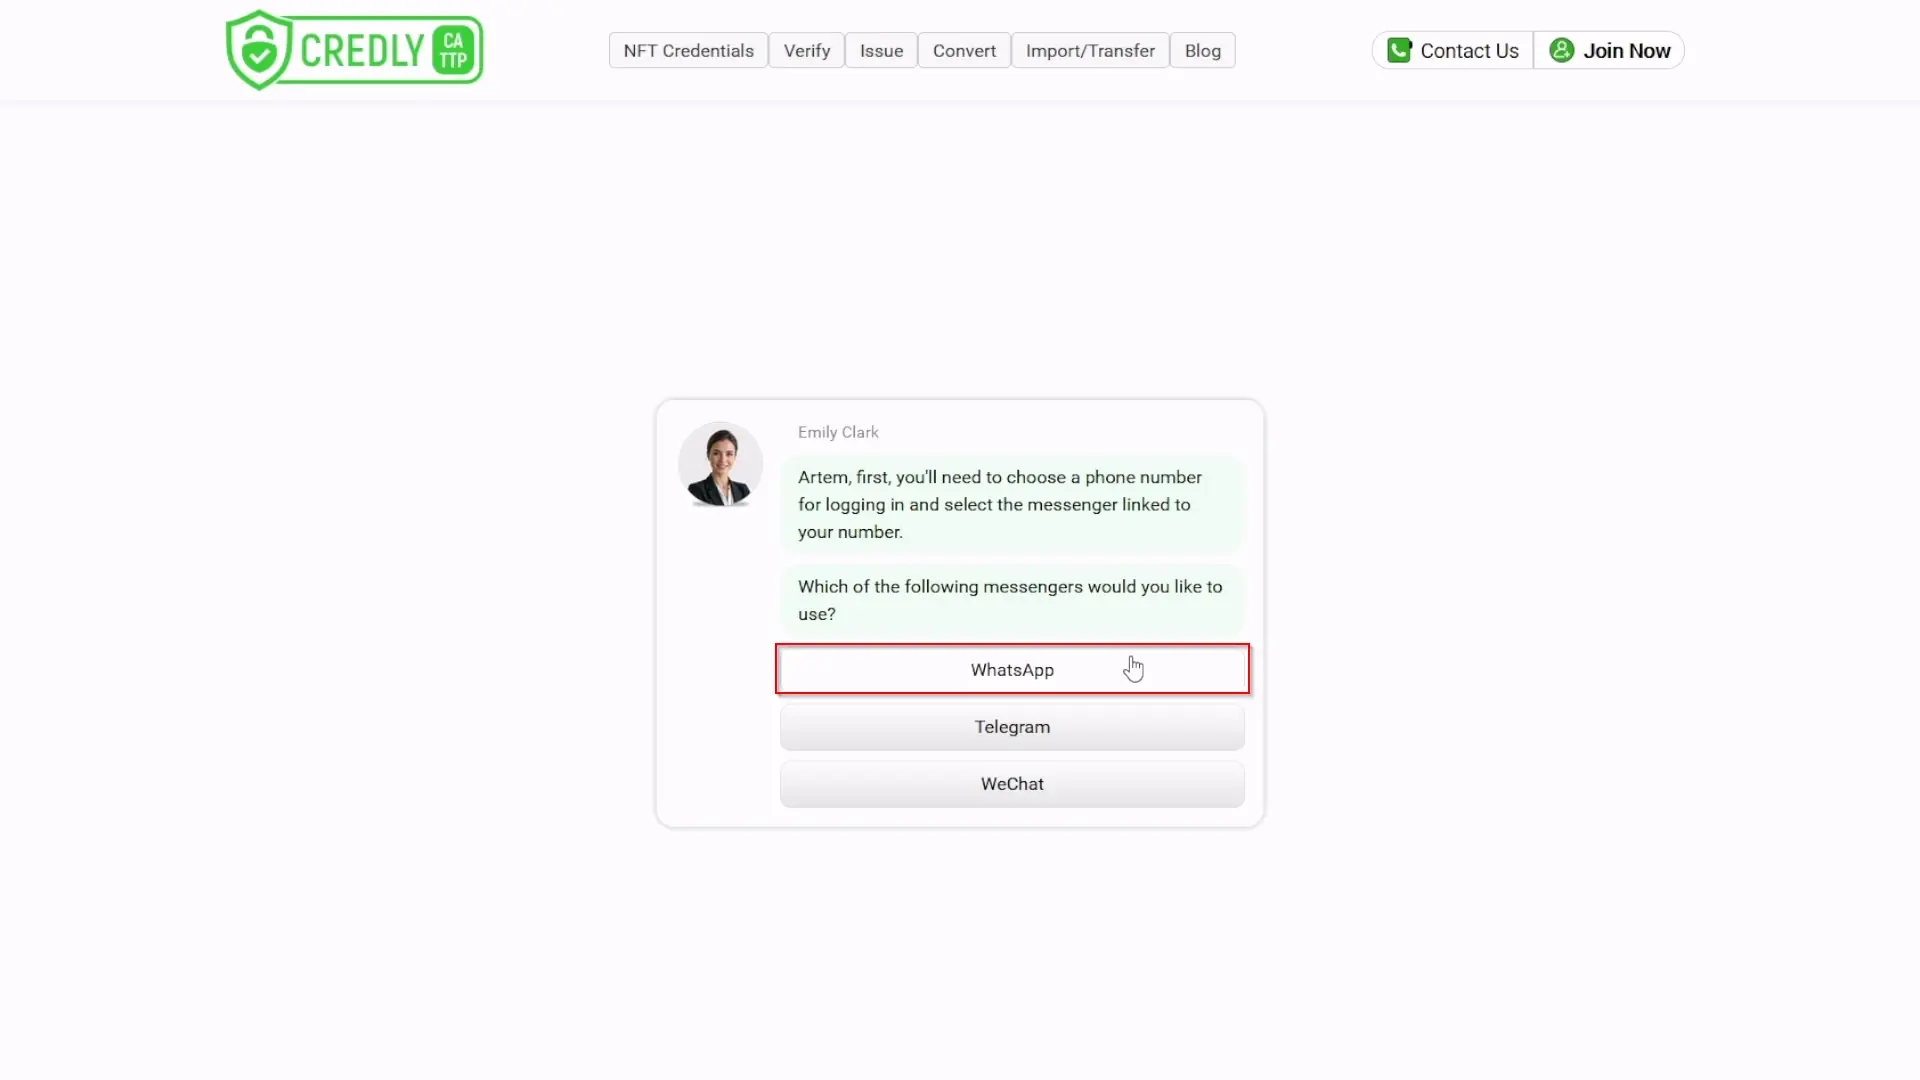
Select Messenger: Choose your preferred messenger (e.g., "WhatsApp").
-
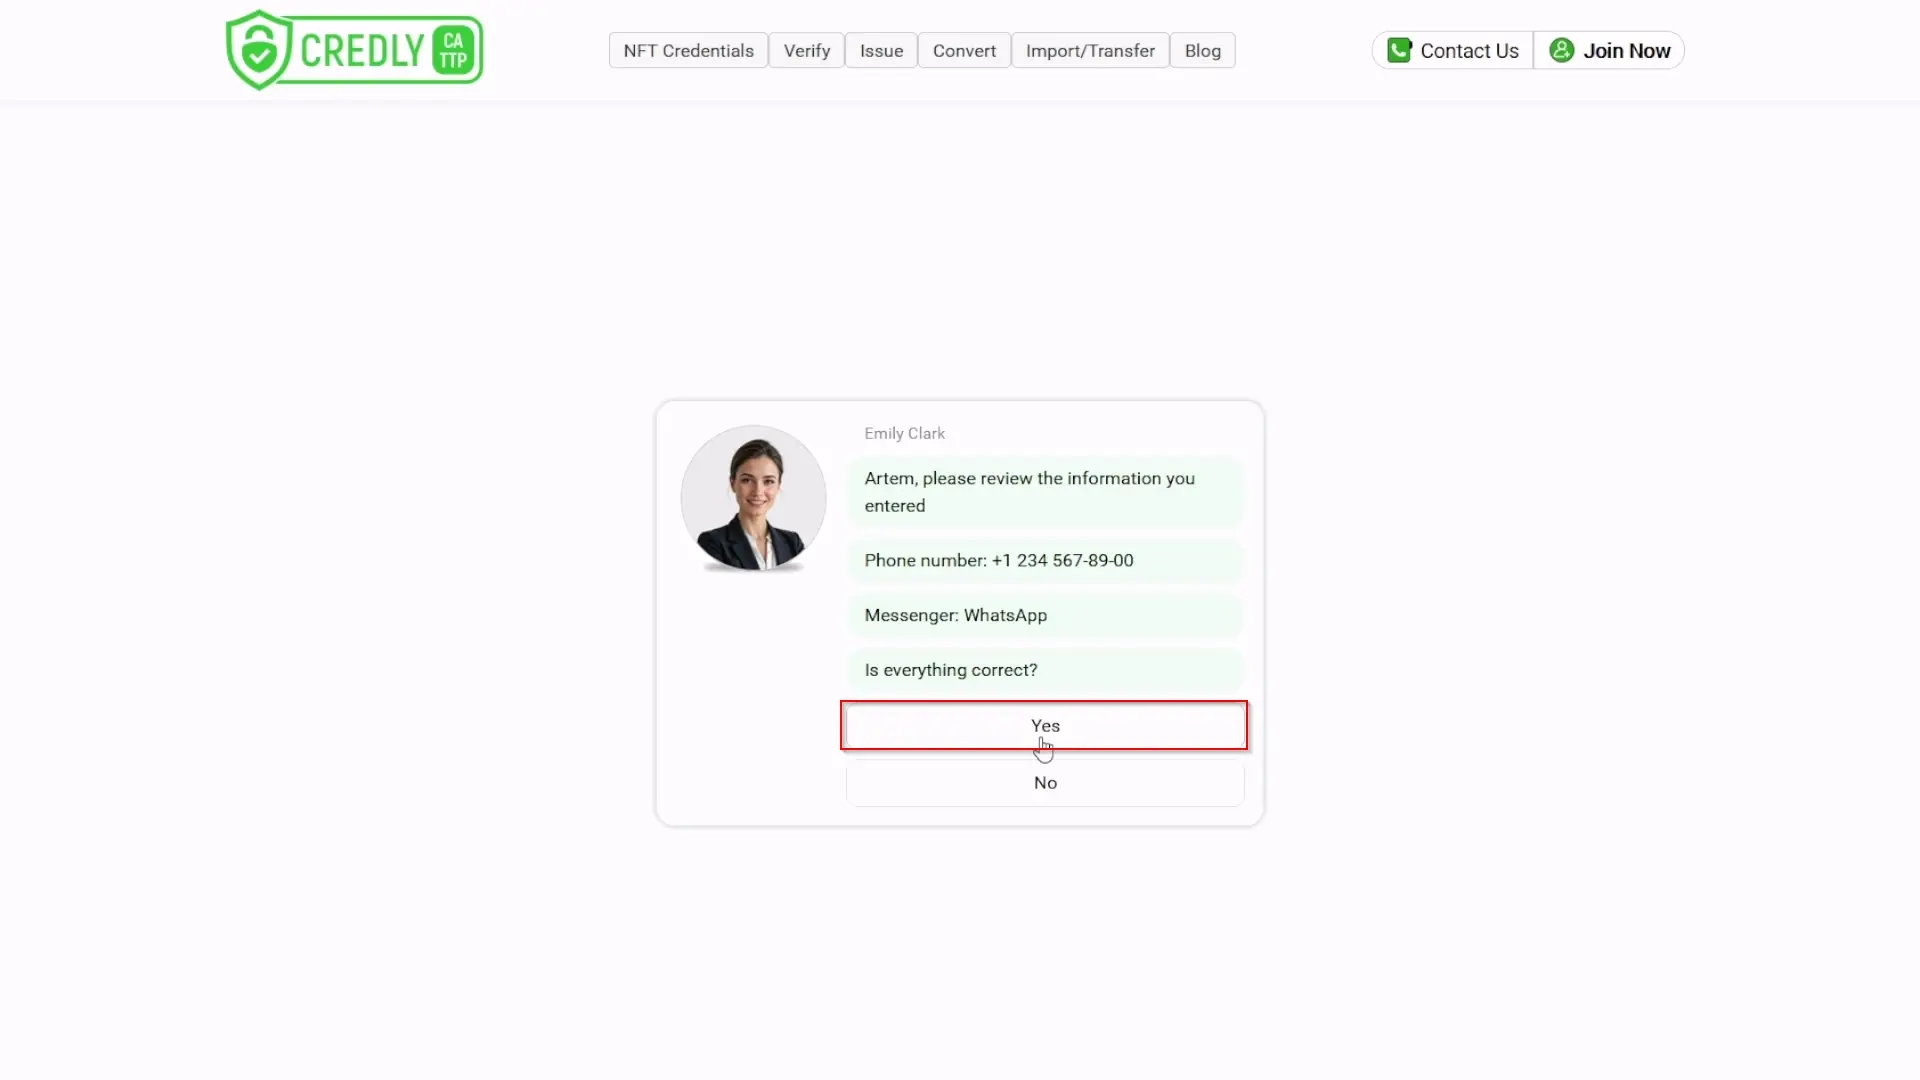
Enter Phone Number: Provide the phone number associated with your chosen messenger.

-
Verify Information: Review the details you've entered. If everything is correct, click "Yes".
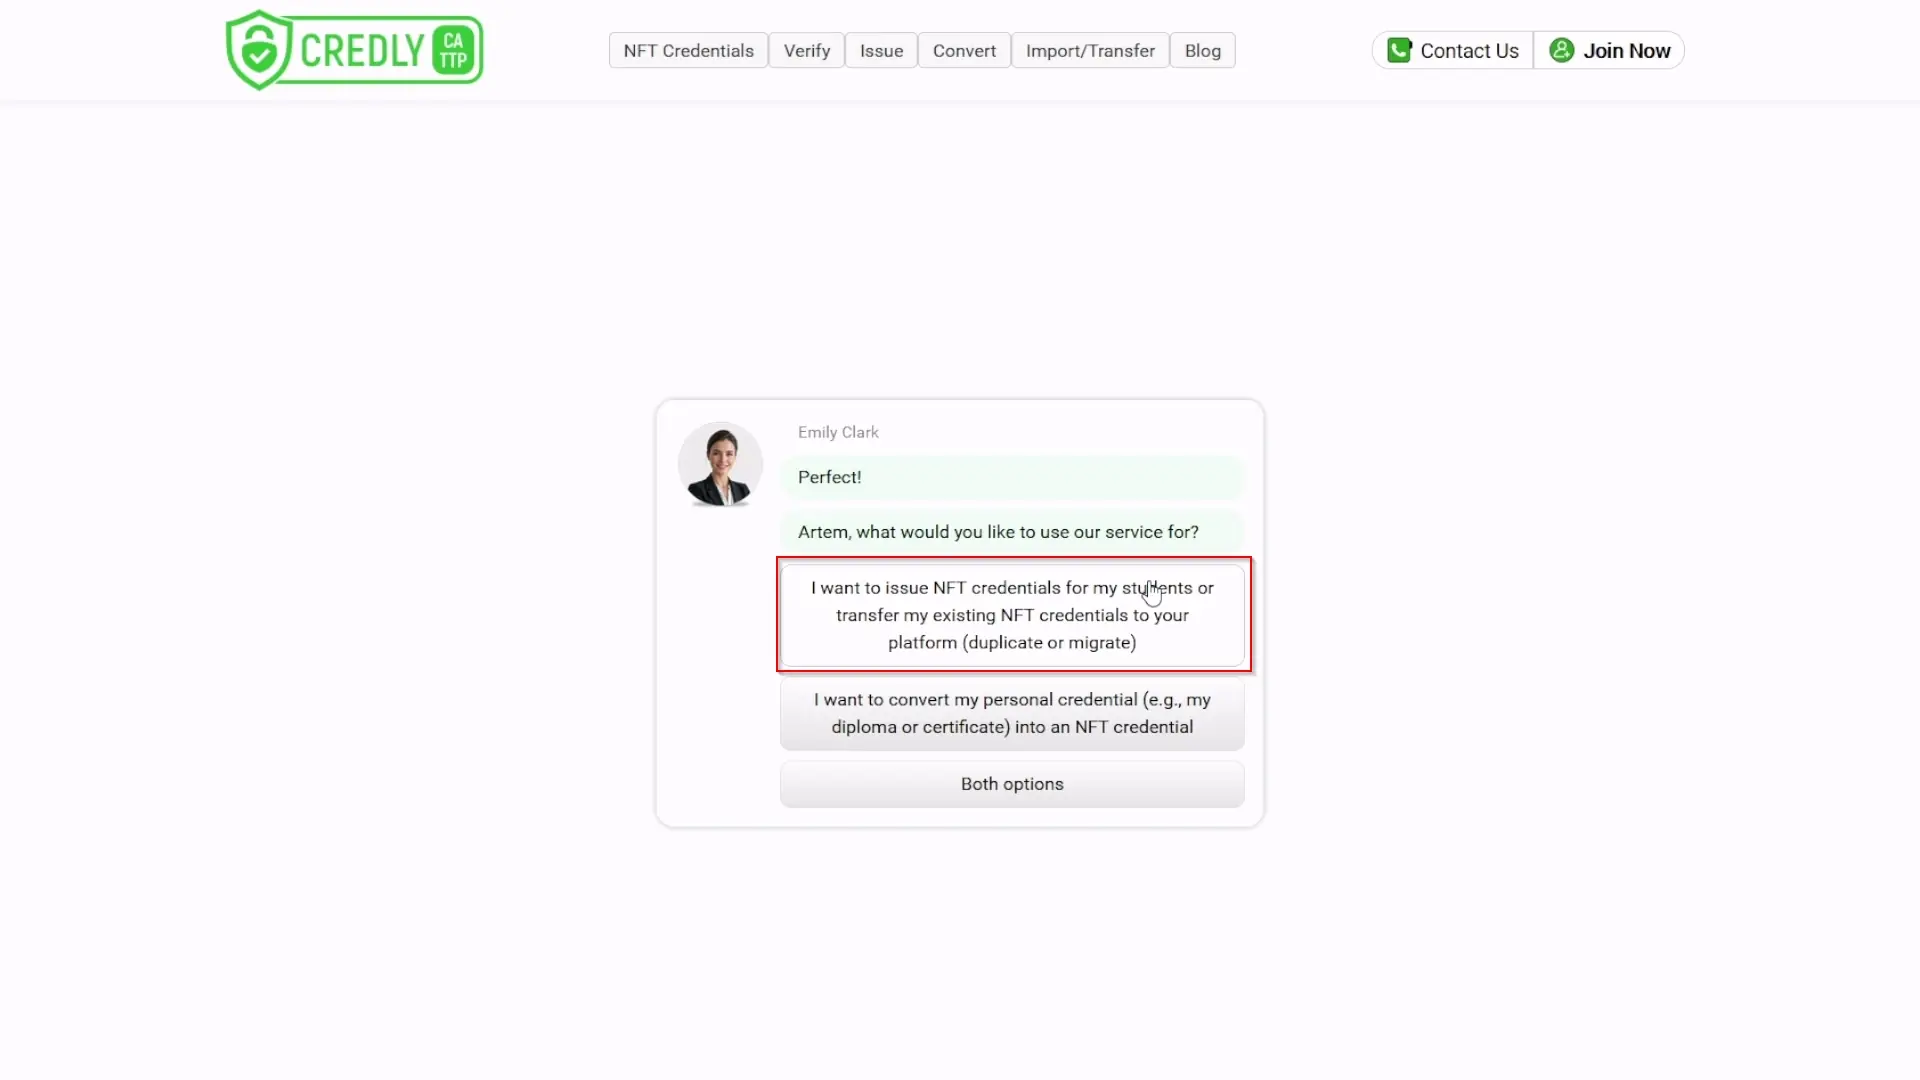
-
State Your Purpose: Select the registration goal: "I want to issue NFT credentials for my students or transfer my existing NFT credentials to your platform (duplicate or migrate)".
-
Provide Institution Details:
- Fill in the name of your educational institution (this will be displayed on your Dashboard under "Edu: [Your Institution Name]").
- Provide links to your institution's website, social media accounts, etc. The more information you provide, the better.
- Once complete, click "Confirm Information".

-
Note Verification Code: A verification code will be displayed (e.g., 813229). Make a note of this code.
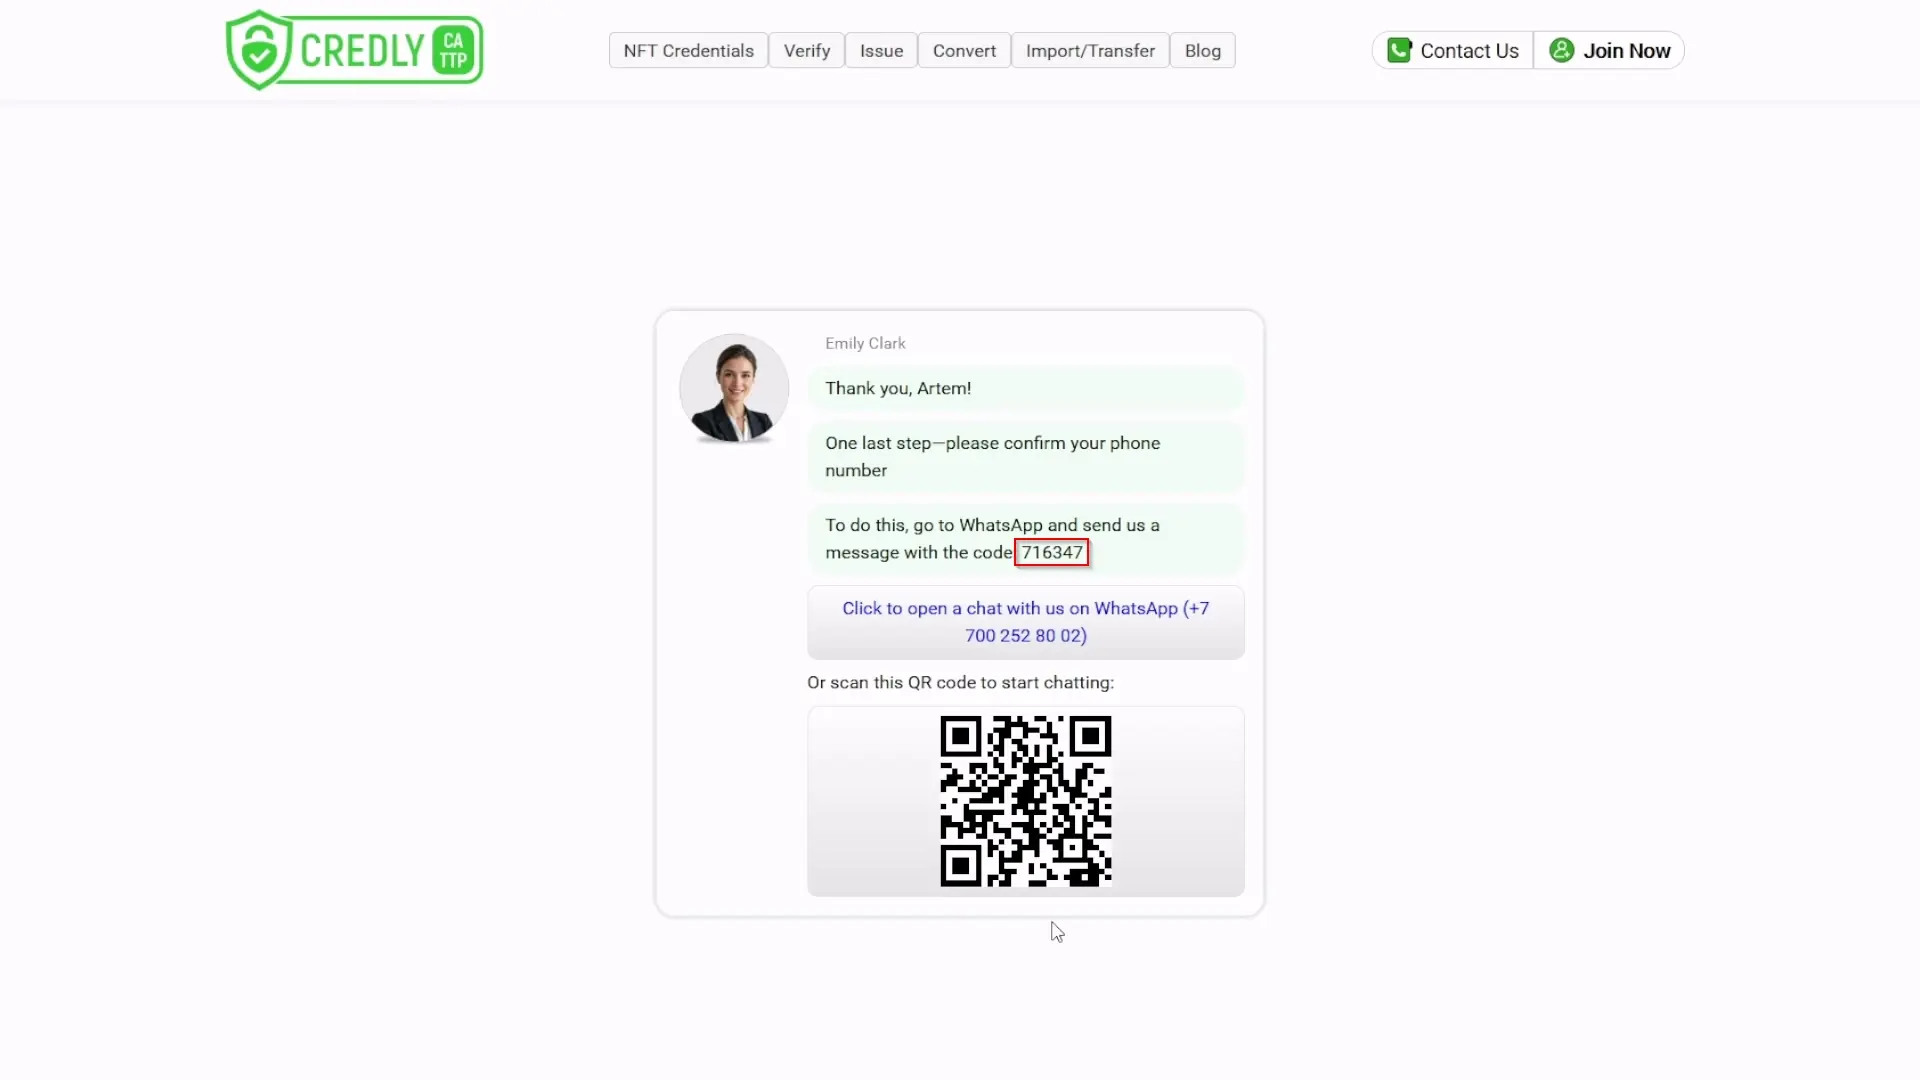
-
Contact Support: Open a chat with our support manager in your selected messenger (use the chat button, scan the QR code, or add +7 700 252 80 02 to your contacts and open your messenger) and send them the verification code you noted.
-
Account Creation: Our support manager will review your provided information, create your account, and send you your login username and password.
Step 2: Log In and Access Your Dashboard
Goal: Log in to your account and navigate to the main control panel.
Procedure:
-
Prepare Credentials: Have your username and password (received from the support manager) ready.
-
Go to the Website: Navigate to https://credly.study/

-
Access Login Area: In the top-right corner, click "Join Now".

-
Indicate Existing Account: Click the button/link that says "I'm already registered".
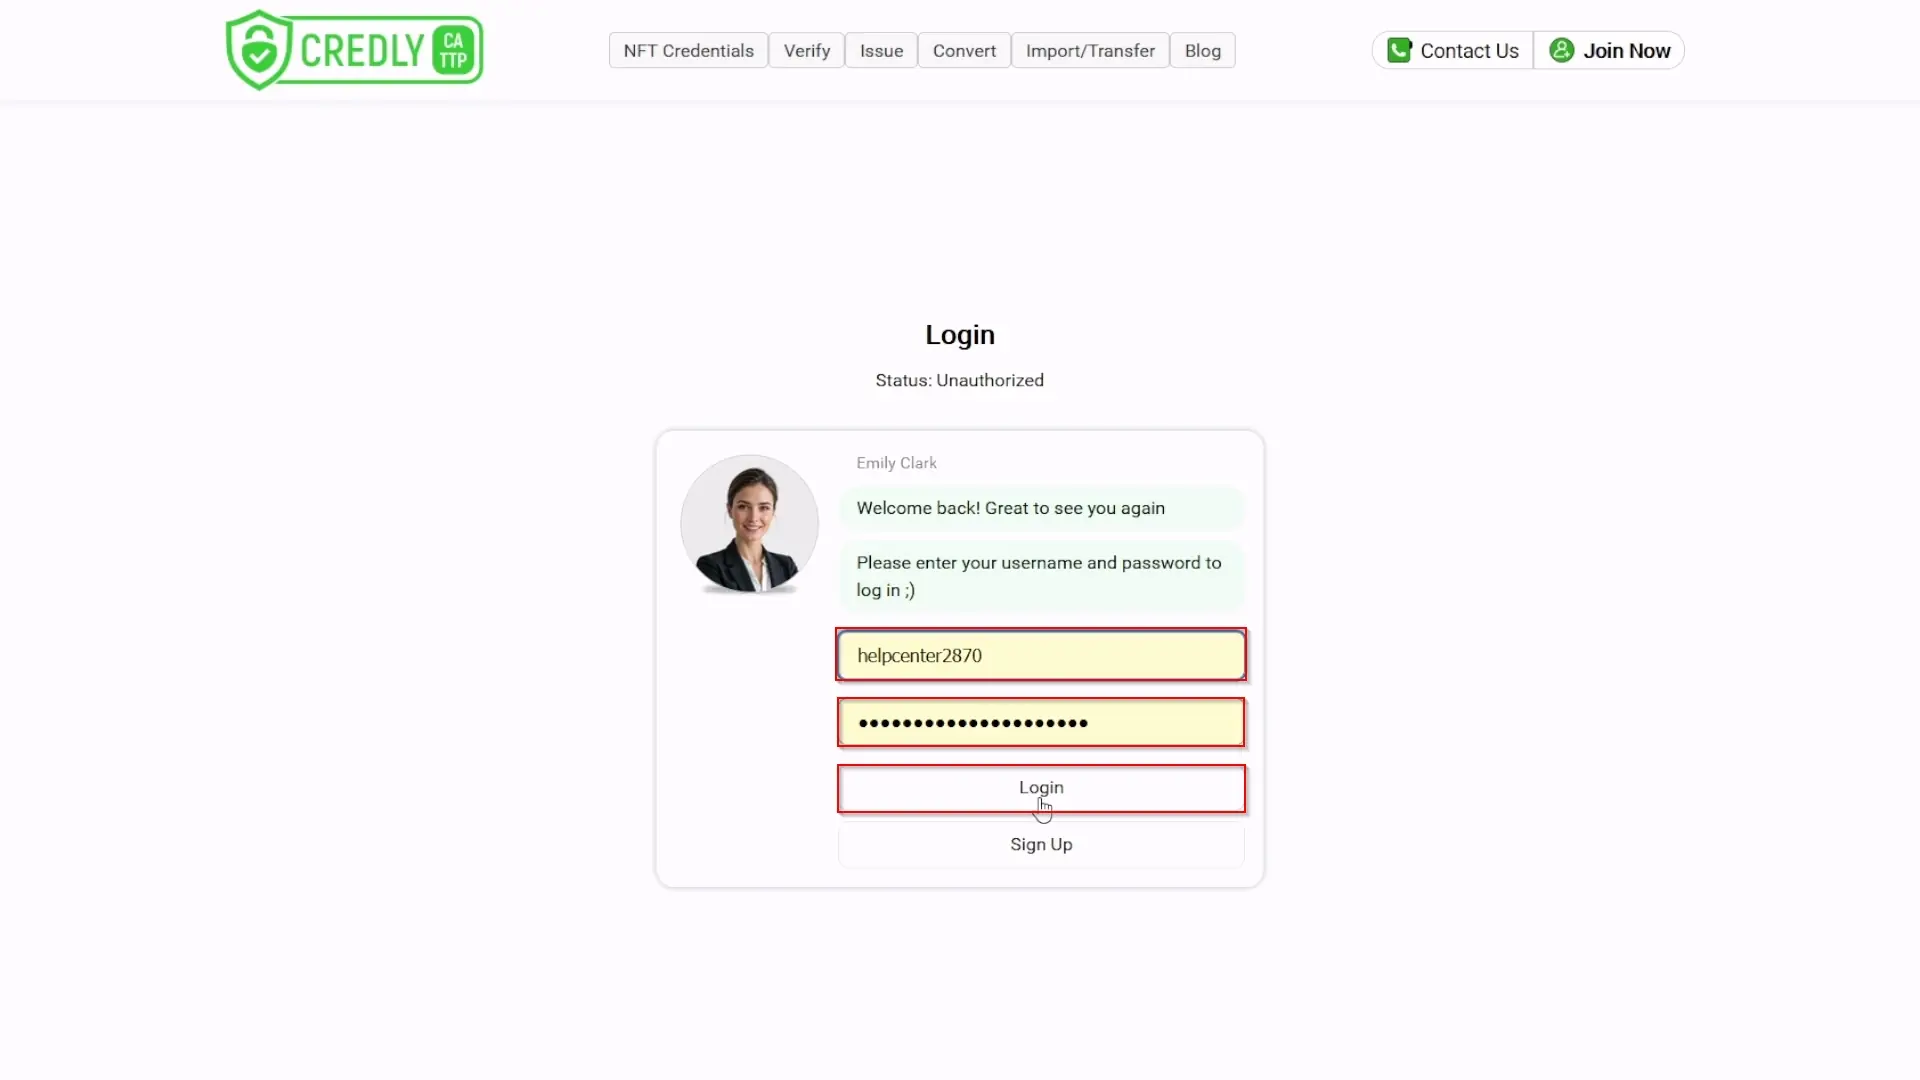
-
Enter Credentials: Type in your username and password, then click "Login".
-
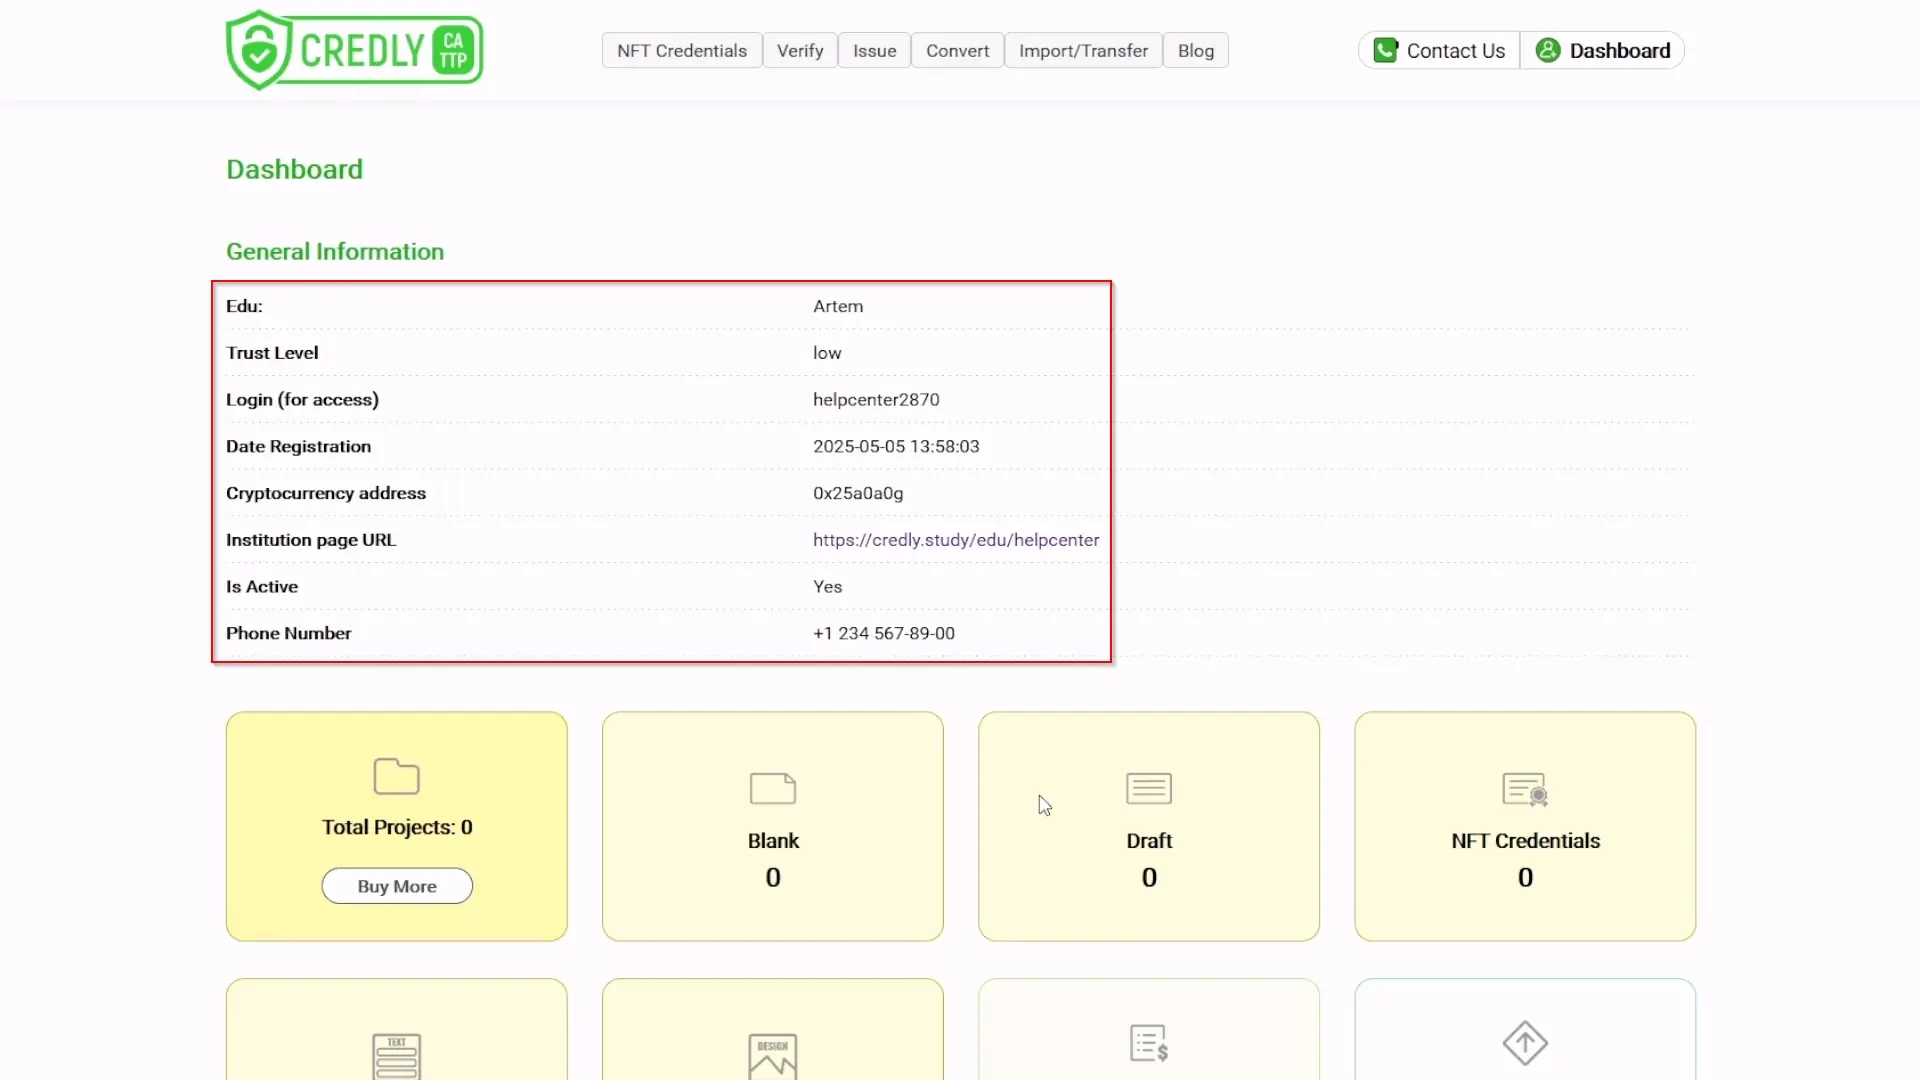
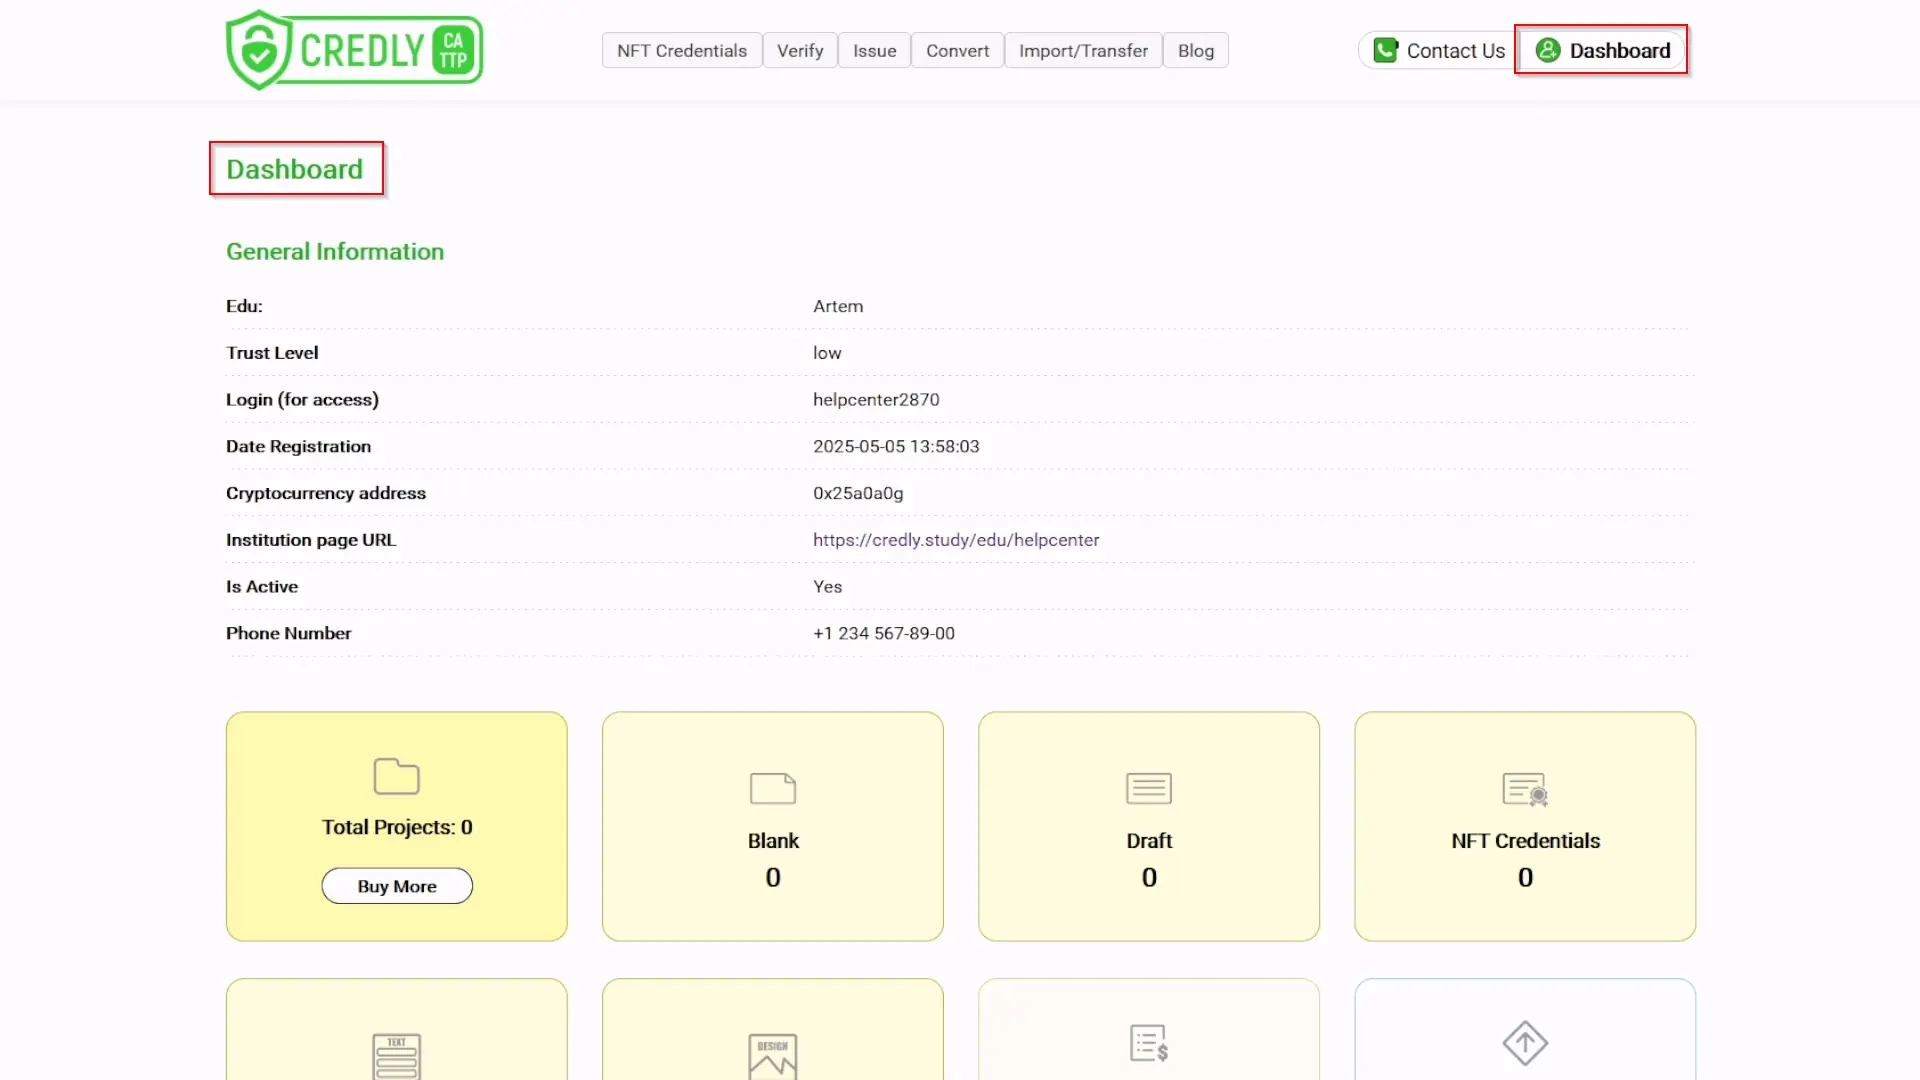
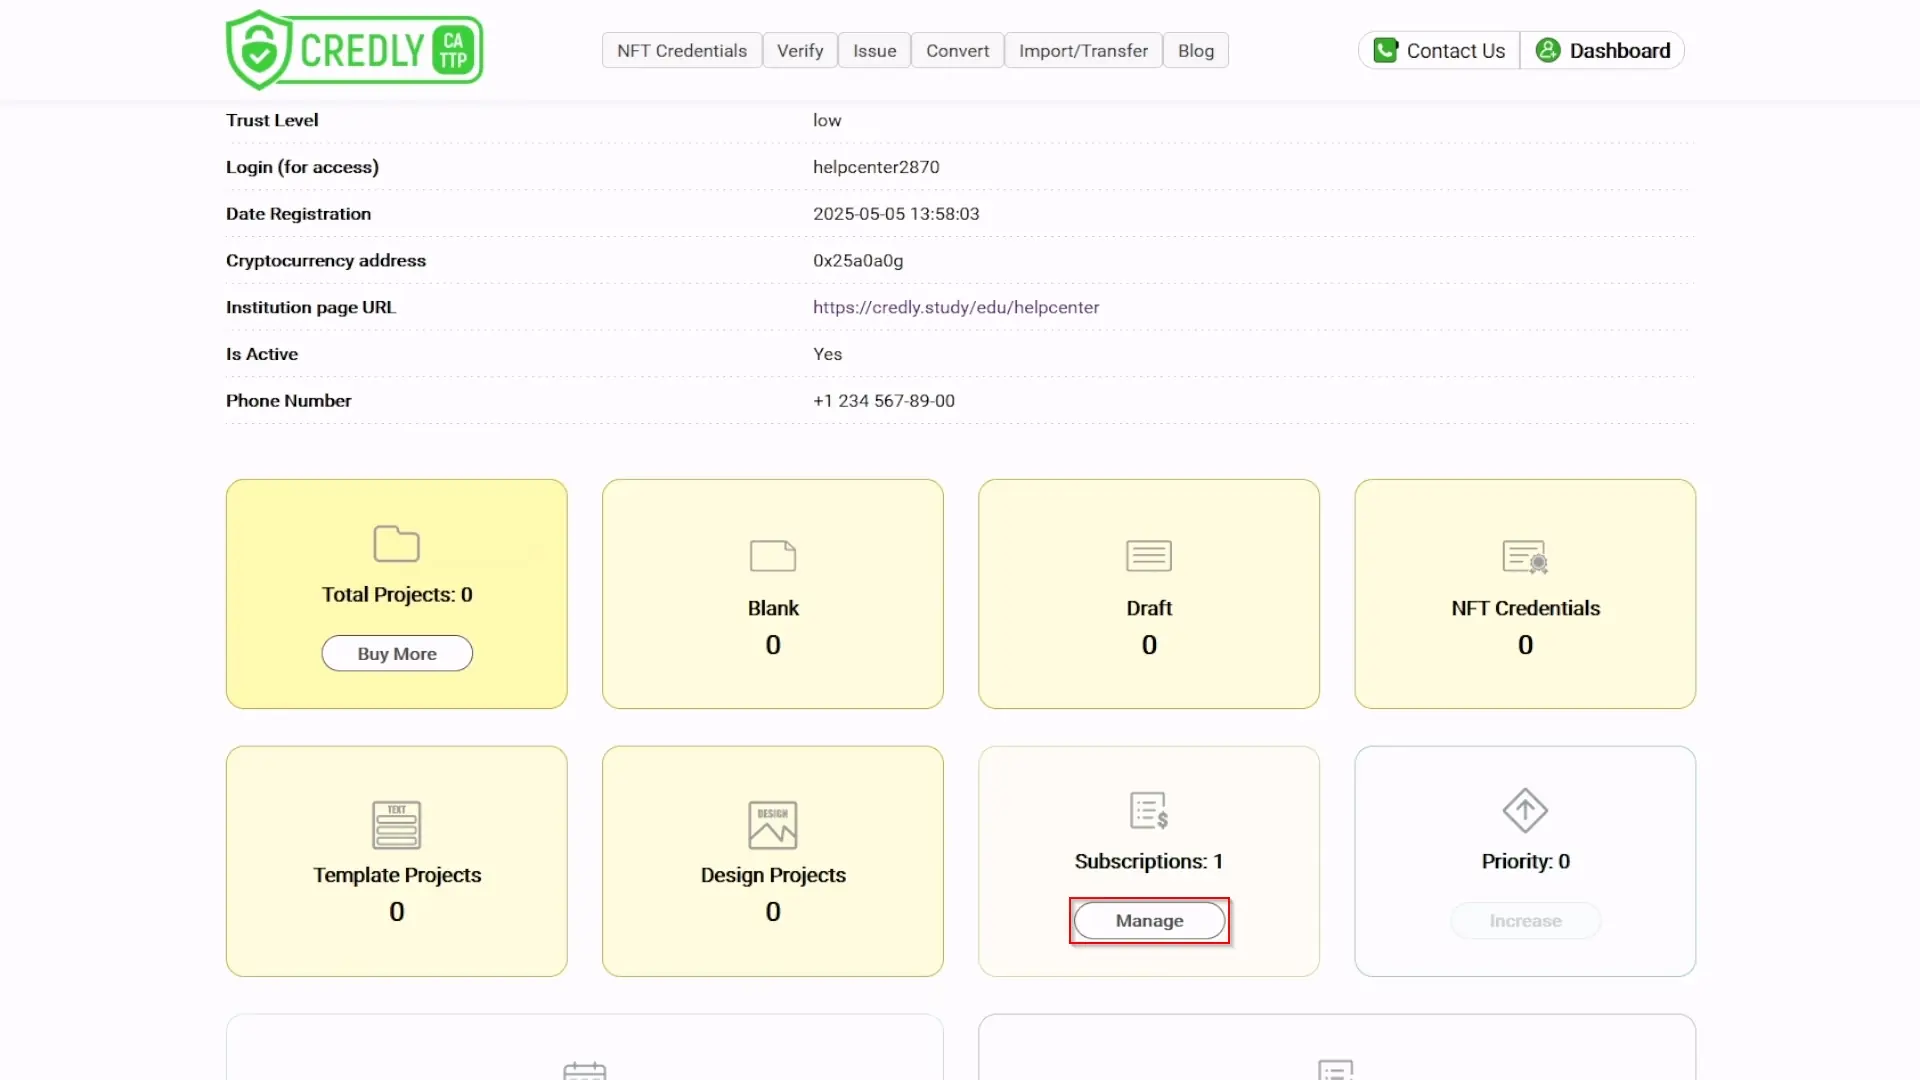
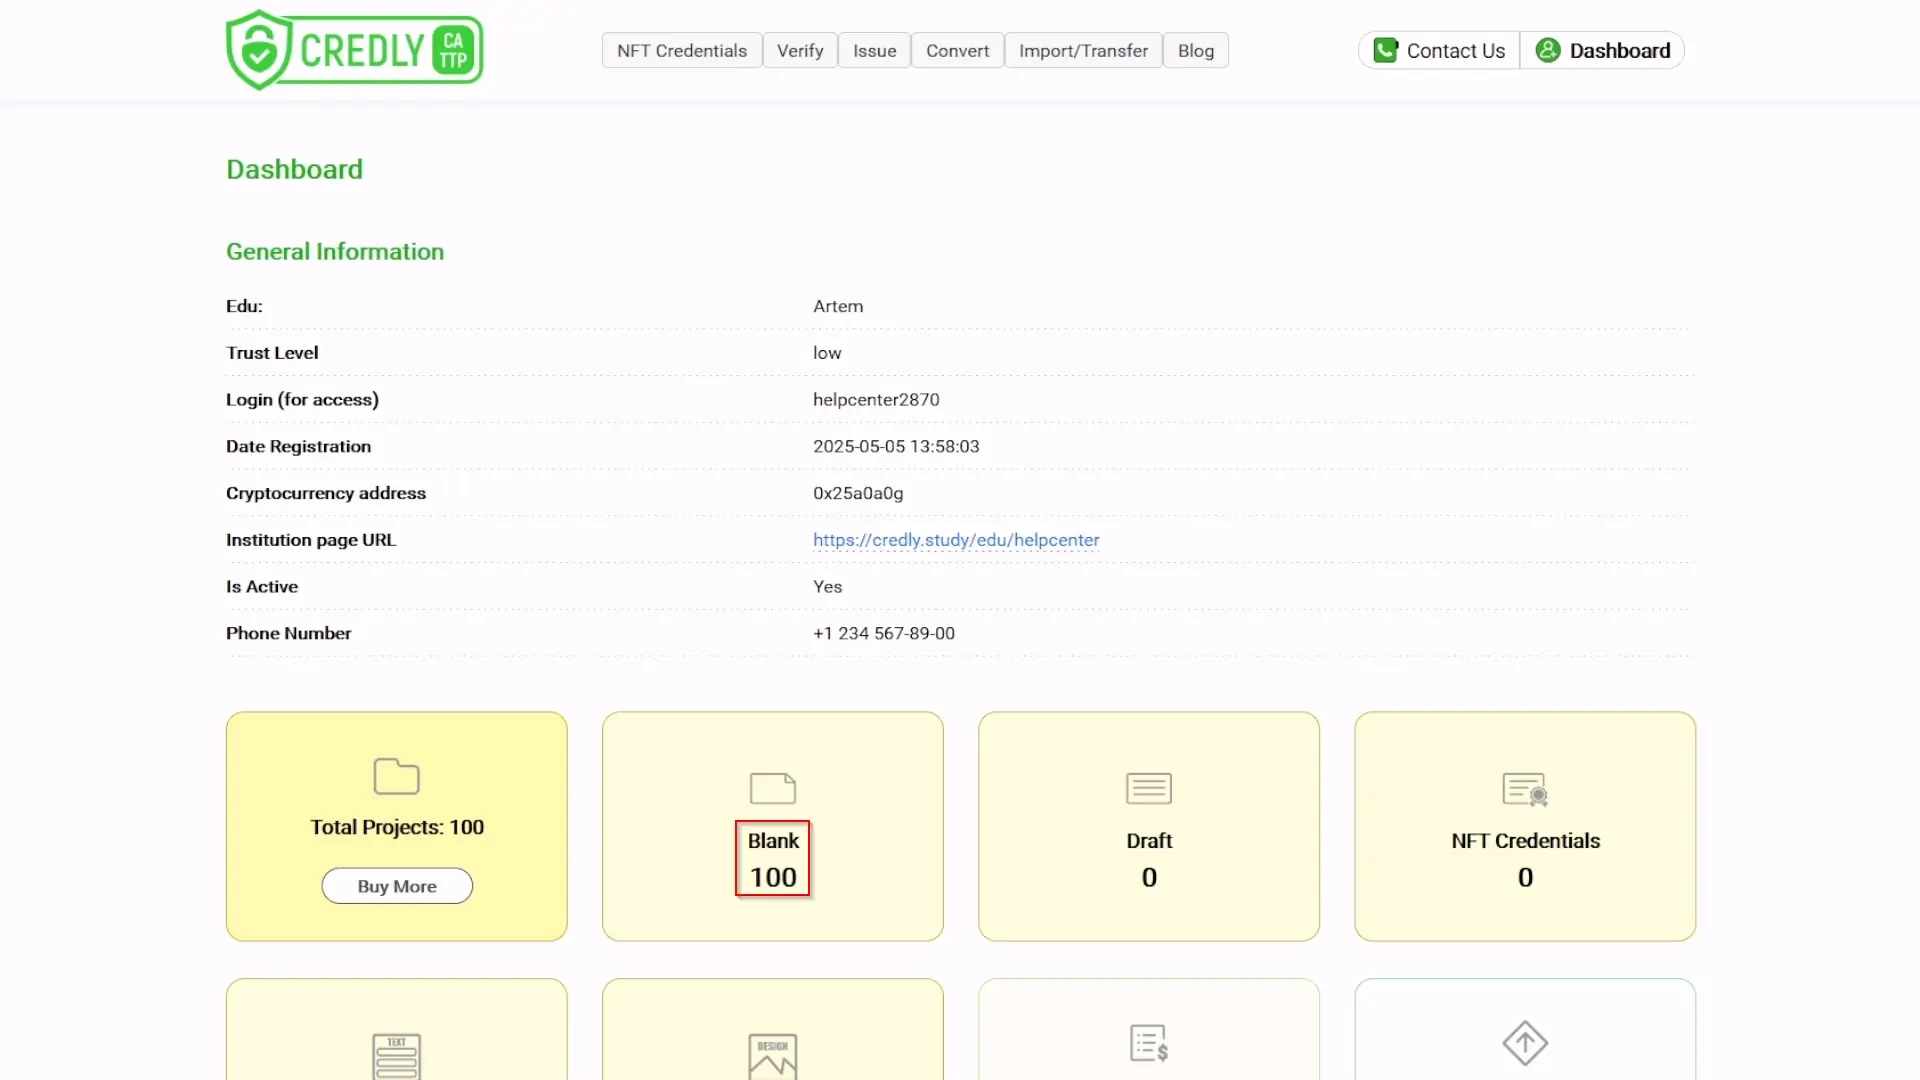
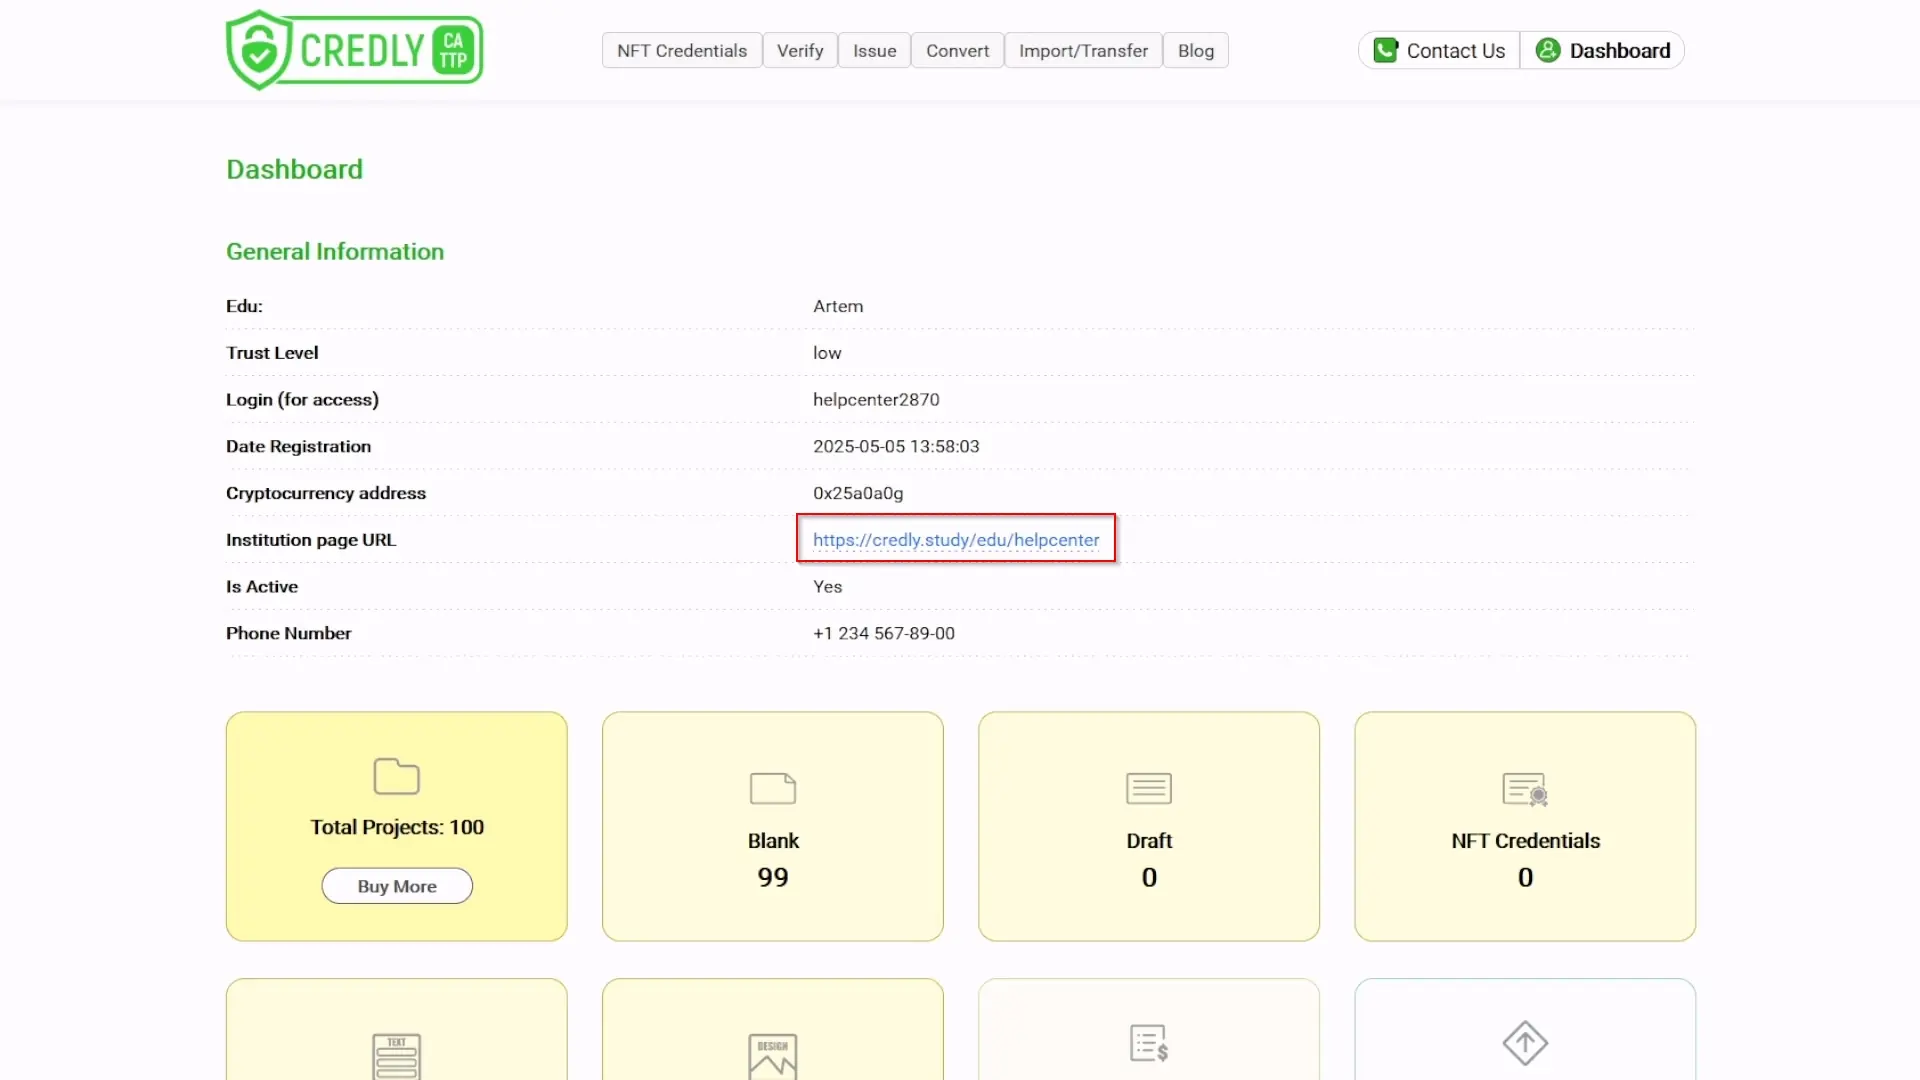
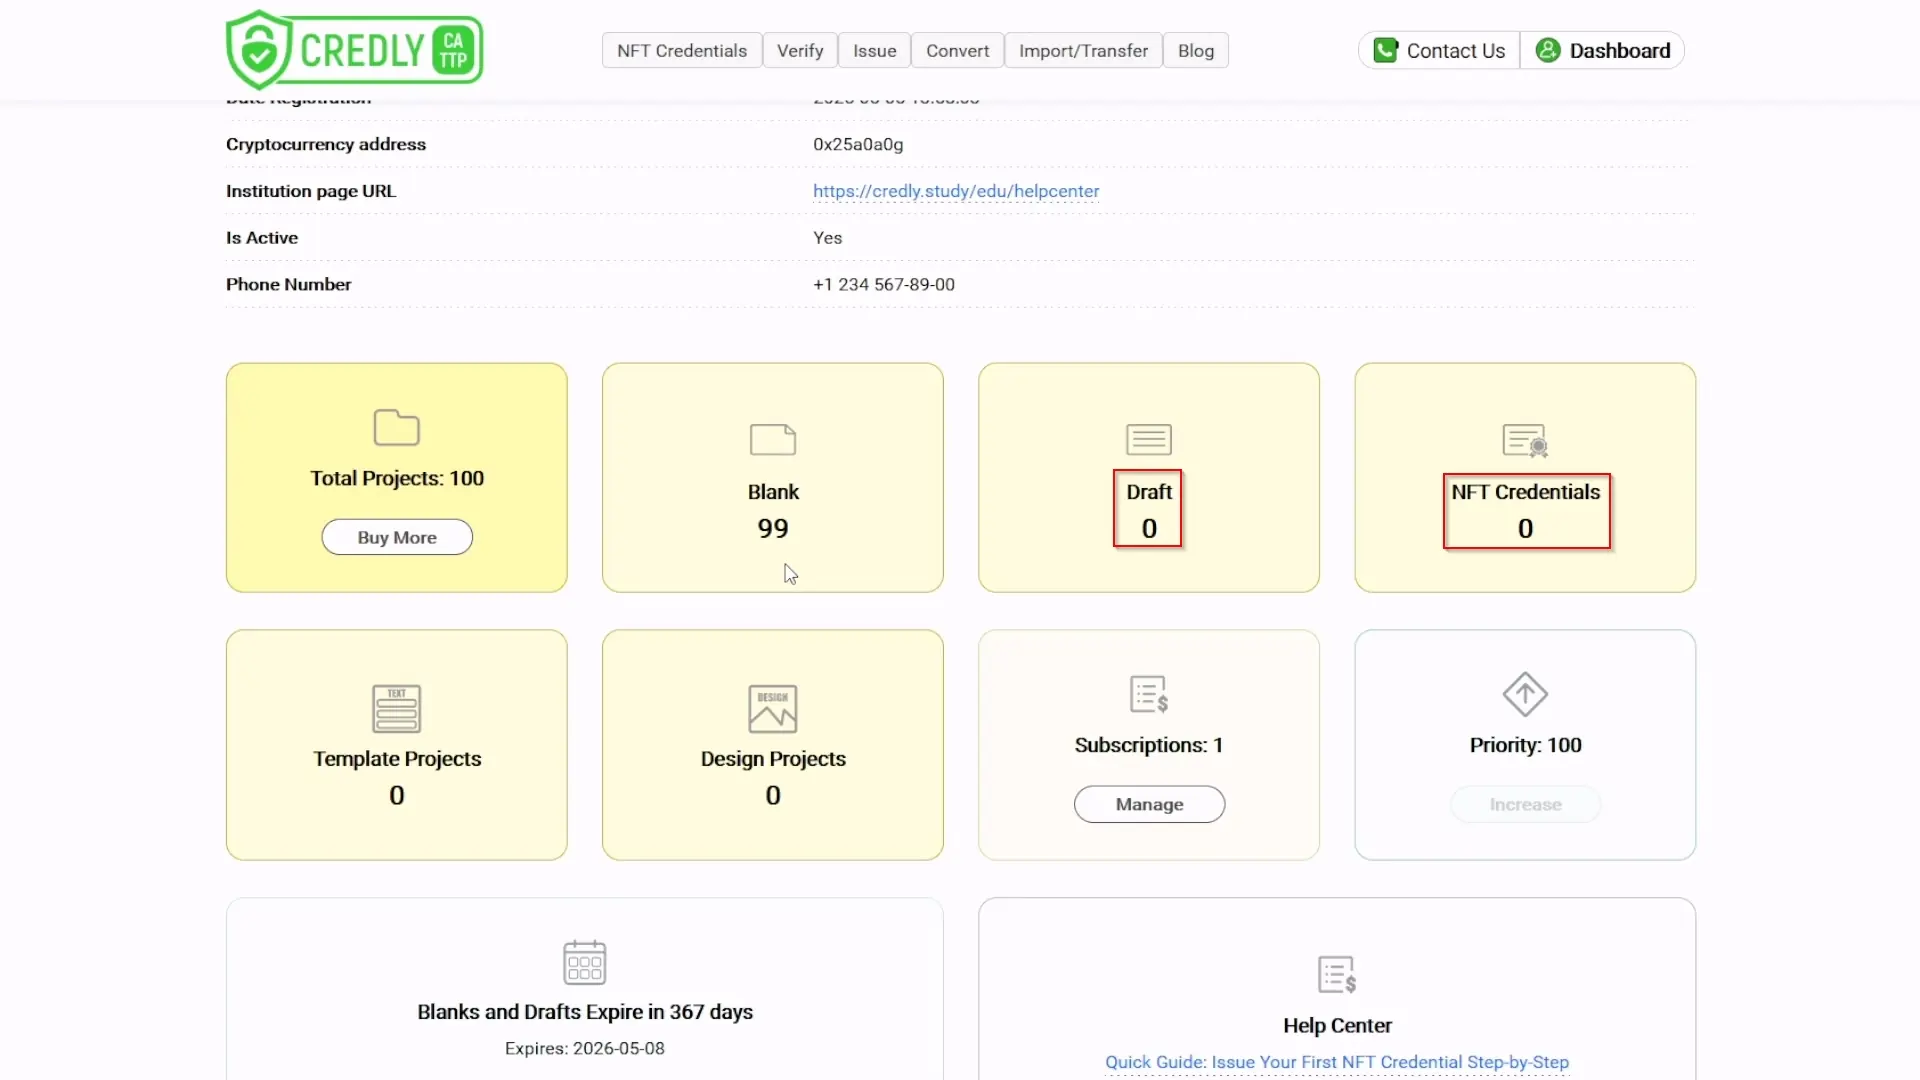
Automatic Redirect: Upon successful login, you will be automatically redirected to your "Dashboard" page. This page provides "General Information" about your account, project metrics, and quick links to key functions. You'll see details like your "Edu" (Institution Name), "Trust Level" (e.g., "low"), "Login (for access)" (your username), "Date Registration", your "Cryptocurrency address" (e.g., "0x25a0a0g" - used for blockchain transactions), and the "Institution page URL".
-
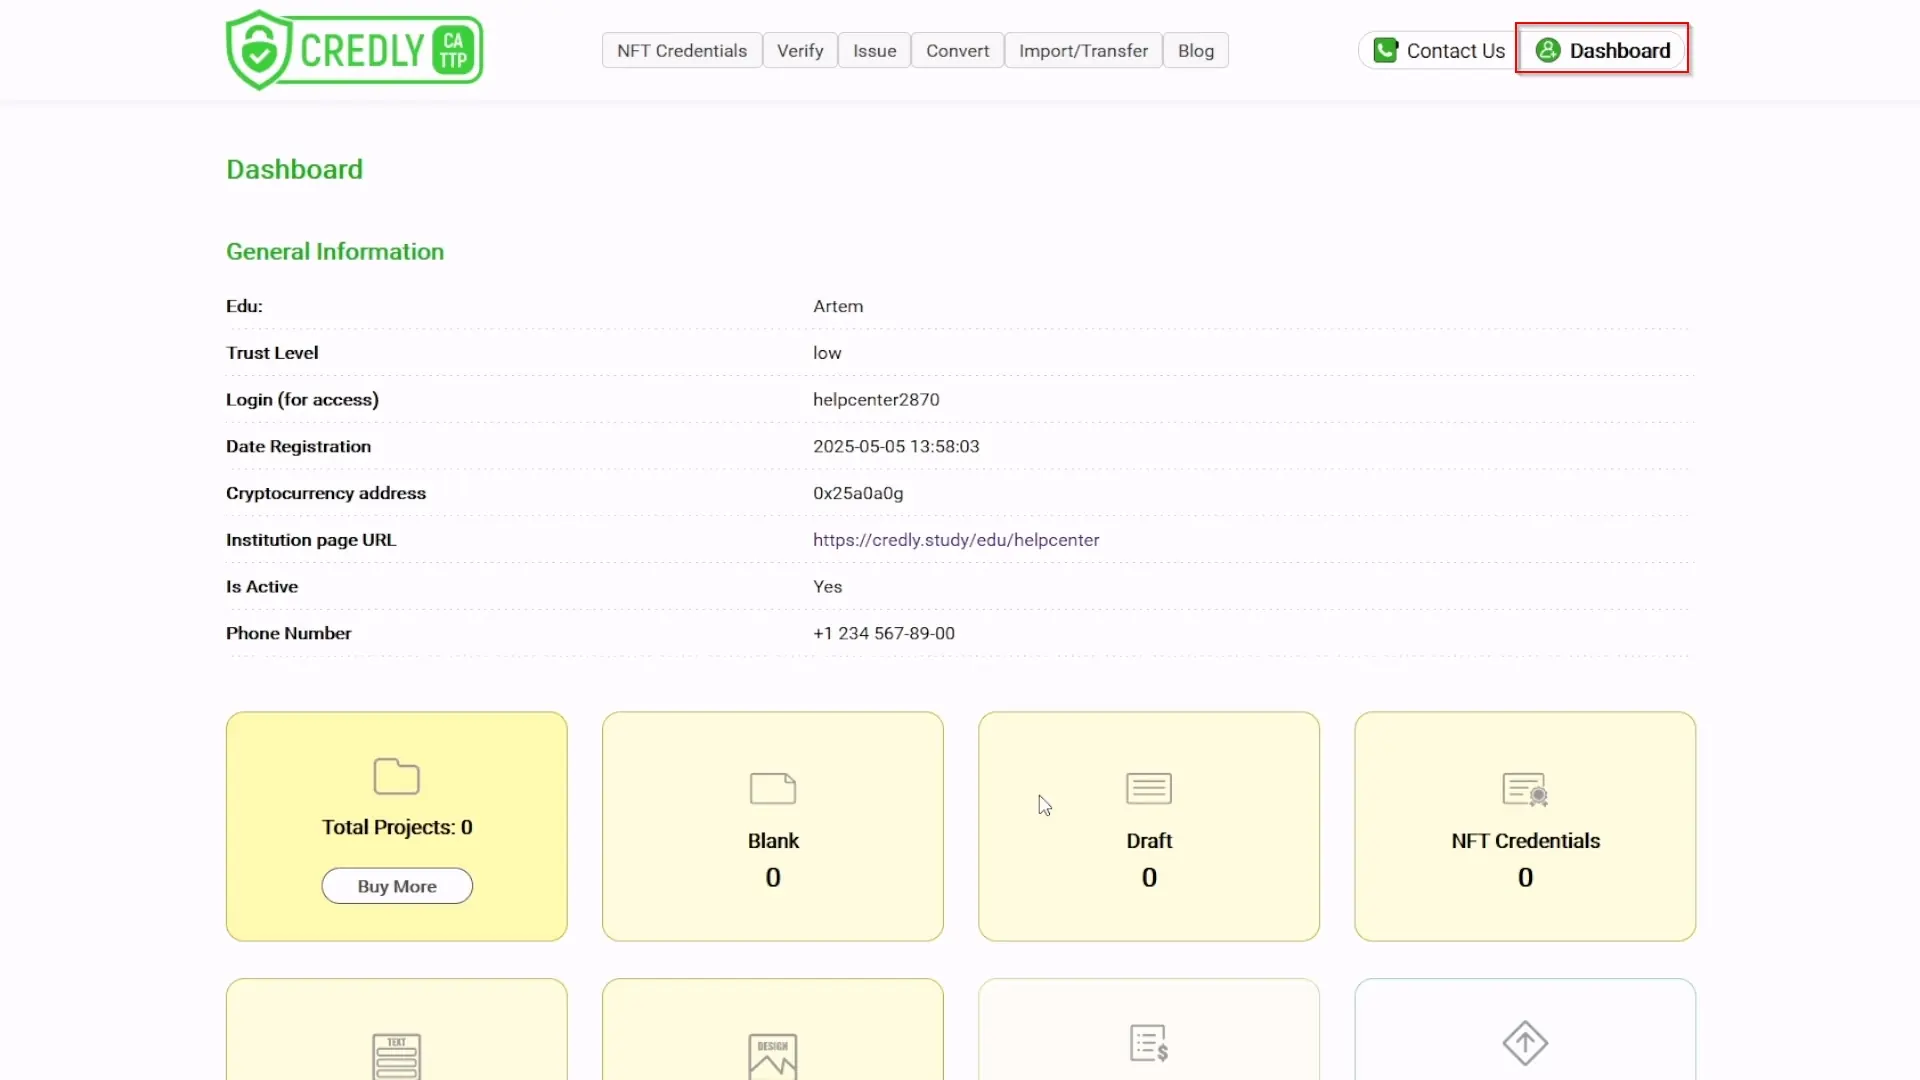
Accessing Dashboard Manually: You can access the "Dashboard" from any page on the site by clicking the "Dashboard" button in the top-right corner (this button is always visible once you are logged in).
Step 3: Purchase Project Credits
Goal: Acquire "Project" credits, which are necessary to create and issue NFT credentials.
Important: Project purchases are final and non-refundable.
Immediately upon purchase, each project is assigned a unique identifier (ID) that becomes permanently associated with your account and can never be assigned to any other account. Consequently, purchased projects cannot be returned, and funds spent on their acquisition are not refundable.
Analogy: Imagine purchasing official, uniquely stamped forms. Once acquired, each form is imprinted with your unique identifier (like a personalized stamp), making it usable only by you. Therefore, you cannot return these personalized forms to the seller.
Procedure:
-
Navigate to Dashboard: Ensure you are on your "Dashboard" page.
-
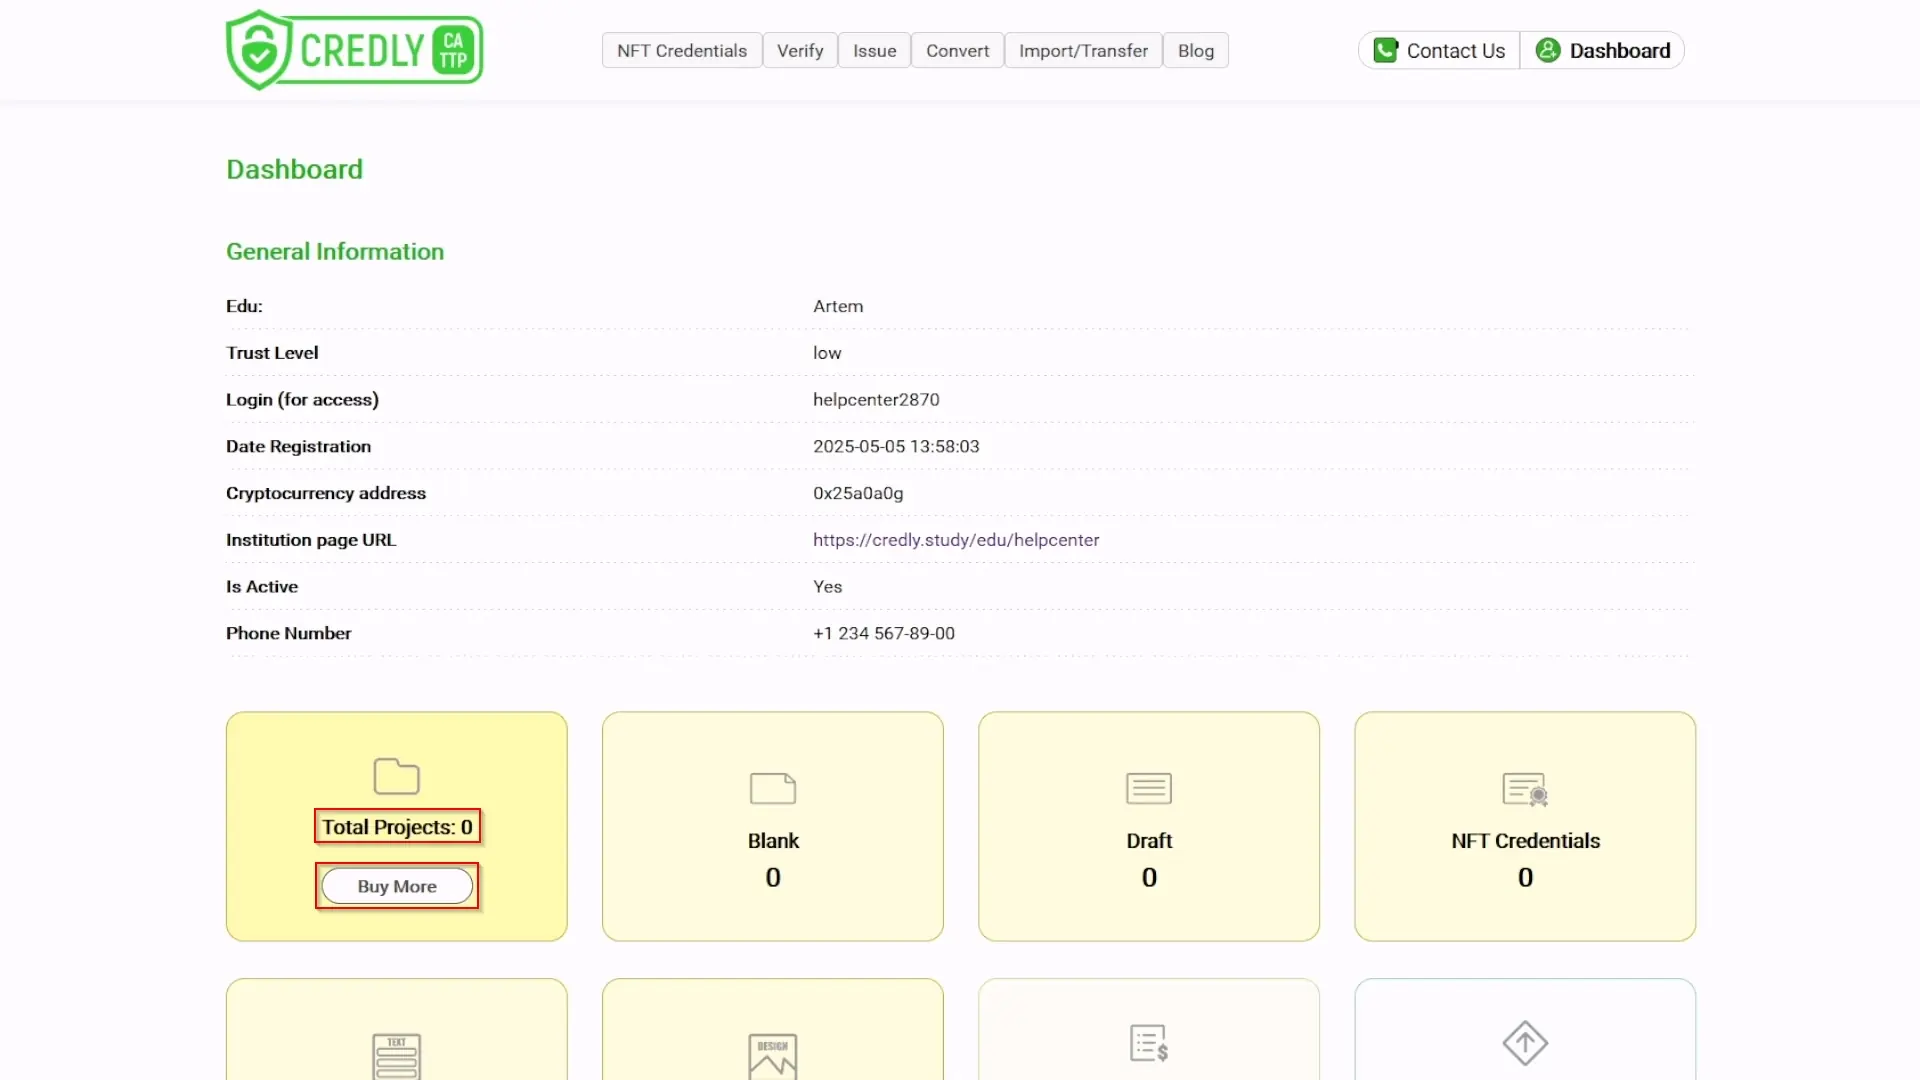
Locate Project Purchase: Find the metric or section labeled "Total Projects" (e.g., "Total Projects: 100"). Below it, click the "Buy More" button.
-
Specify Quantity: Enter the desired number of project credits you wish to purchase and click "Subscribe Now".
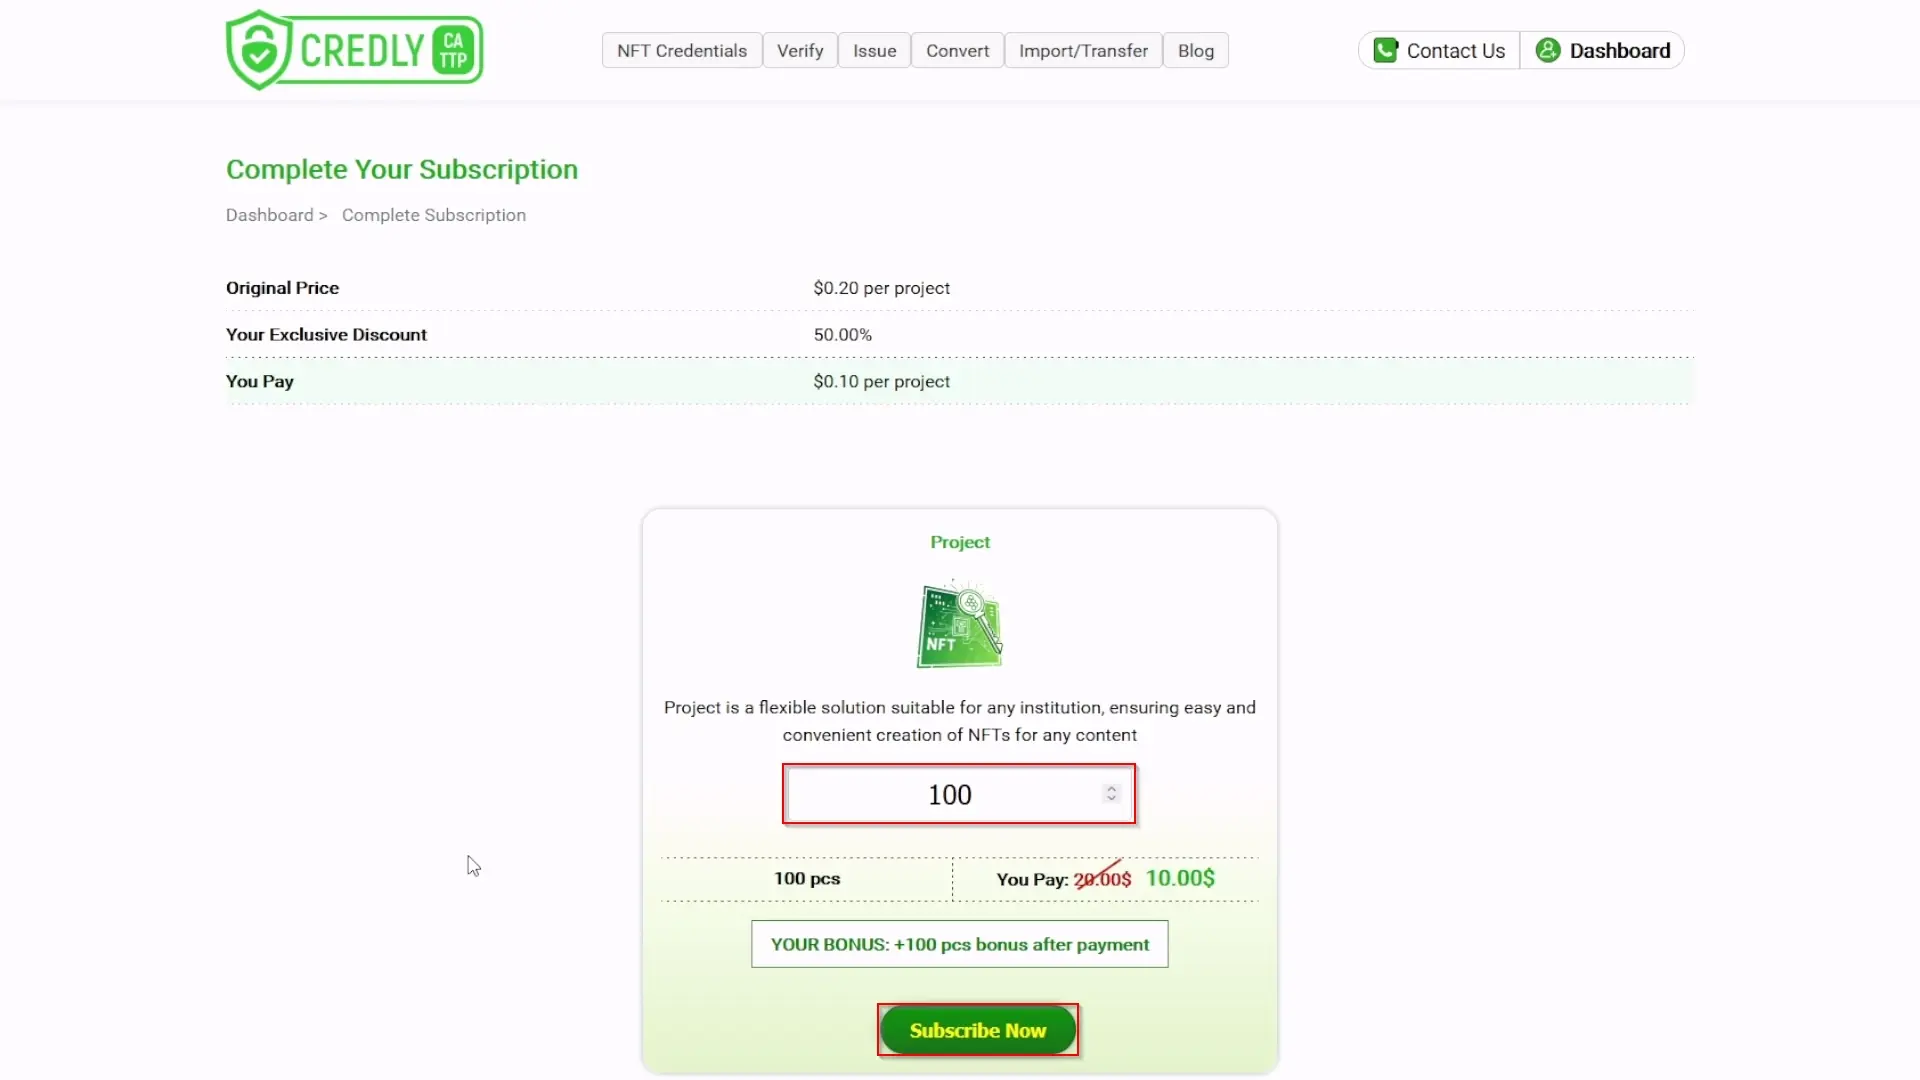
-
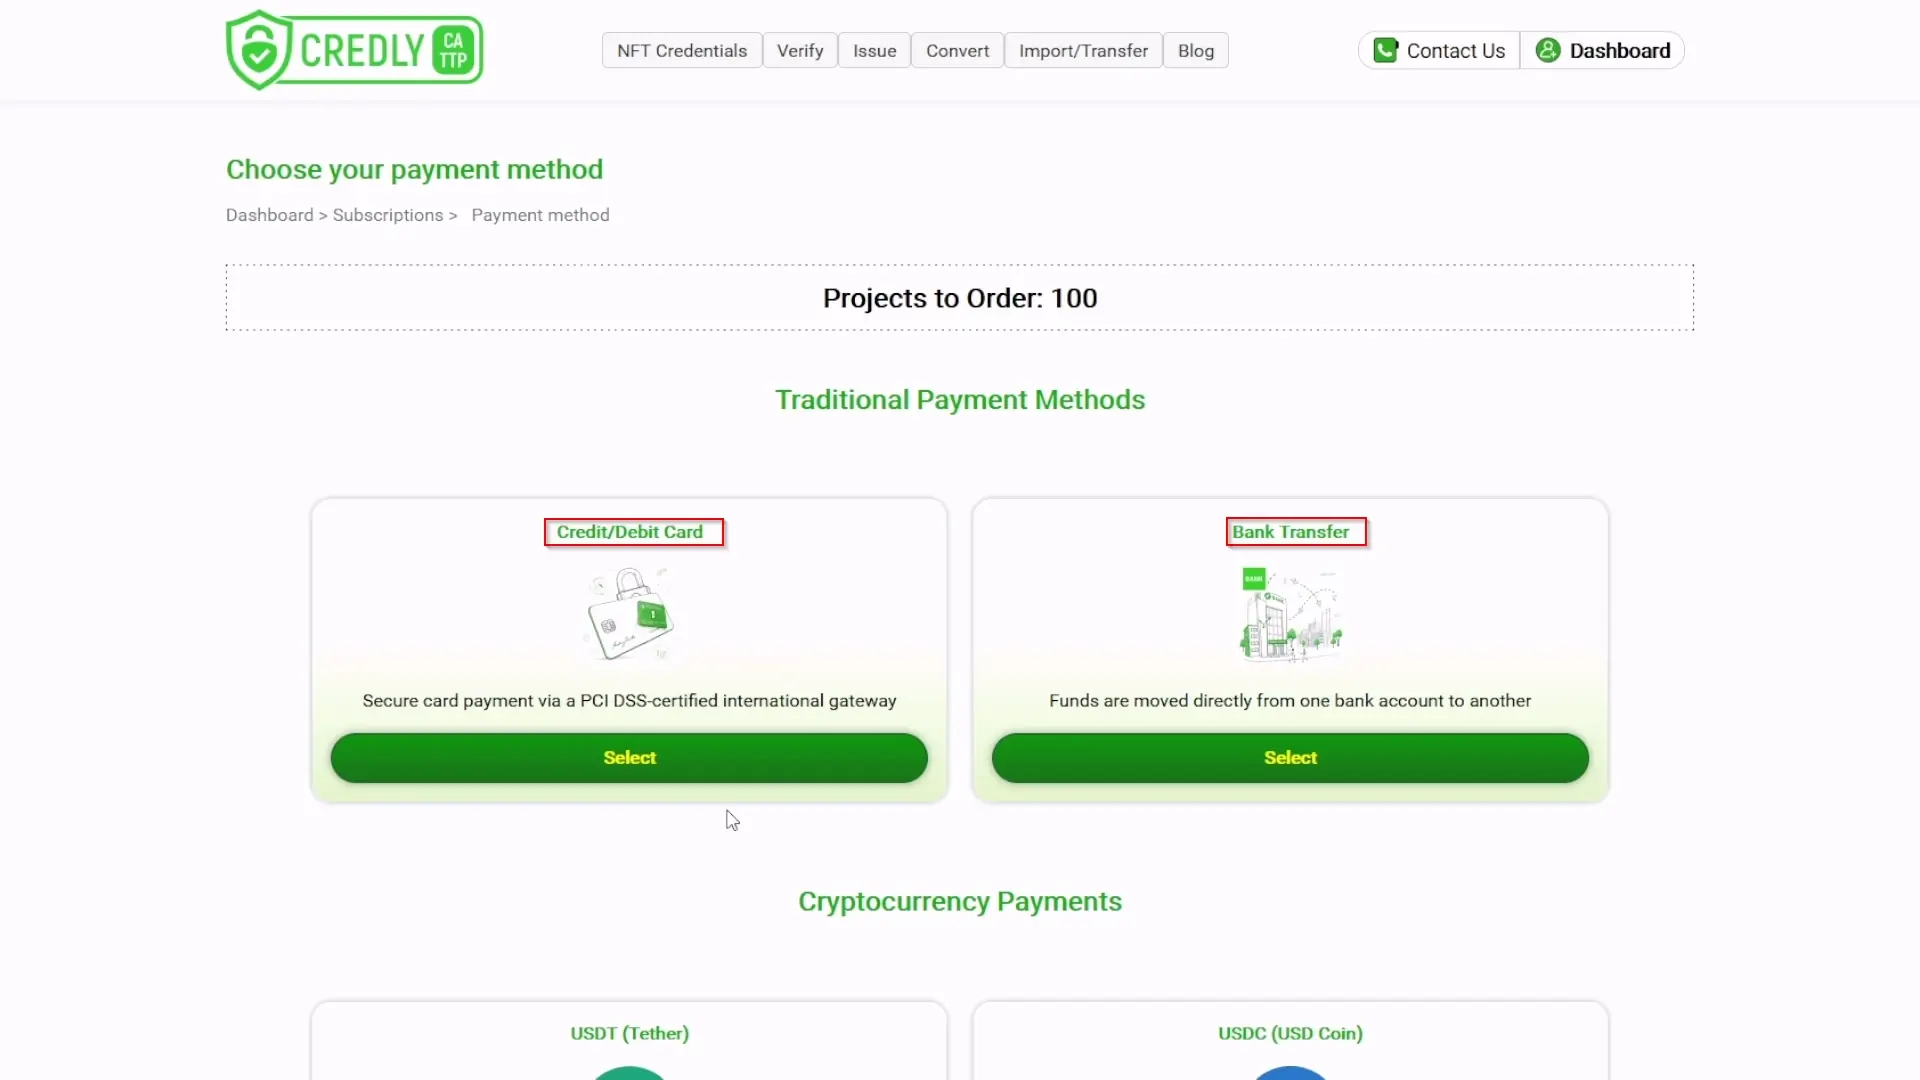
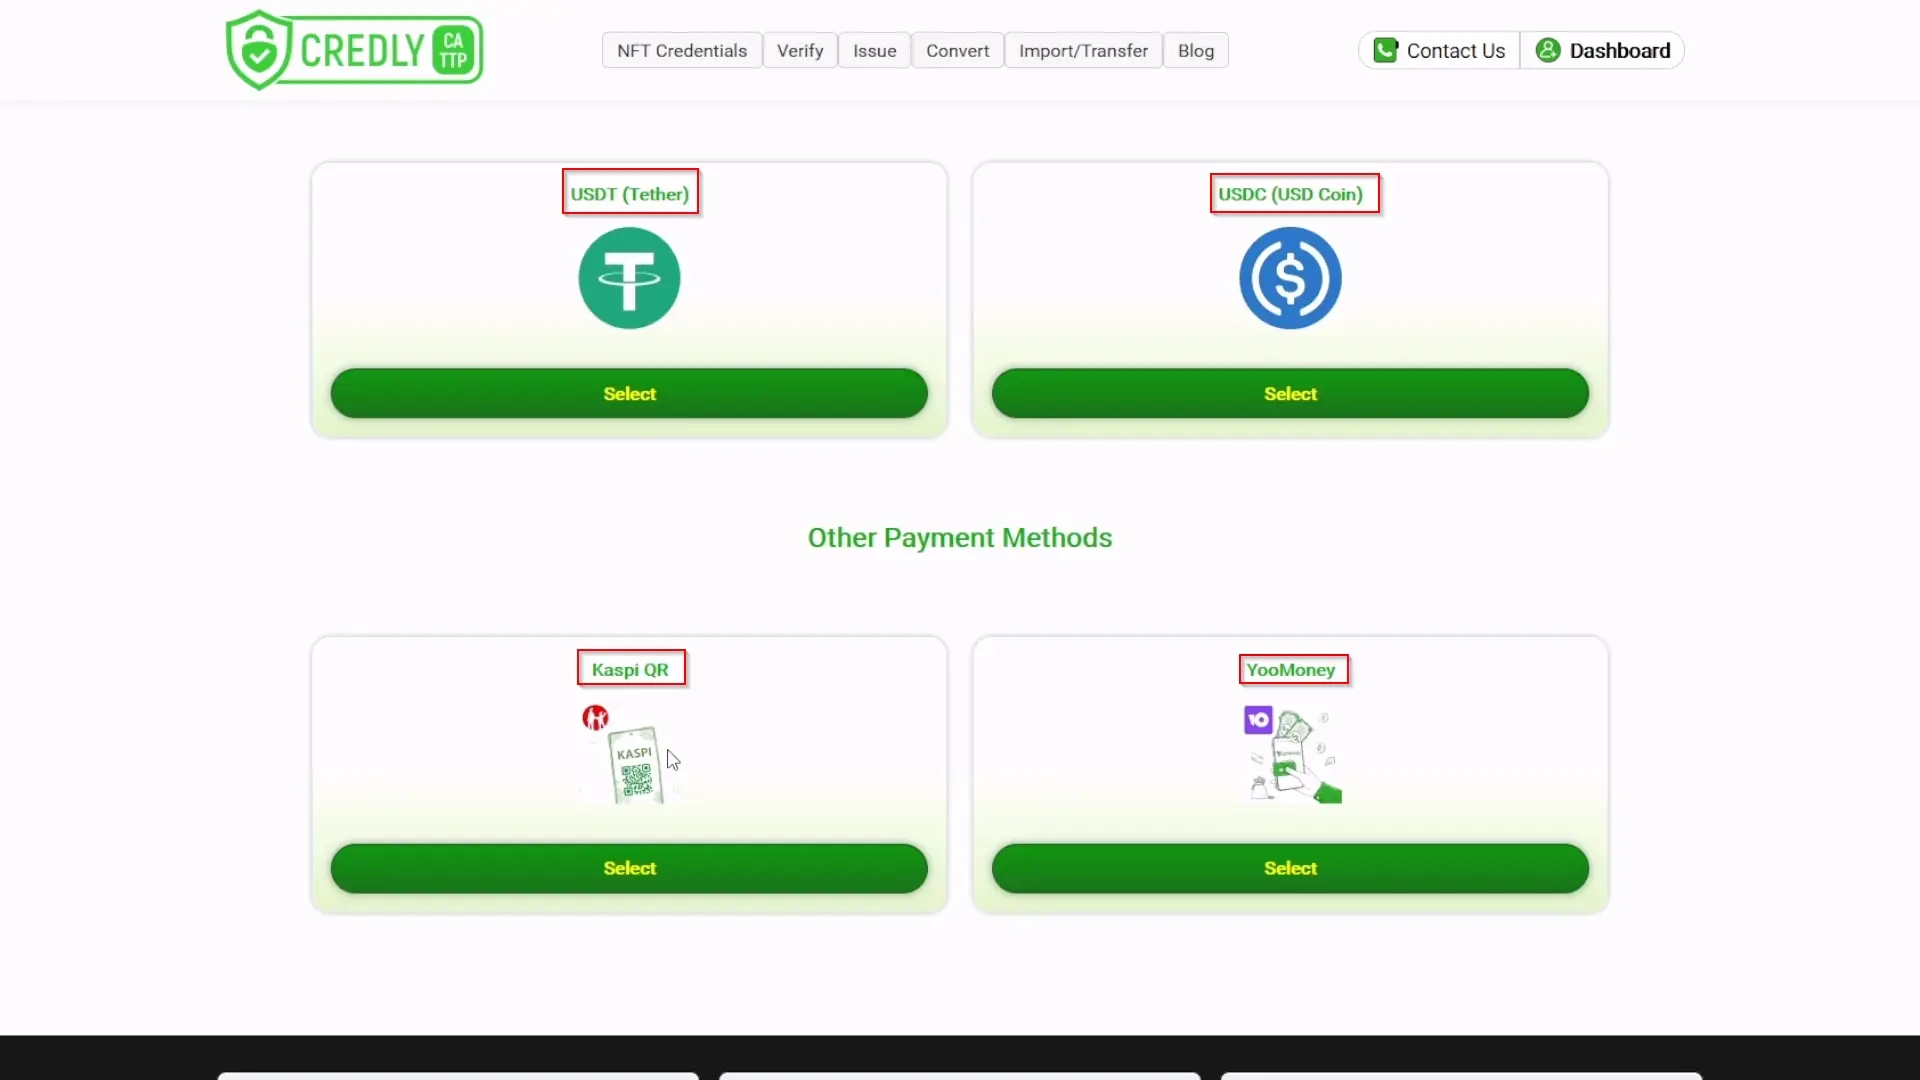
Complete Payment: Choose your preferred payment method and follow the on-screen instructions to complete the purchase.
-
Return to Dashboard: After successful payment, navigate back to your "Dashboard".
-
Verify Subscription:
- Locate the "Subscriptions:" metric/section on your Dashboard (e.g., "Subscriptions: 1").
- Click "Manage". You should see your newly created subscription in the list.
-
Await Activation: Our team will review and activate your subscription. Once activated, the purchased project credits will be assigned to your account.
-
Confirm Credits: You can confirm that the credits have been assigned by:
- Checking the "Blank" projects metric on your Dashboard (e.g., "Blank 96"). This number reflects your available unused project credits. The "Import projects" page will also show the number of "available for importing" projects (e.g., "(available for importing 96 projects)").
- Viewing the "Subscriptions" section (click "Manage"); your active subscription should show a status like "Projects Assigned".
Step 4: Set Up Your Institution's Profile Page
Goal: Create and customize the public-facing profile page for your institution. Users who receive NFT credentials from you can visit this page.
Procedure:
-
Navigate to Dashboard: Go to your "Dashboard".
-
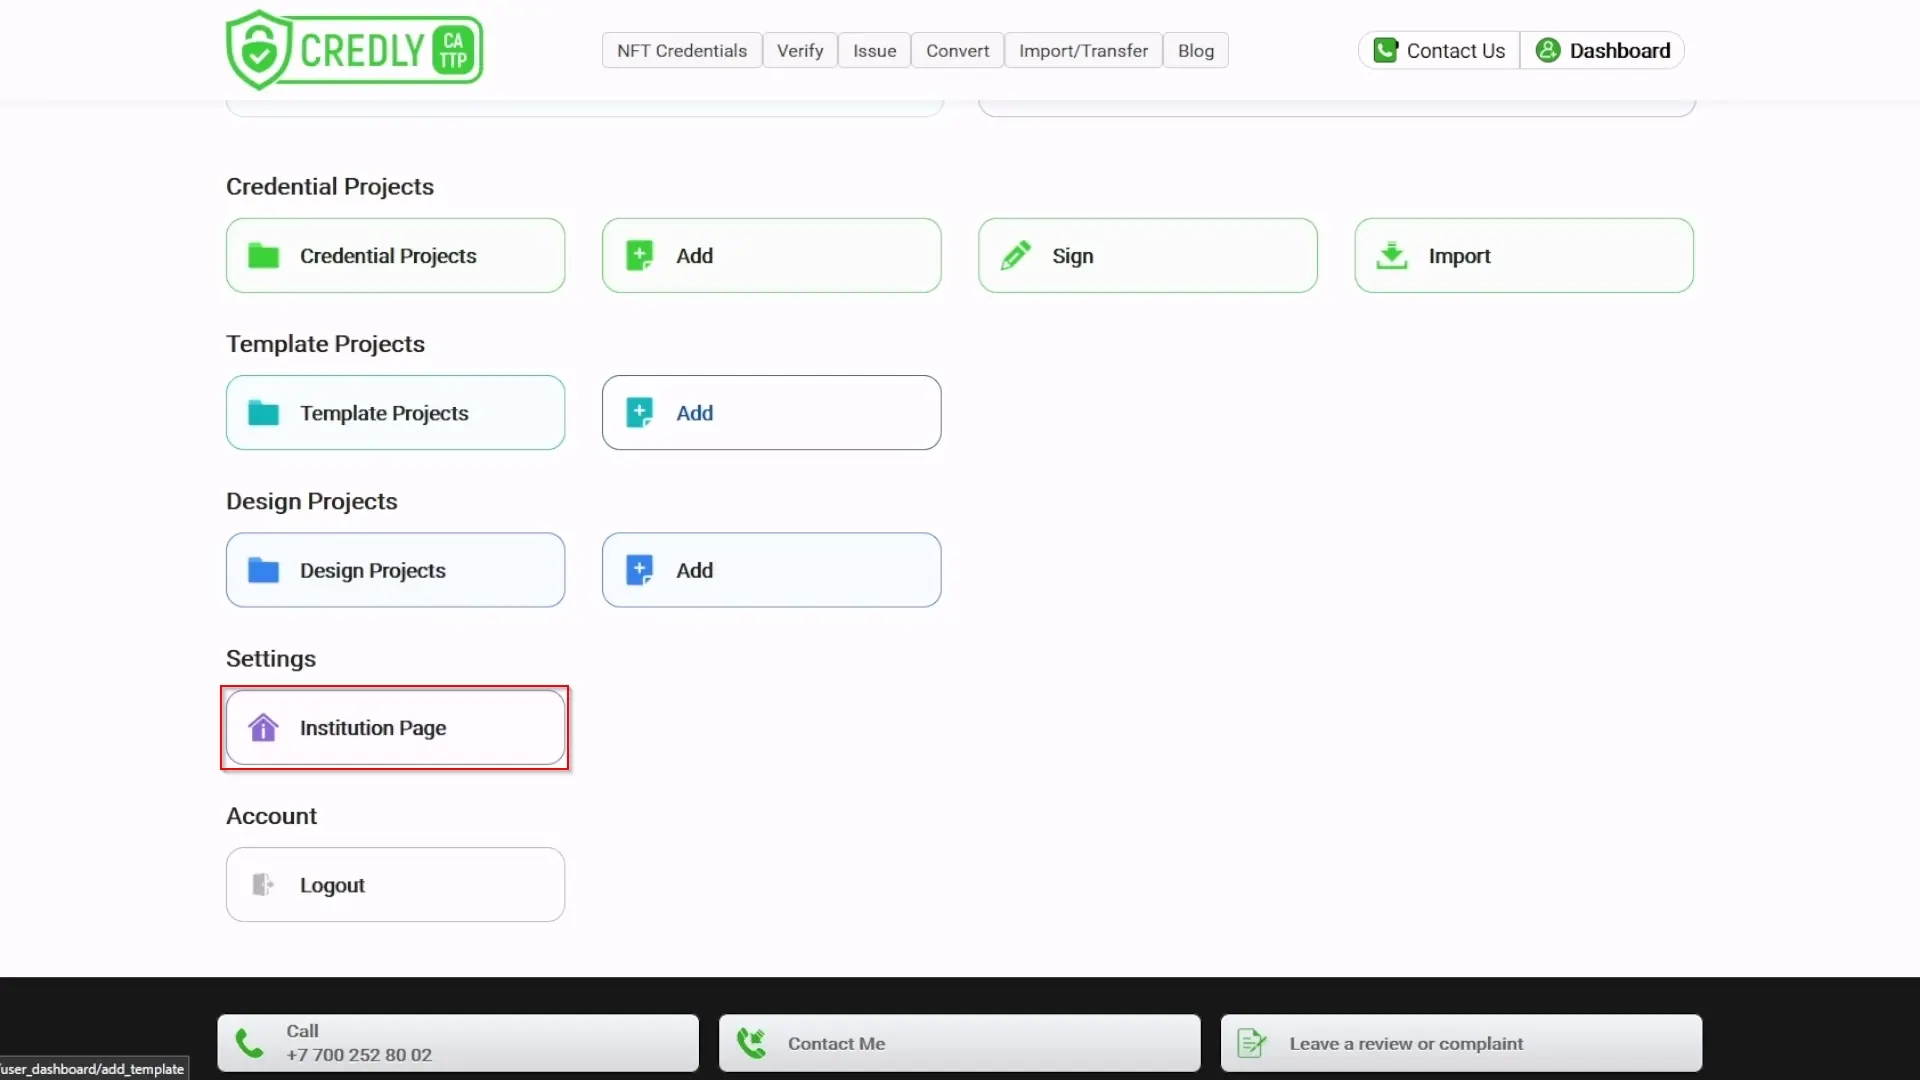
Access Institution Settings: Find the "Settings" section and click on "Institution Page". This will take you to the "Edit Institution Information" page.
-
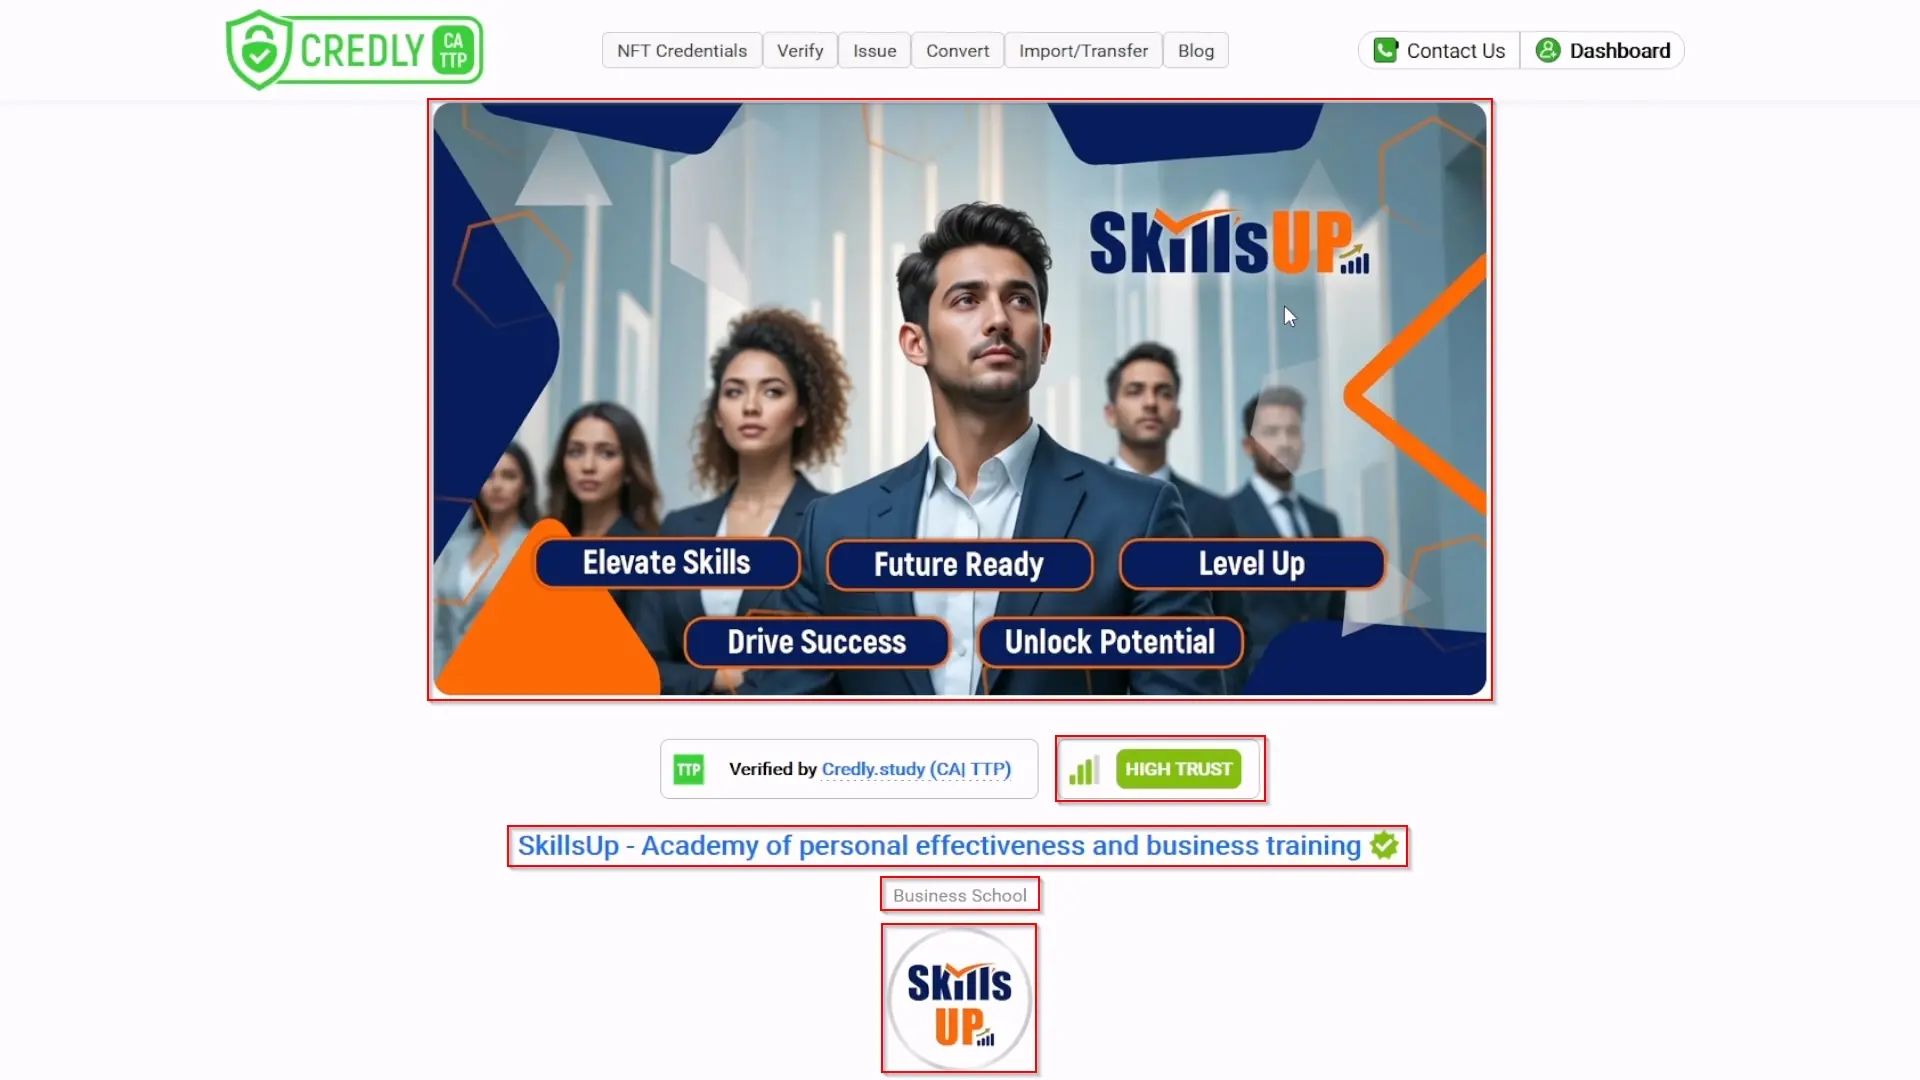
View an Example (Optional): To see how a completed profile looks, click "View Skillsup Profile". This shows an example from one of our partners. Notice the structure: Cover Image (you'll see "Current Cover Image" once you upload yours), Trust Level (your Dashboard shows your current "Trust Level"), Name, Type, Logo ("Current Logo" once uploaded), Description, Tags, Contacts, Share options.
-
Close Example: Close the partner's profile page to return to your "Edit Institution Information" page.
-
Visual Examples (Optional): You can click `[Example]` links (if available on your page) for visual guides on cover images and logos.
-
Upload Cover Image:
- In the "Cover" section, click the "Browse" (or "Choose File" / "Upload") button.
- Select your desired cover image file from your computer. (Max 1MB. Changes are often saved automatically upon file selection.) Your "Current Cover Image" will update.
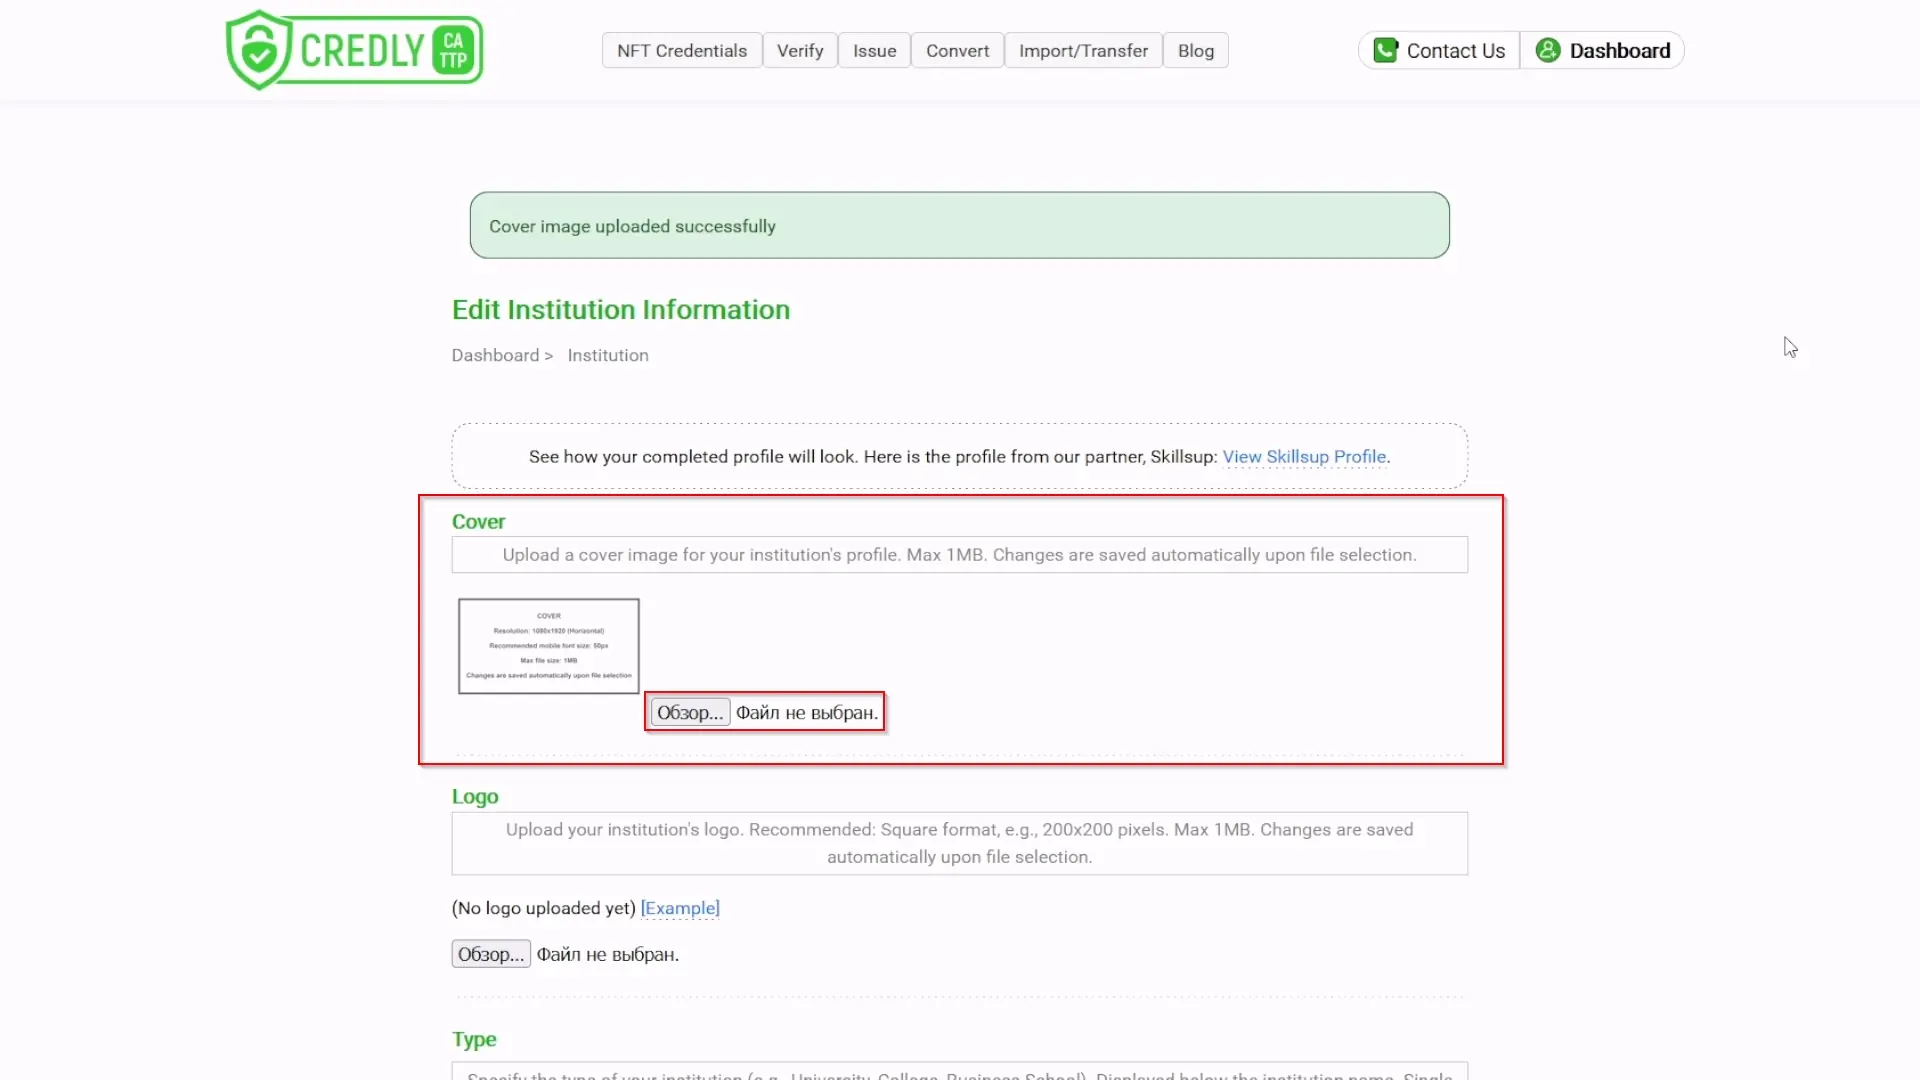
-
Upload Logo:
- In the "Logo" section, click the "Browse" (or "Choose File" / "Upload") button.
- Select your institution's logo file. (Recommended: Square format, e.g., 200x200 pixels. Max 1MB. Changes often saved automatically.) Your "Current Logo" will update.
![]()
-
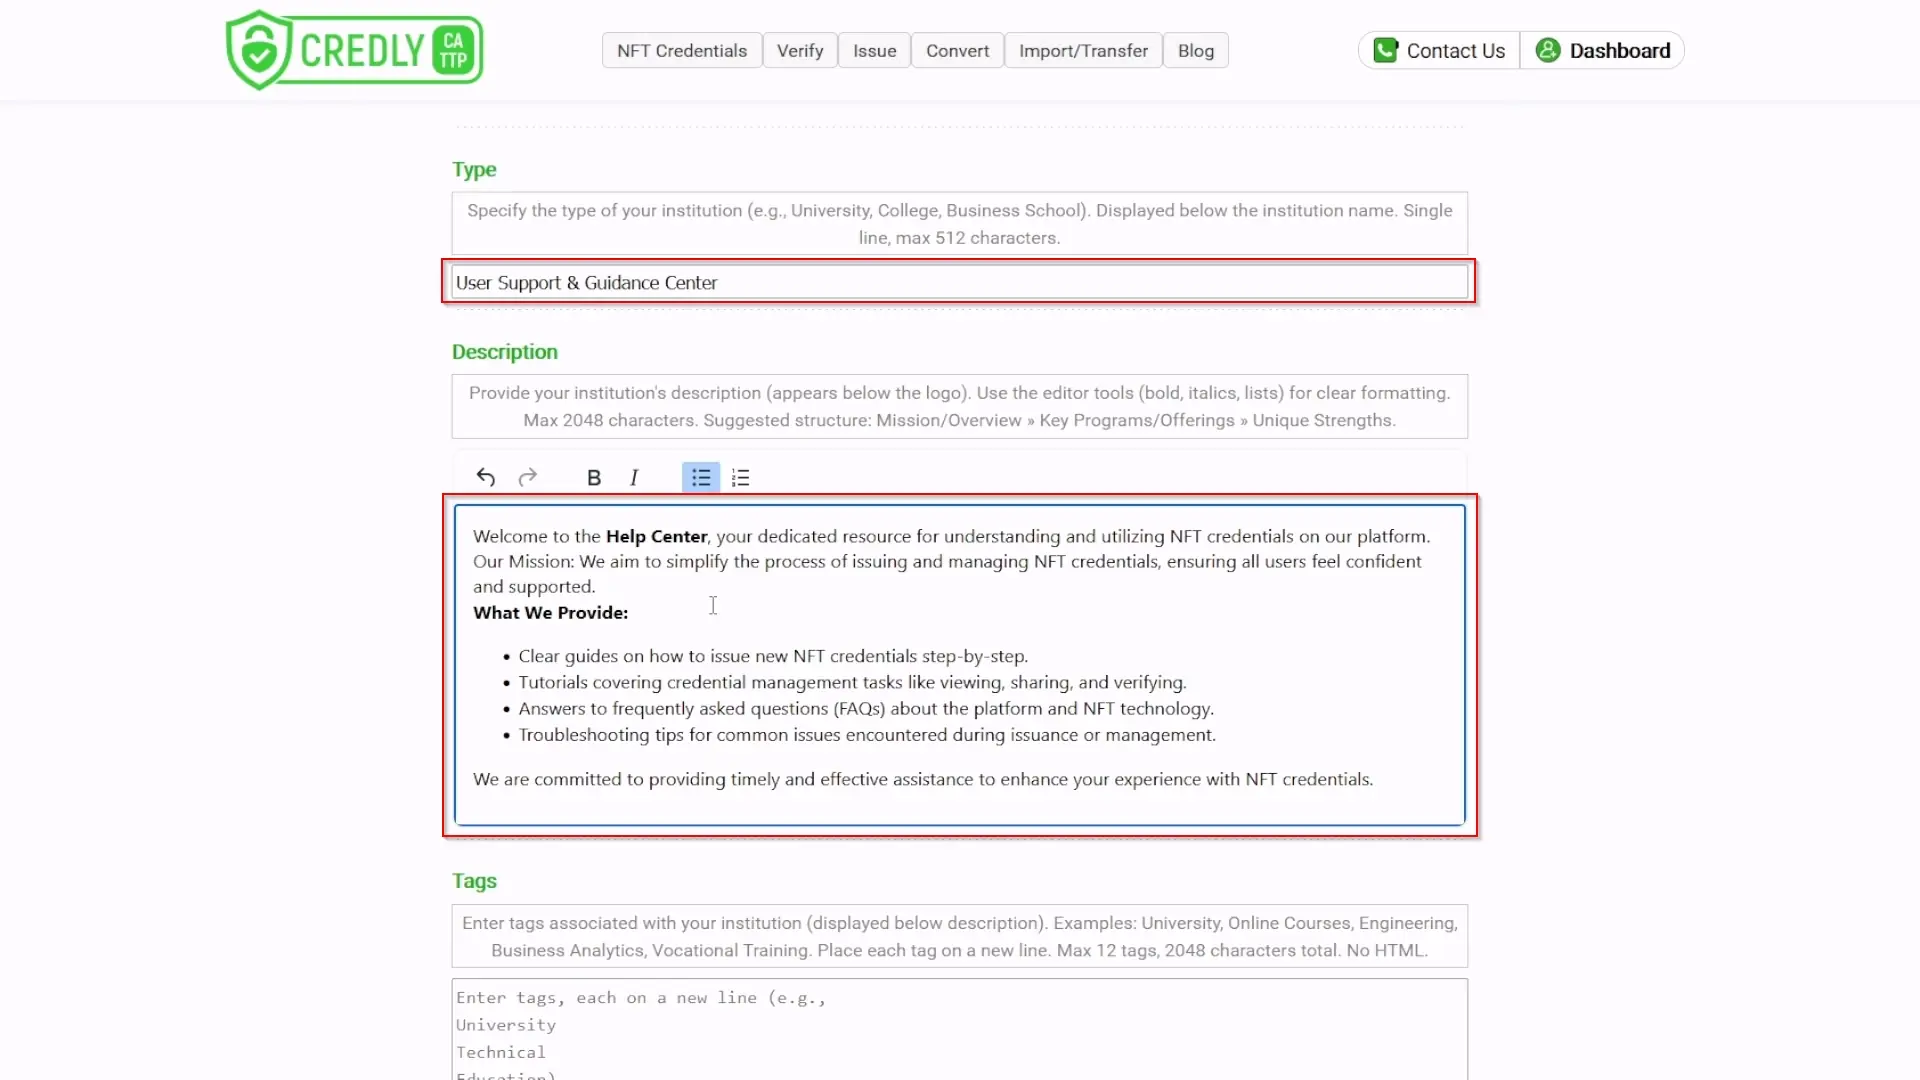
Specify Institution Type: Fill in the field for your institution's type (e.g., University, College, Business School). This appears below the institution name (single line, max 512 characters).
-
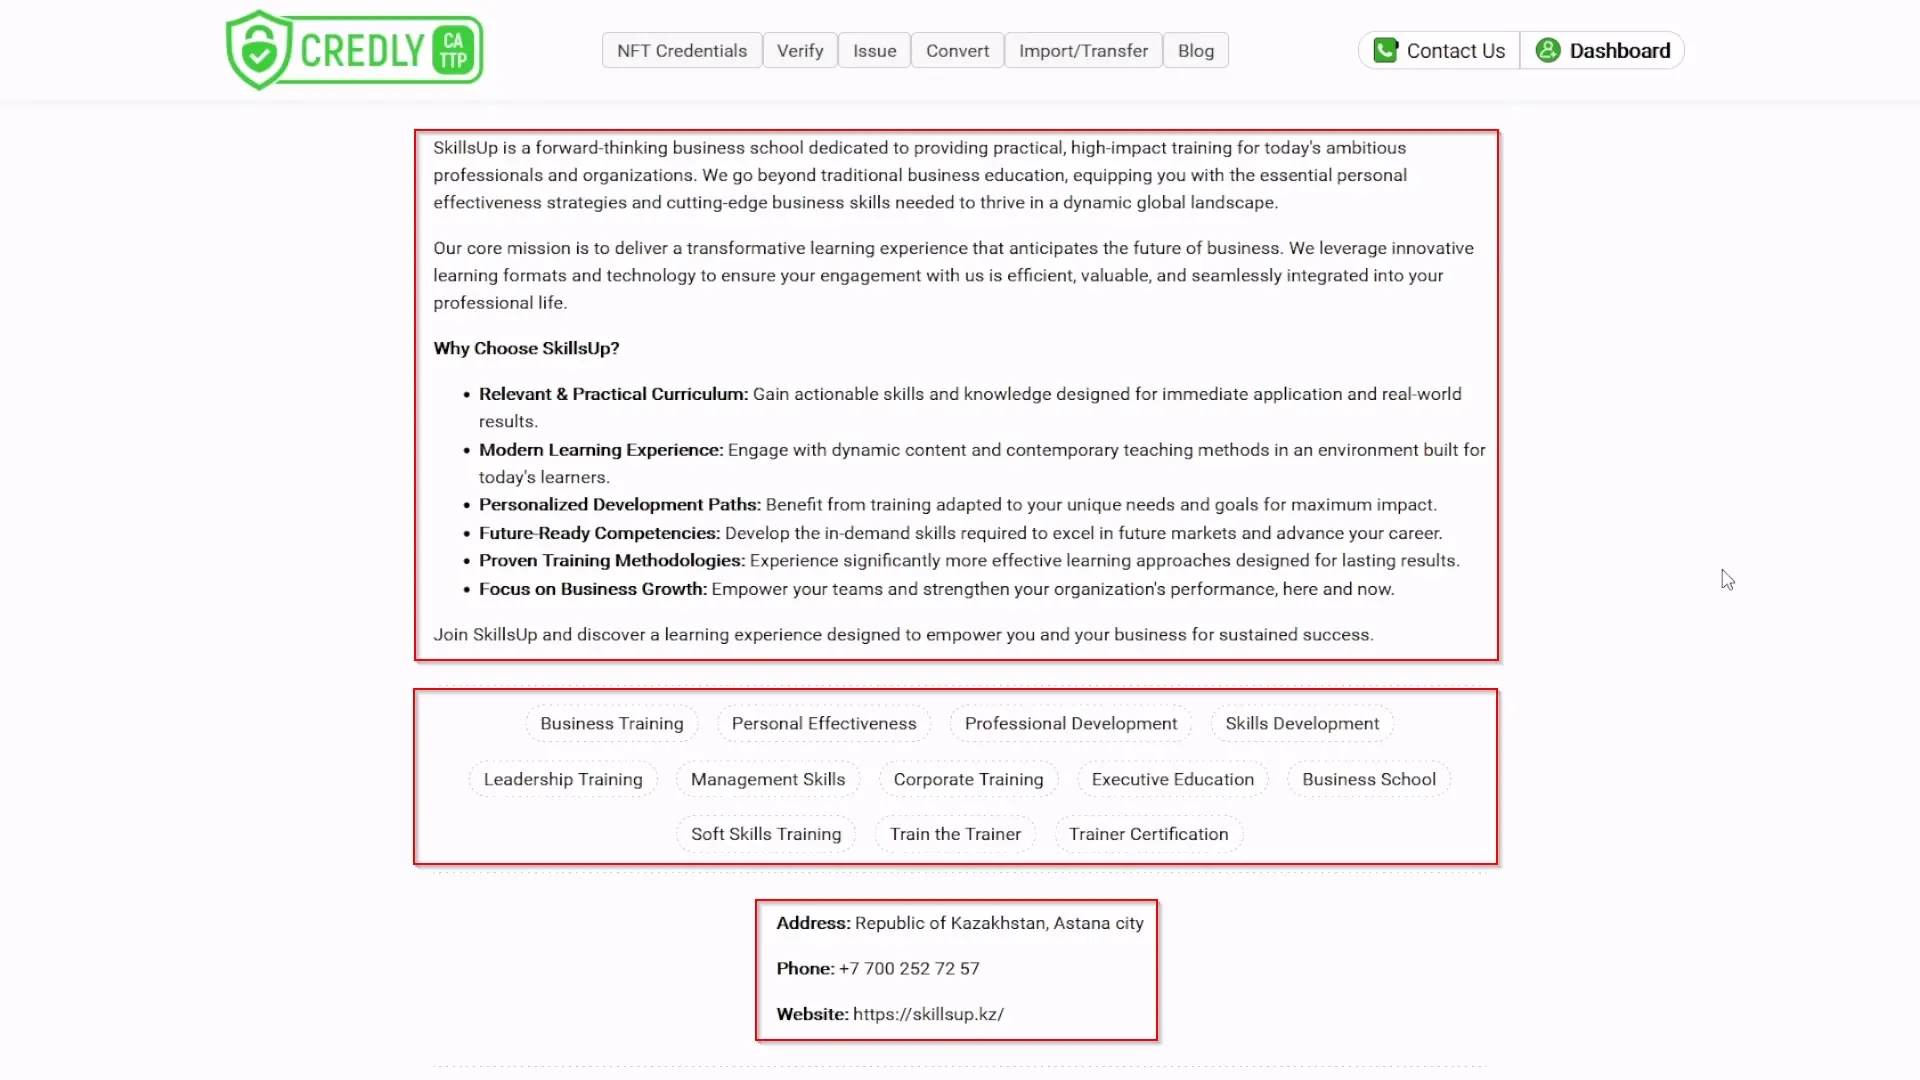
Write Description: Provide a description of your institution (appears below the logo). Use the editor tools (bold, italics, lists) for clear formatting. (Max 2048 characters).
- Suggested structure: Mission/Overview » Key Programs/Offerings » Unique Strengths.
- Avoid using special HTML characters like `&` directly; use their encoded equivalents if necessary or write them out (e.g., "and").
-
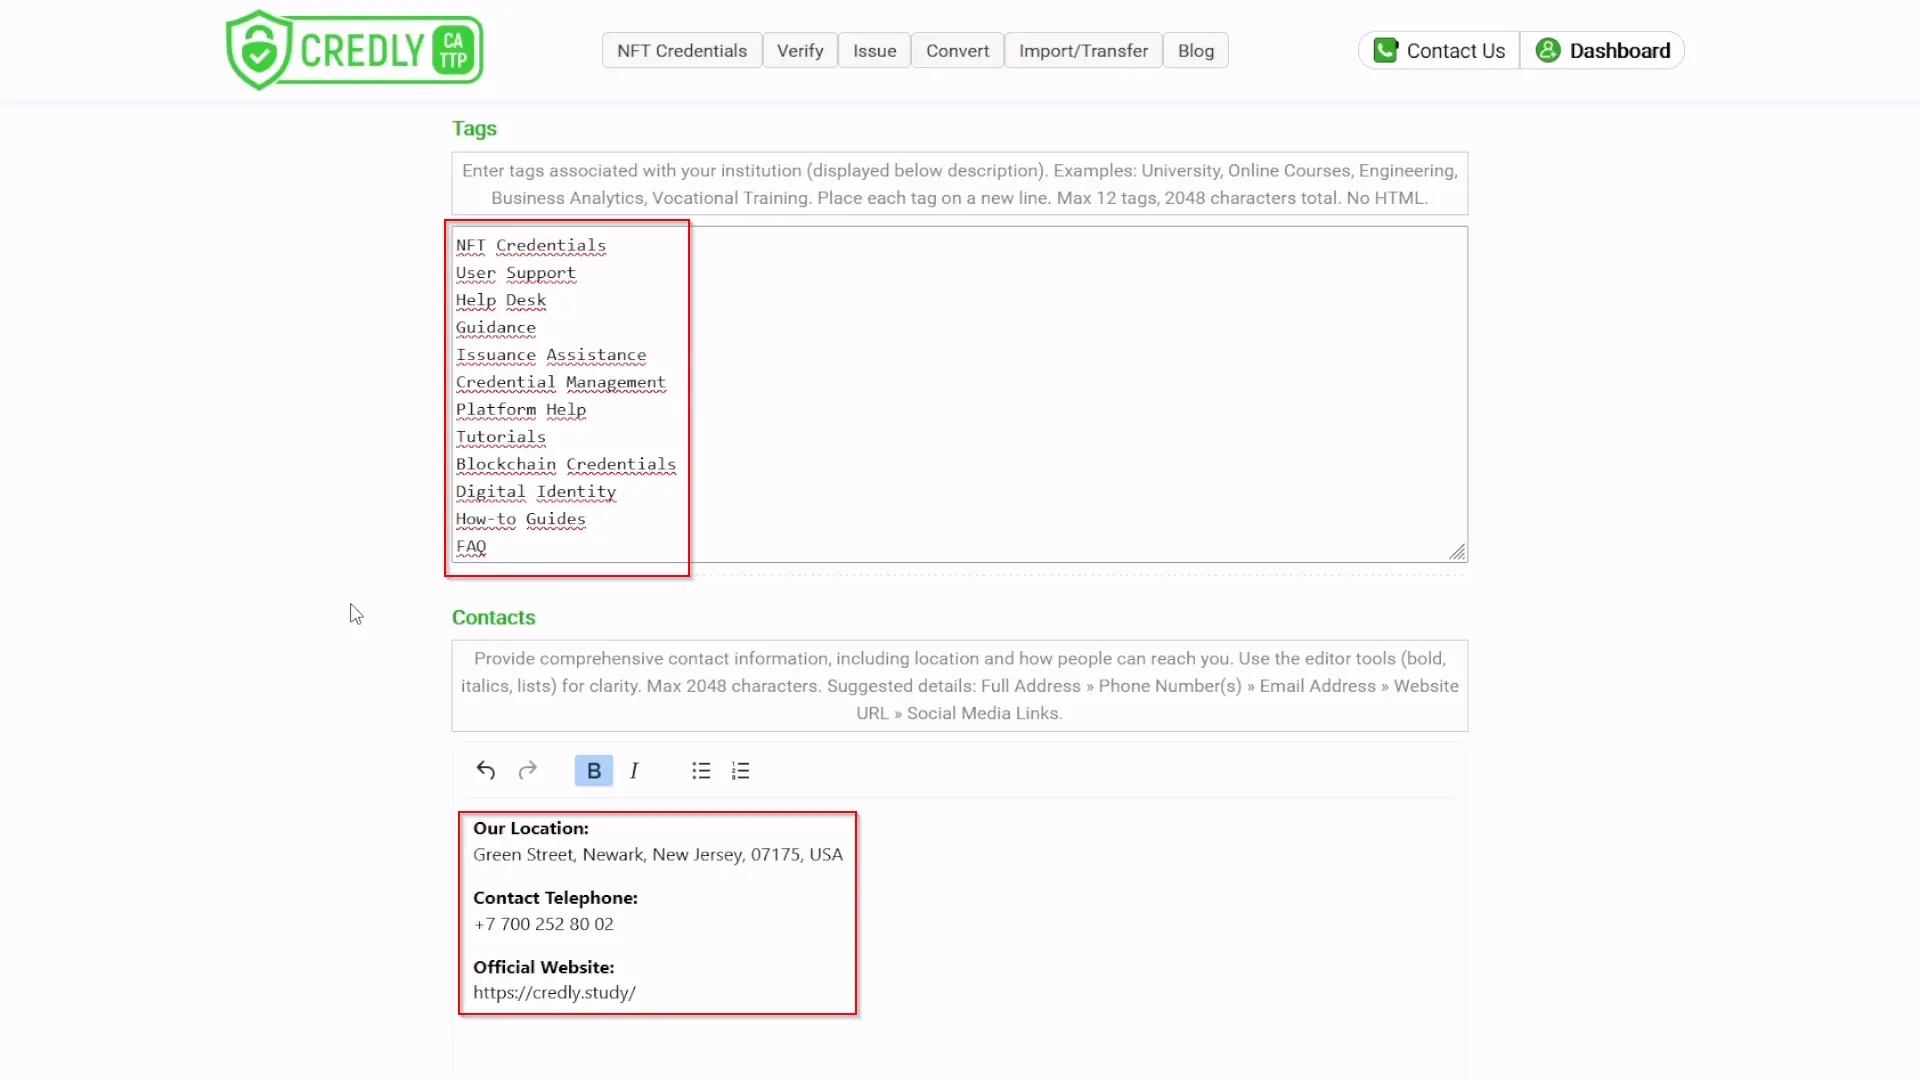
Add Tags: Enter tags associated with your institution (displayed below the description). Examples: University, Online Courses, Engineering, Business Analytics, Vocational Training. Place each tag on a new line. (Max 12 tags, 2048 characters total. No HTML.) The example tags provided on the "Edit Institution Information" page like "NFT Credentials", "User Support", "Tutorials" can give you ideas.
-
Provide Contact Information: Fill in comprehensive contact details, including the "Phone Number" that can be displayed. Use editor tools for clarity. (Max 2048 characters).
- Suggested details: Full Address » Phone Number(s) » Email Address » Website URL » Social Media Links.
-
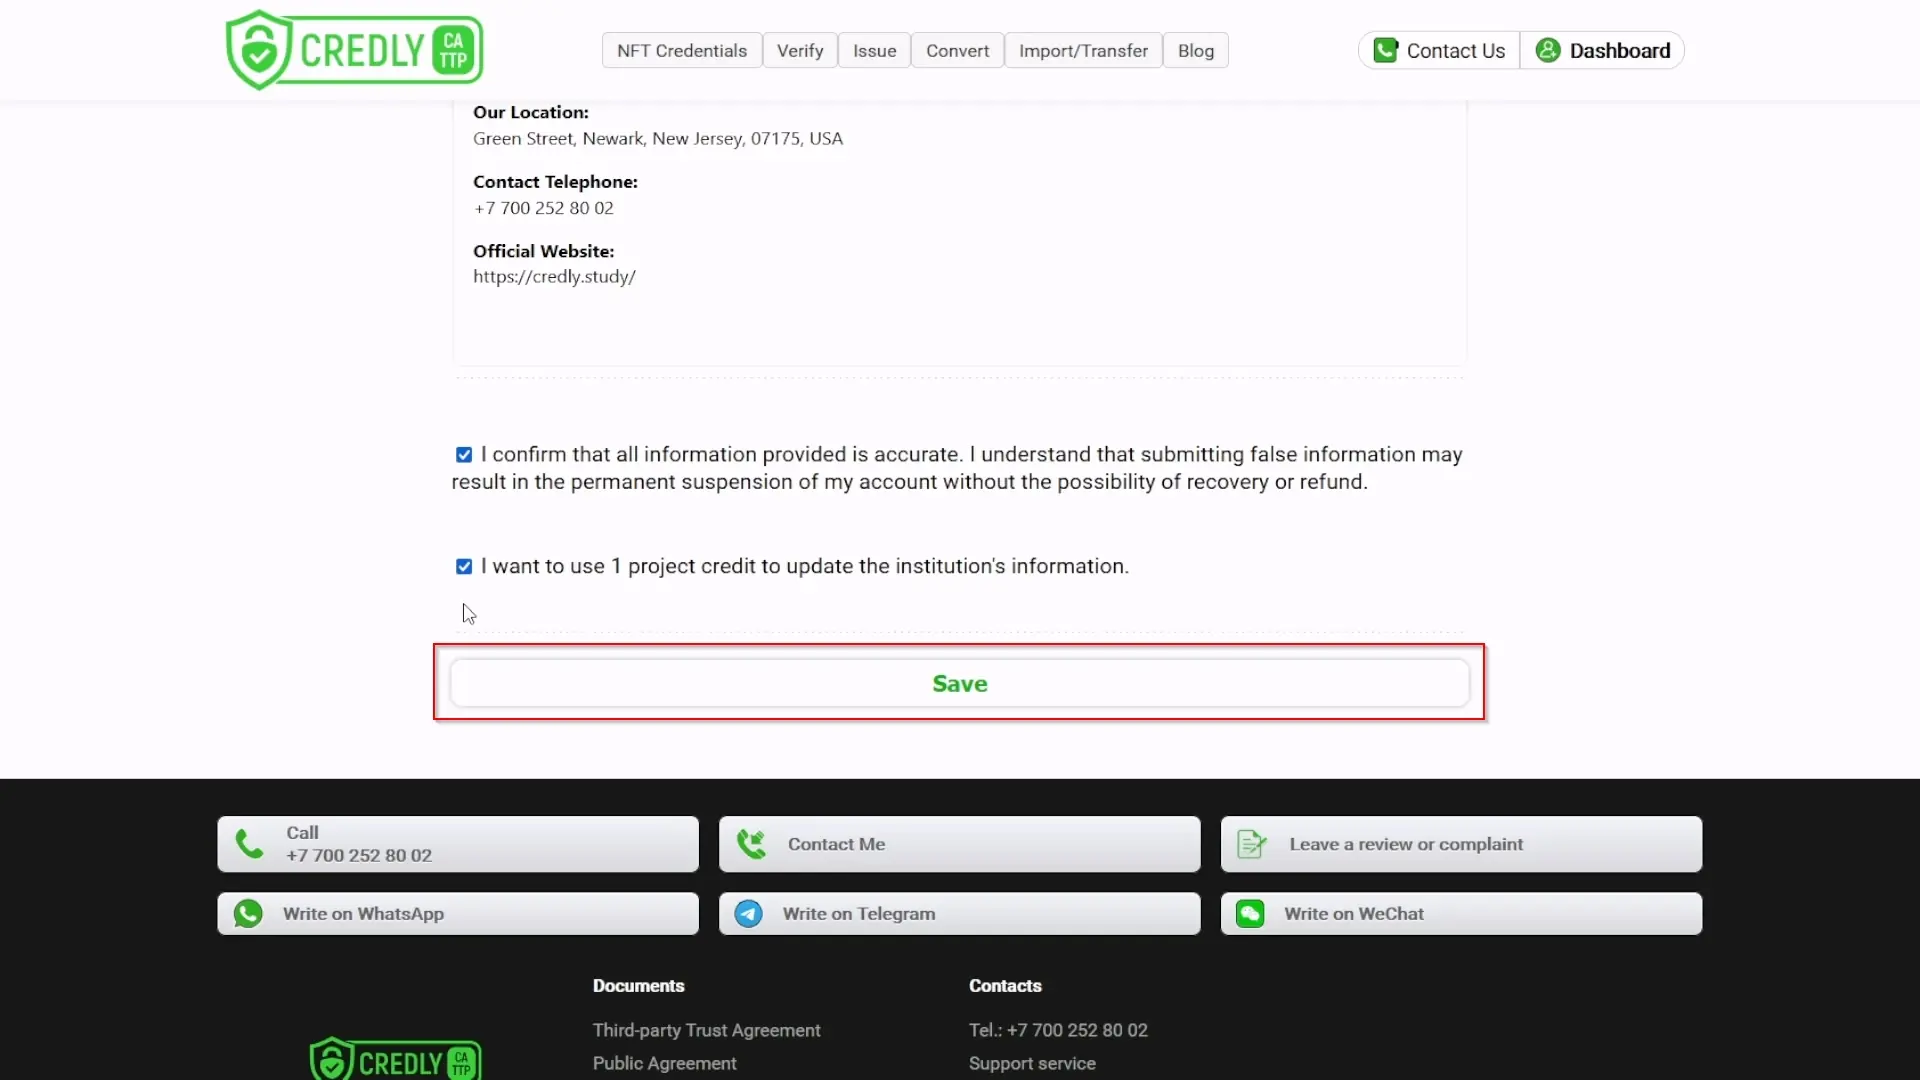
Review All Information: Carefully check all the data you've entered for accuracy.
-
Confirm Accuracy: Tick the checkbox: "I confirm that all information provided is accurate. I understand that submitting false information may result in the permanent suspension of my account without the possibility of recovery or refund."
-
Confirm Credit Usage: Tick the checkbox: "I want to use 1 project credit to update the institution's information." (This indicates that updating the page consumes one of your project credits).
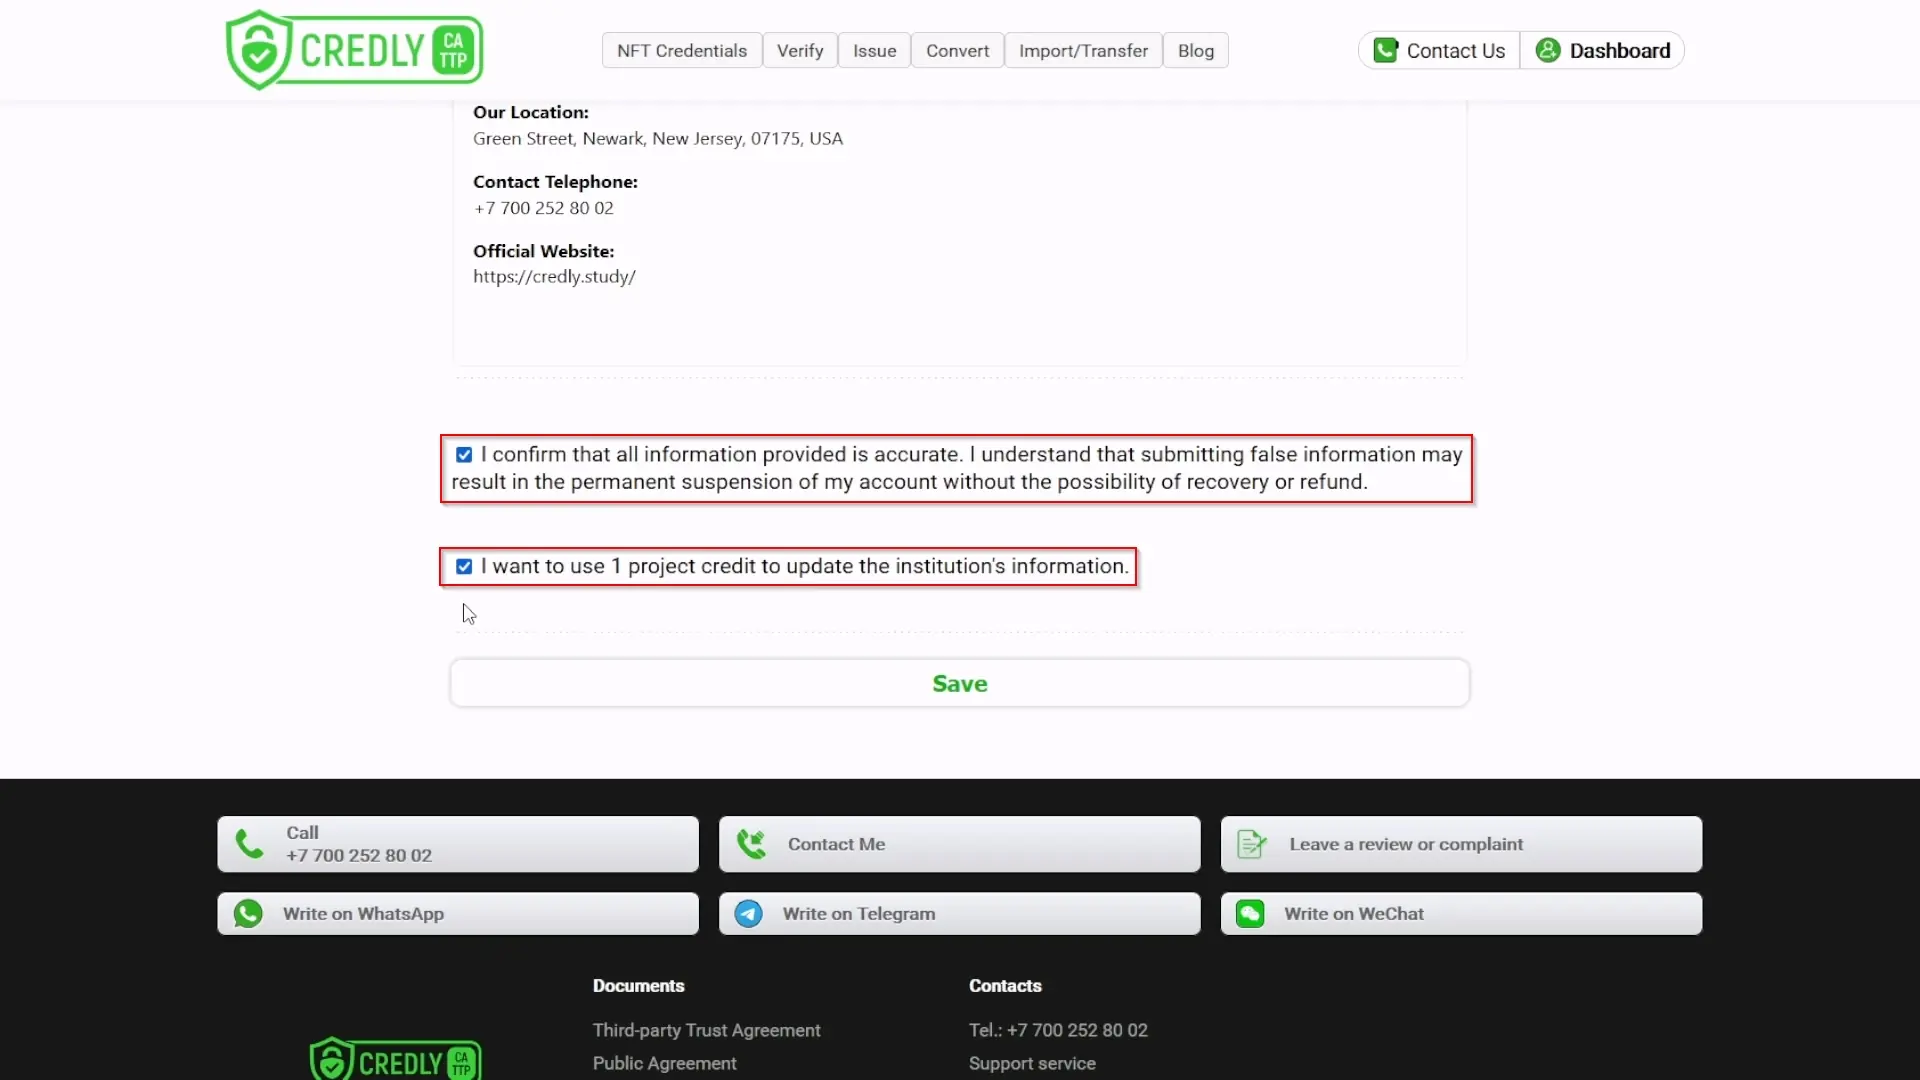
-
Save Changes: Click the "Save" button.
-
Return to Dashboard: Navigate back to your "Dashboard".
-
View Your Profile Page: You can now view your institution's live profile page by clicking the link provided under "Institution page URL" in the "General Information" section of your Dashboard.
-
Note on Name Changes: The institution's information is now updated. For security reasons, changing the primary name of the institution (the "Edu" field on your dashboard) is a separate service and must be requested through a support manager.
Step 5: Understanding "Projects"
Goal: Get a clear understanding of what "Projects" are and their different statuses, as displayed on your Dashboard and the "My Projects" page.
Overview:
-
5.1. Navigate to Dashboard: Go to your "Dashboard". You will see key metrics for your projects here.
-
5.2. What is a "Project"?
- On Credly.study, a "Project" is the initial digital record and workspace for creating and managing your document (like a diploma or certificate) before it's officially issued as an NFT. Think of it as the draft and preparation stage for your secure digital credential. Each Project tracks the information, status (e.g., Draft, Signed, Document/NFT), and settings for one specific document.
-
5.3. Project Status:
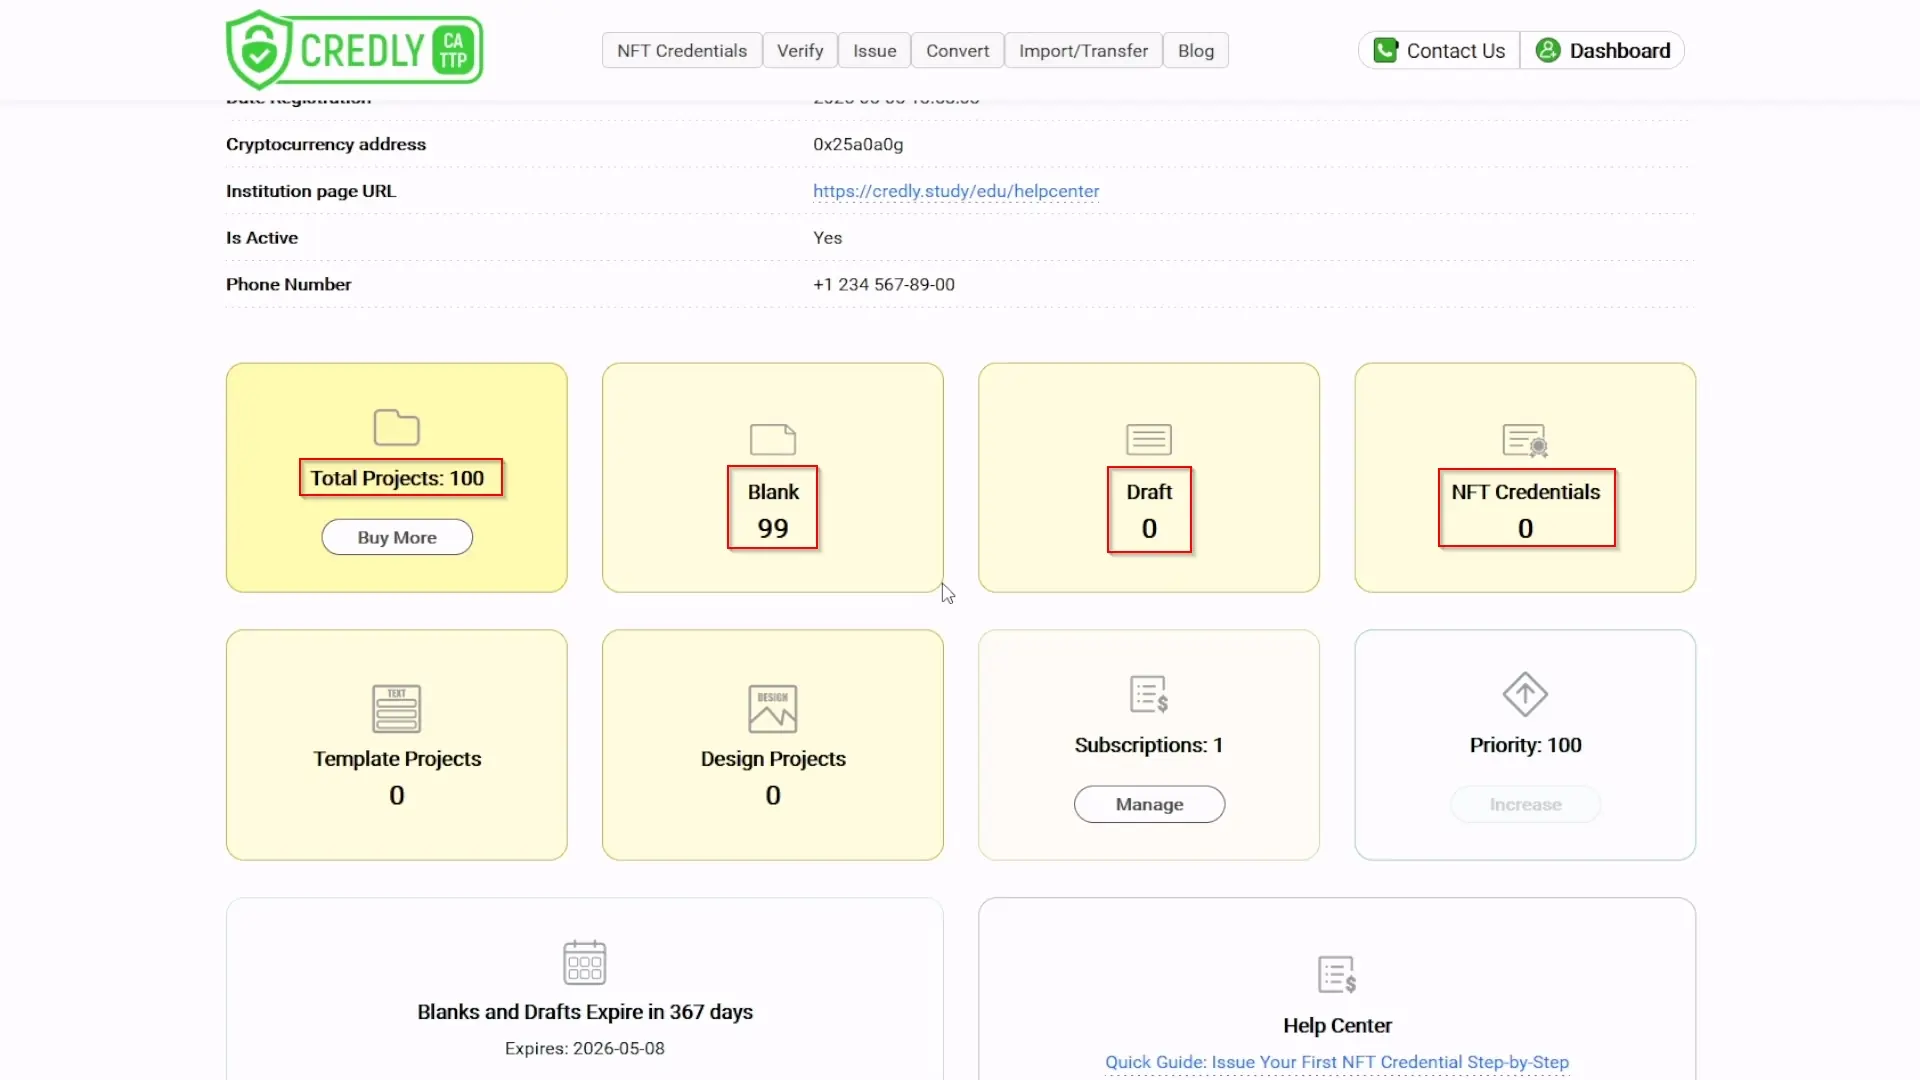
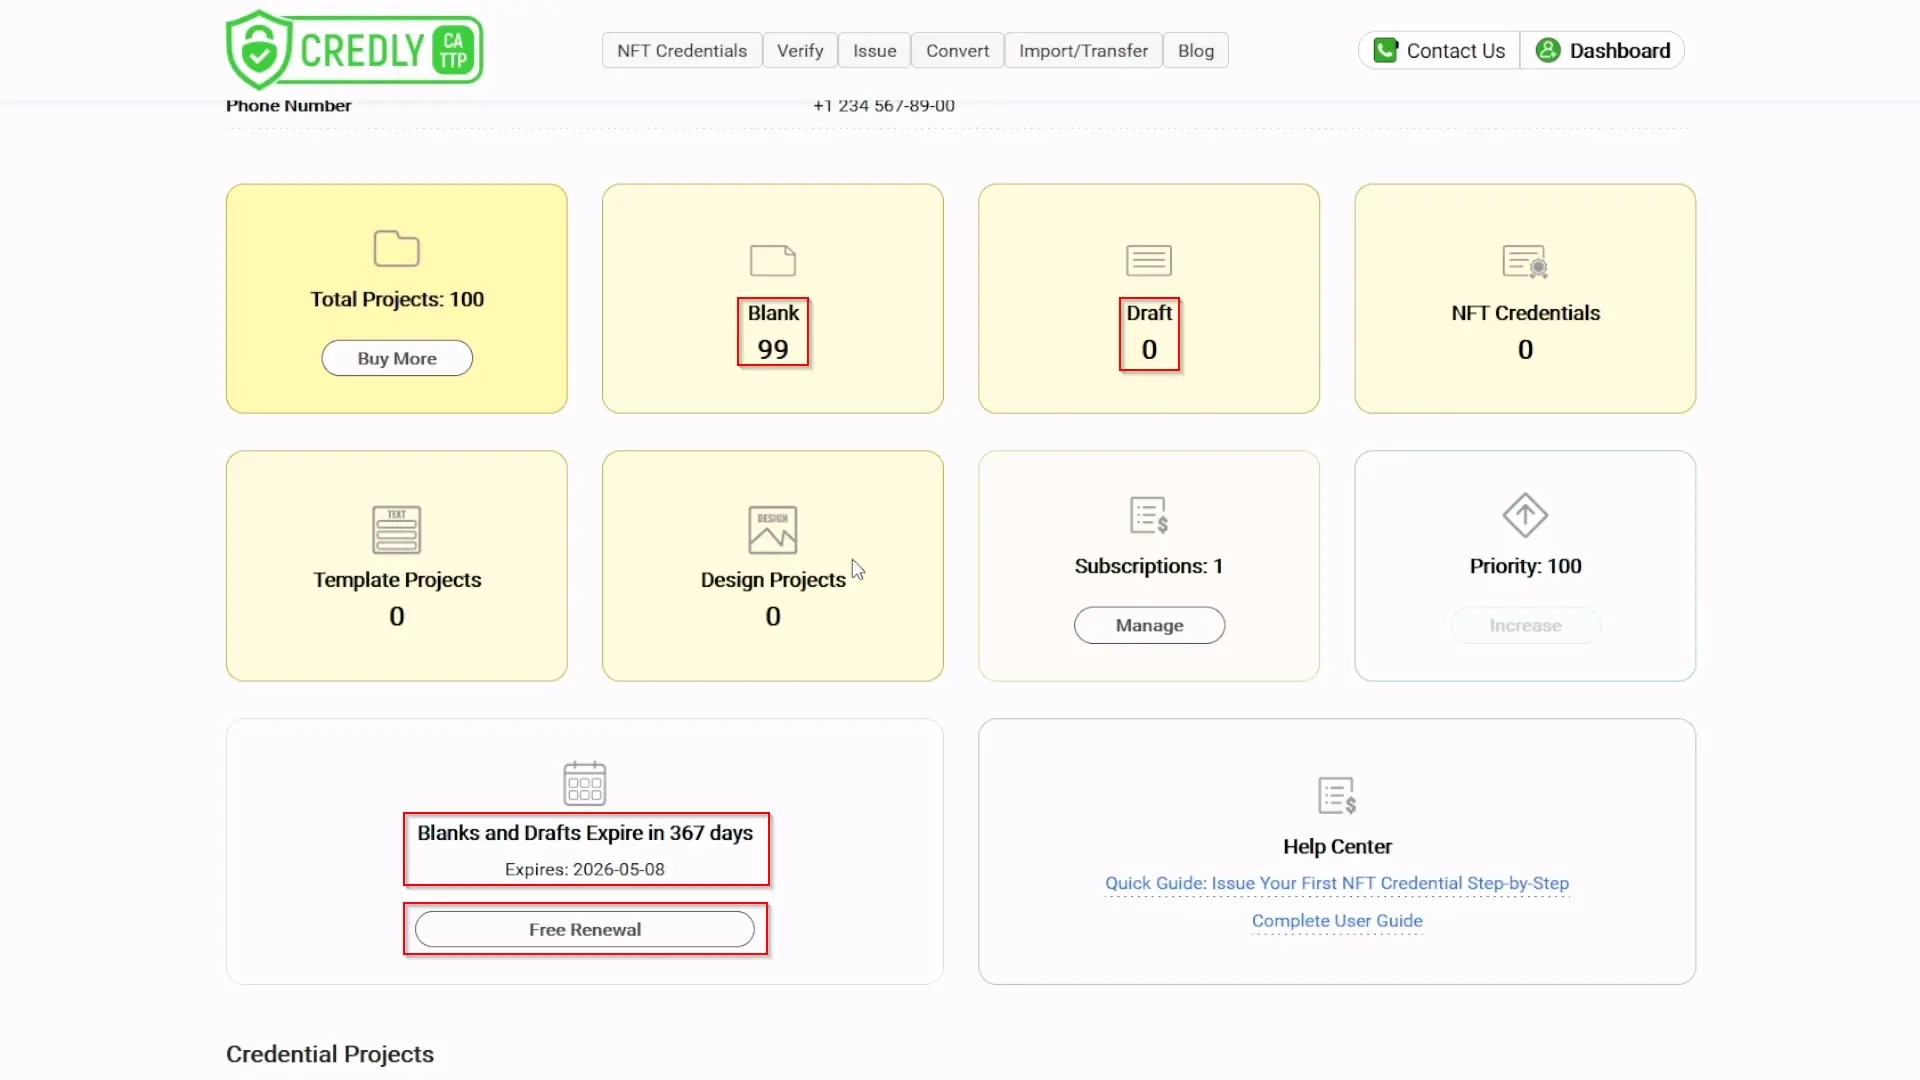
Blank- Displayed on your Dashboard as "Blank [Number]" (e.g., "Blank 96"). This represents the number of unused project credits you have. Think of them as brand new, official, blank templates ready to be filled with document information.
- These "blanks" are required to create new documents or import existing ones.
- Pay attention to the "Blanks and Drafts Expire in [X] days. Expires: [Date]" notice on your Dashboard (e.g., "Blanks and Drafts Expire in 367 days Expires: 2026-05-08"). It's advisable to use them before they expire. You might see an option like "Free Renewal" if applicable.
-
5.4. Project Status:
Draft- Displayed on your Dashboard as "Draft [Number]" (e.g., "Draft 0"). This shows the number of projects you are currently working on. You can still make changes to these.
- Think of these as your official templates where you've started filling in details (perhaps like writing with a pencil).
- NFT credentials are created from
Draftprojects.
-
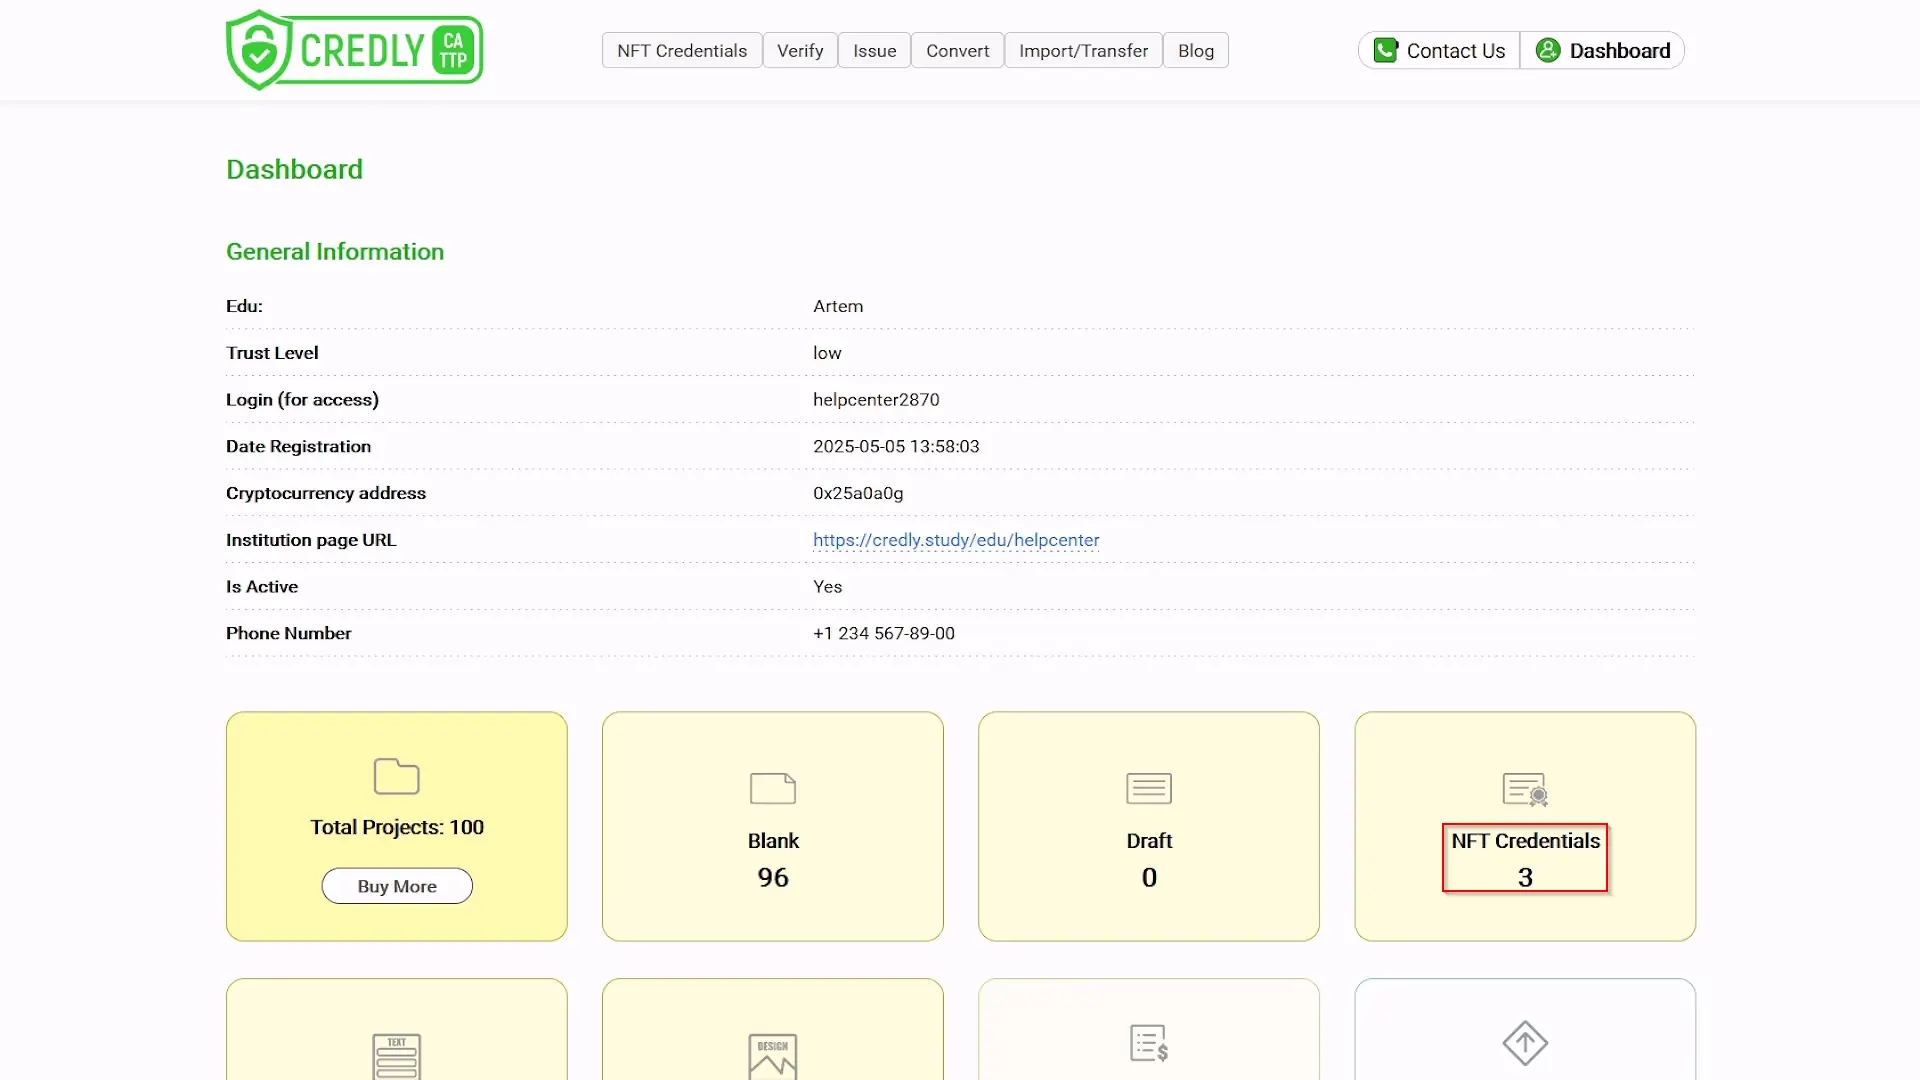
5.5. Project Status:
NFT Credentials(orDocument)- Displayed on your Dashboard as "NFT Credentials [Number]" (e.g., "NFT Credentials 3"). This indicates the number of projects that have been successfully issued as NFTs on the blockchain.
- These cannot be altered. Think of them as your official templates, now filled in with permanent ink, officially stamped, and registered in a public ledger.
-
5.6. Project Management Overview (from Dashboard):
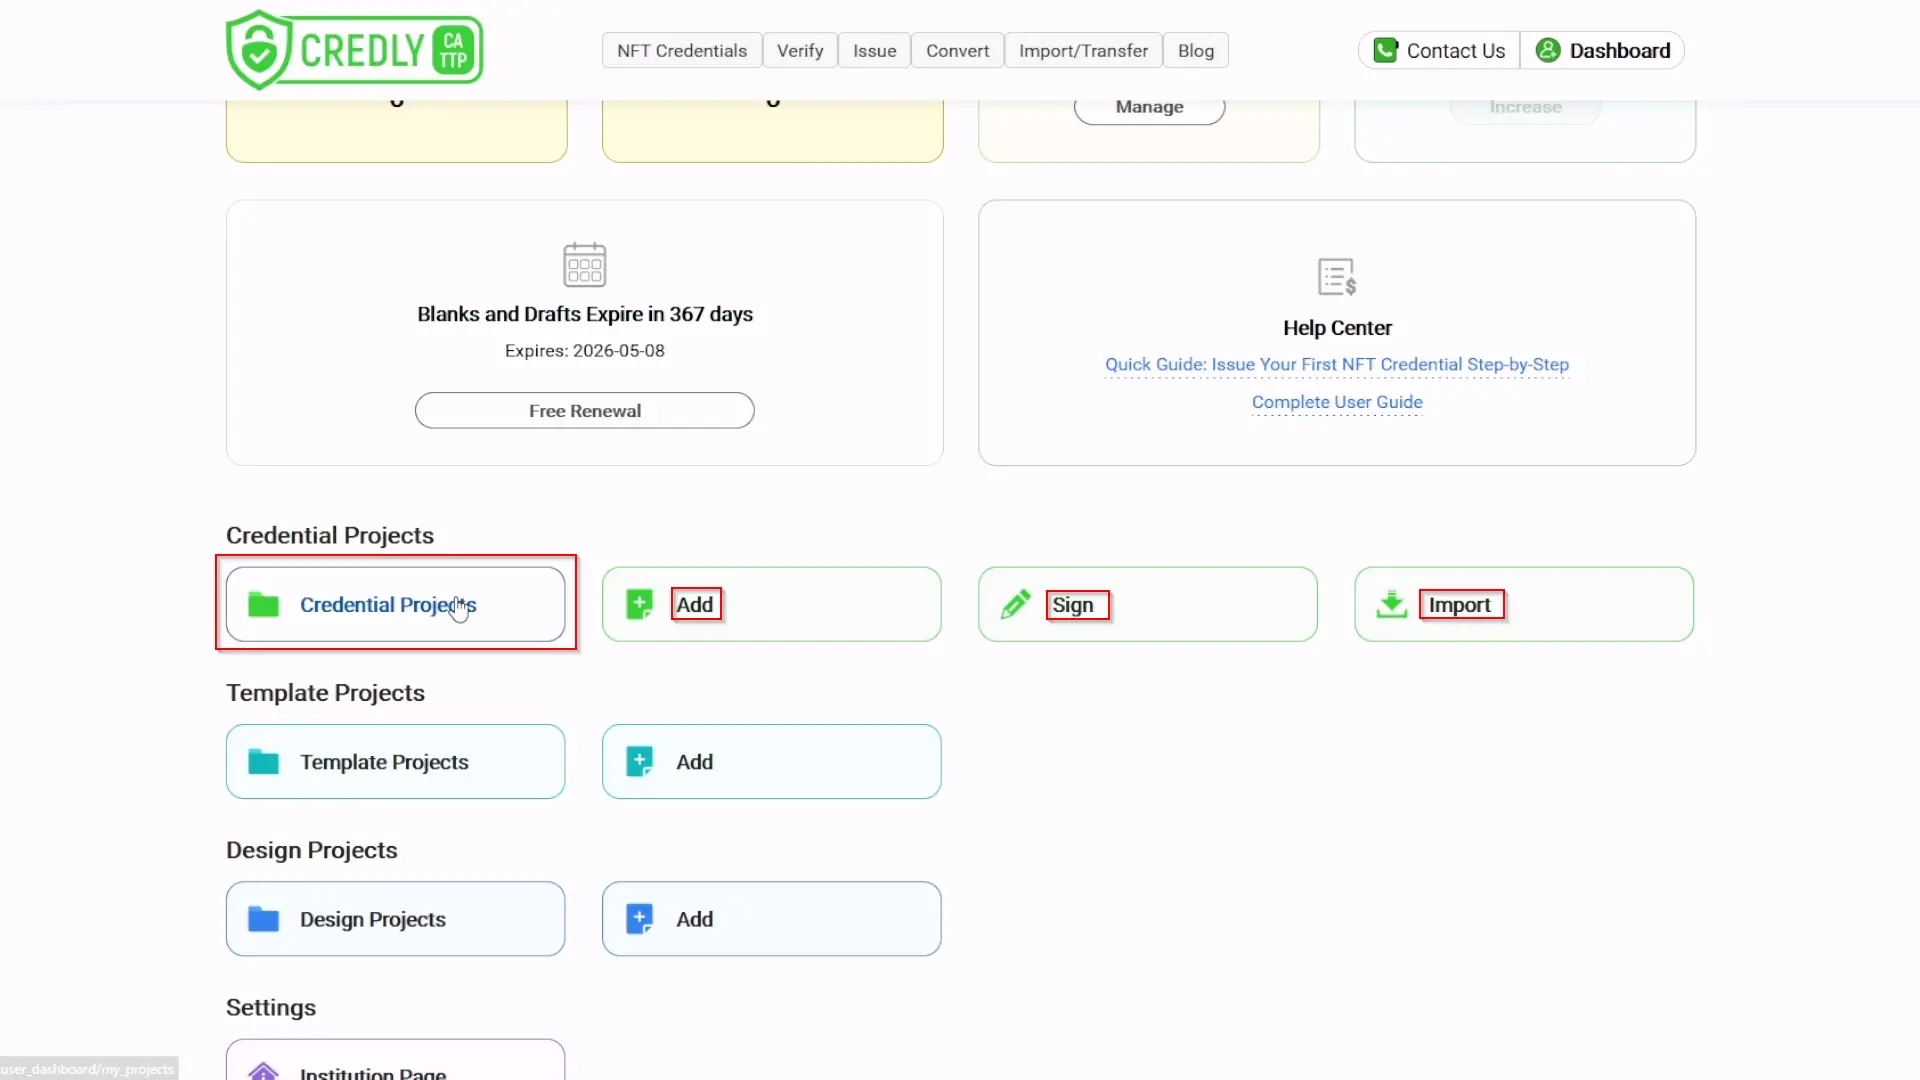
- On your Dashboard, the "Credential Projects" section provides quick access to key actions:
- Credential Projects (button): Takes you to a list of all your projects (the "My Projects" page).
- Add (button): For manually creating individual projects.
- Sign (button): For signing
Draftprojects to prepare them for blockchain issuance. - Import (button): For importing project data from a spreadsheet.
- Click the main "Credential Projects" button to go to the "My Projects" page.
- On your Dashboard, the "Credential Projects" section provides quick access to key actions:
-
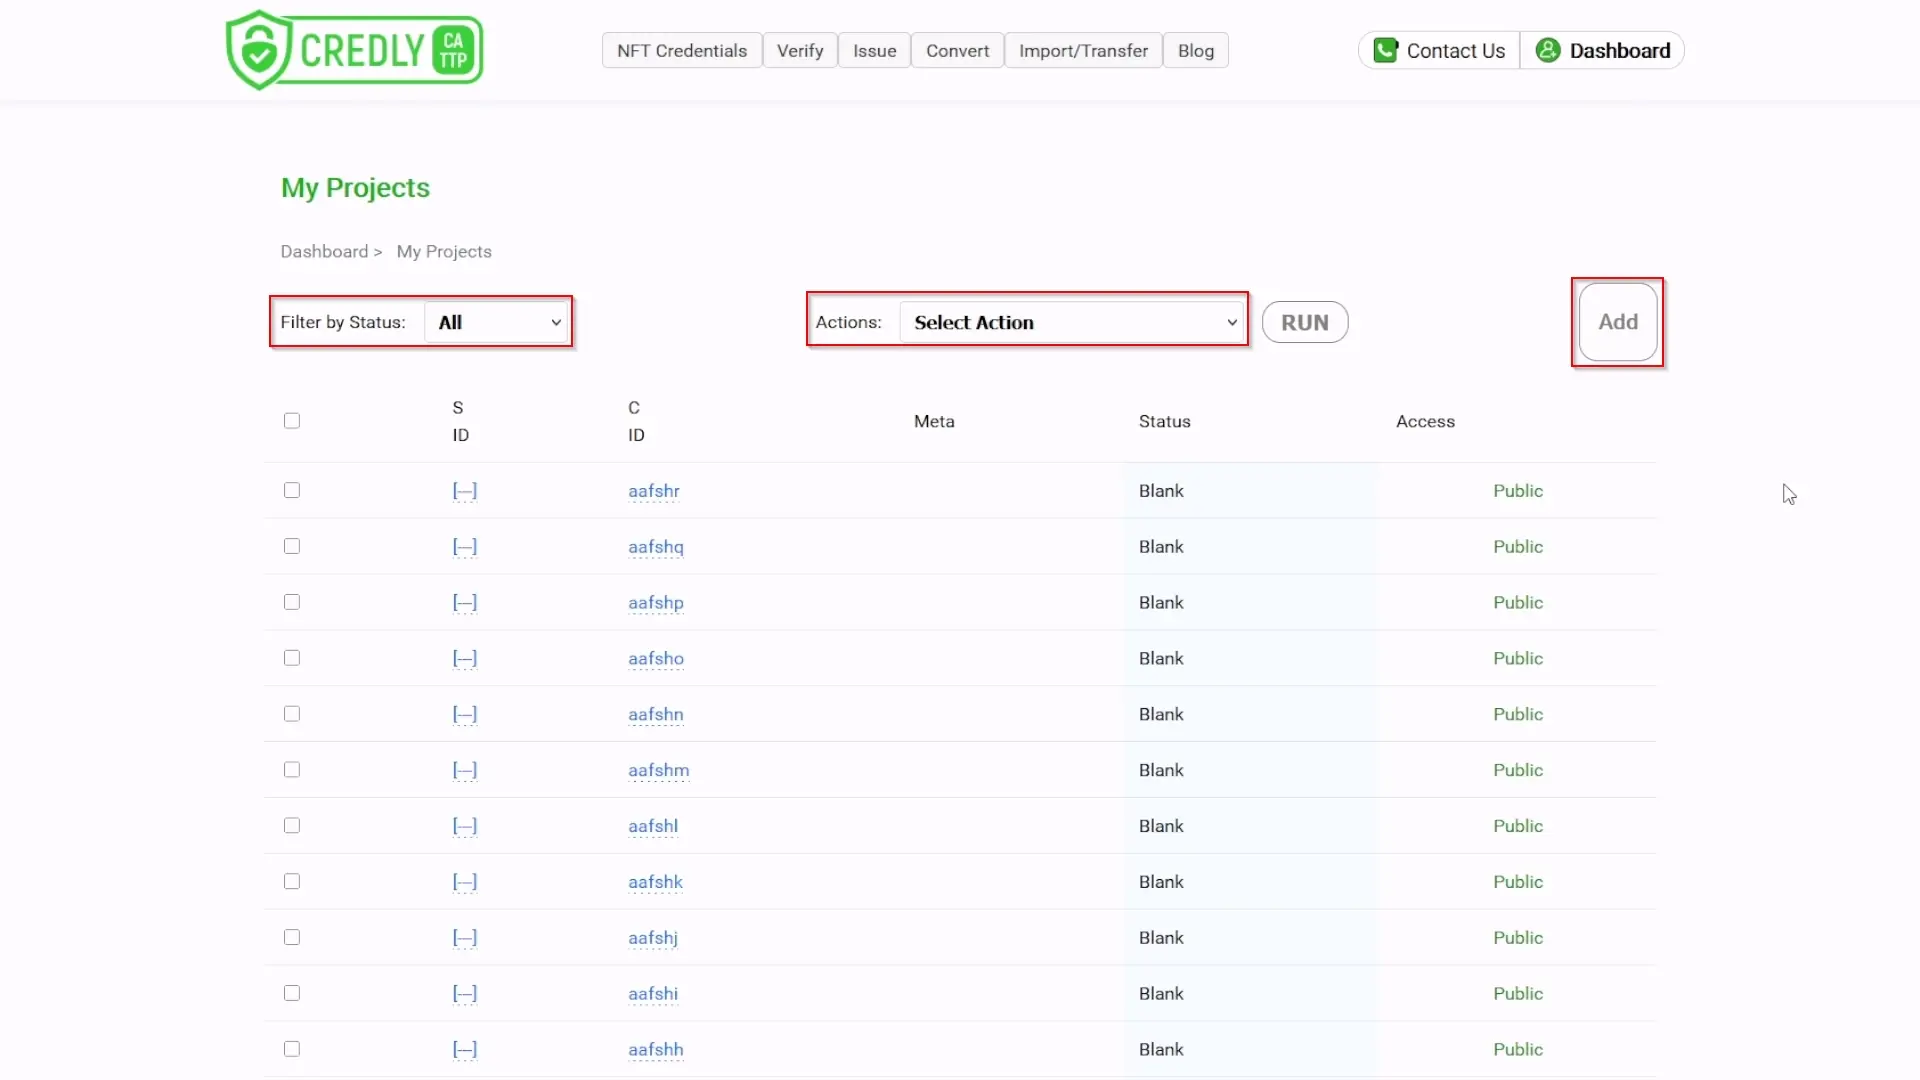
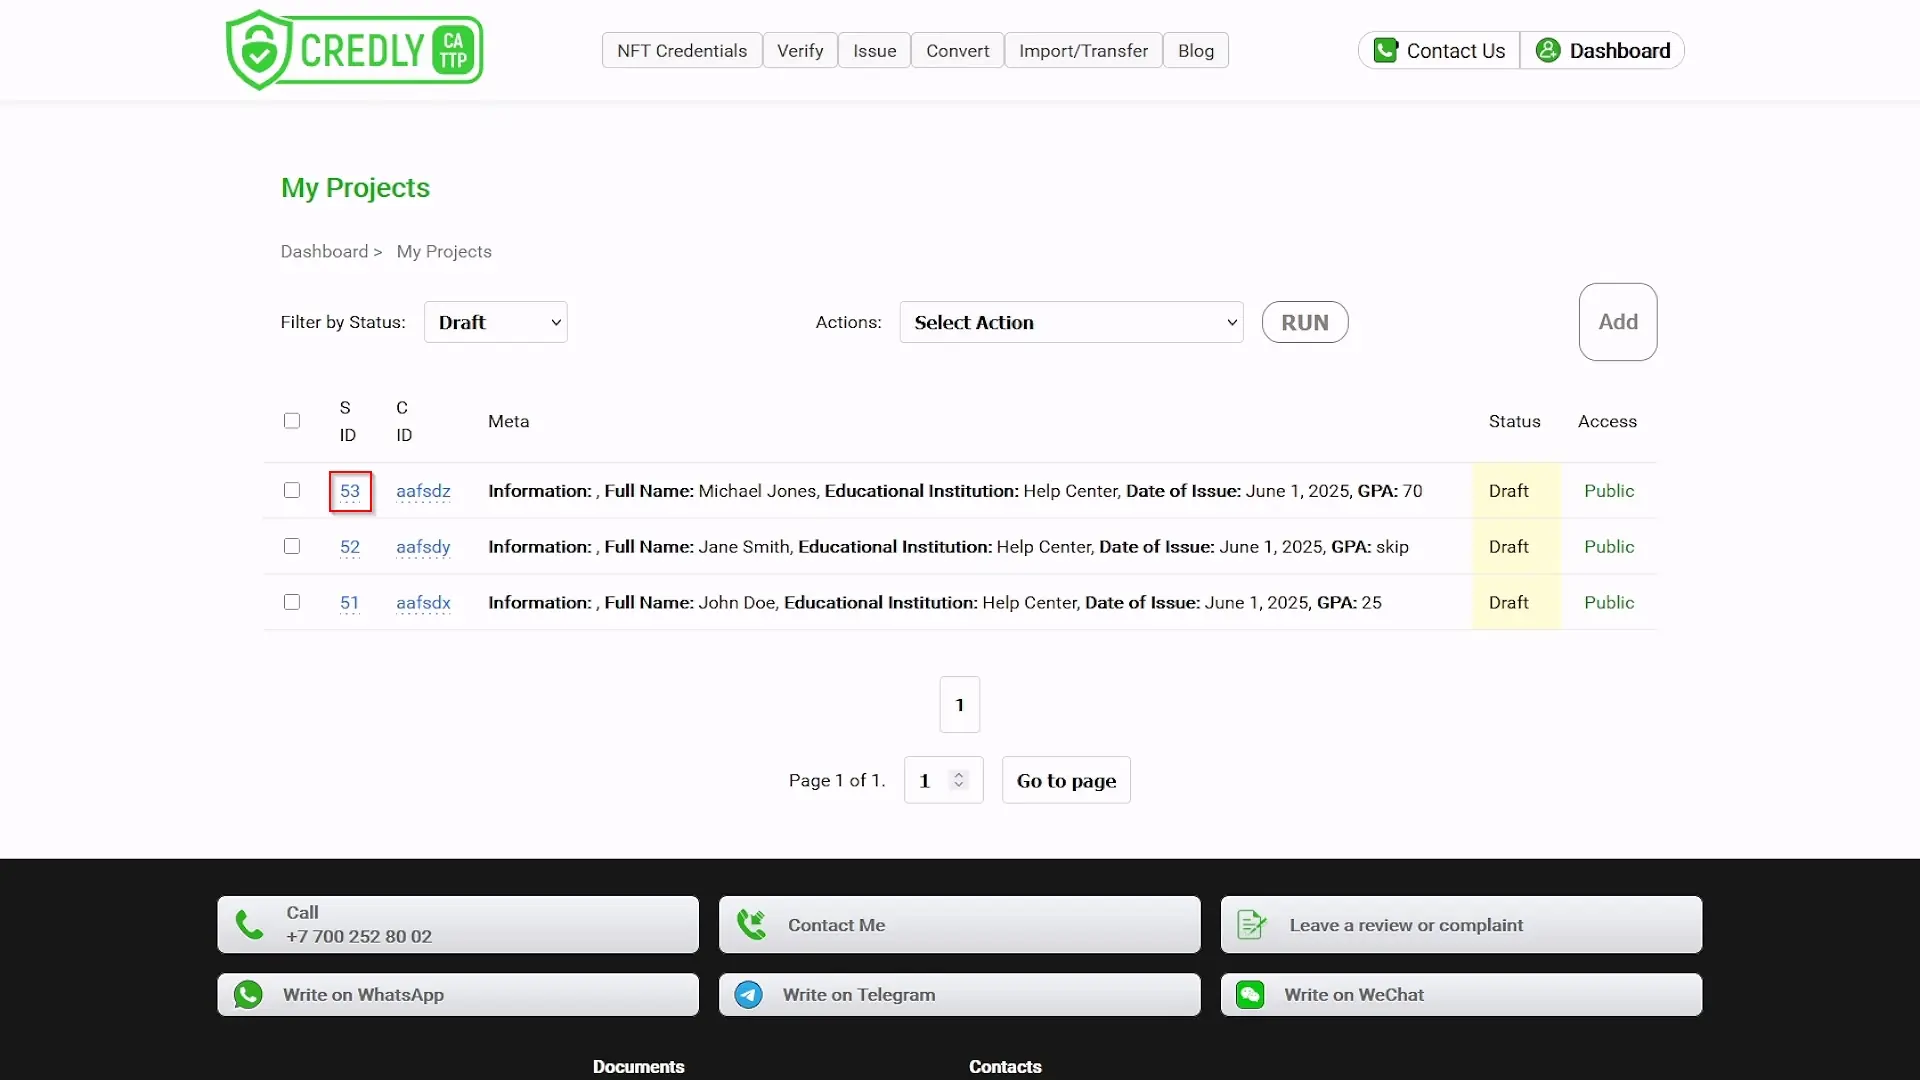
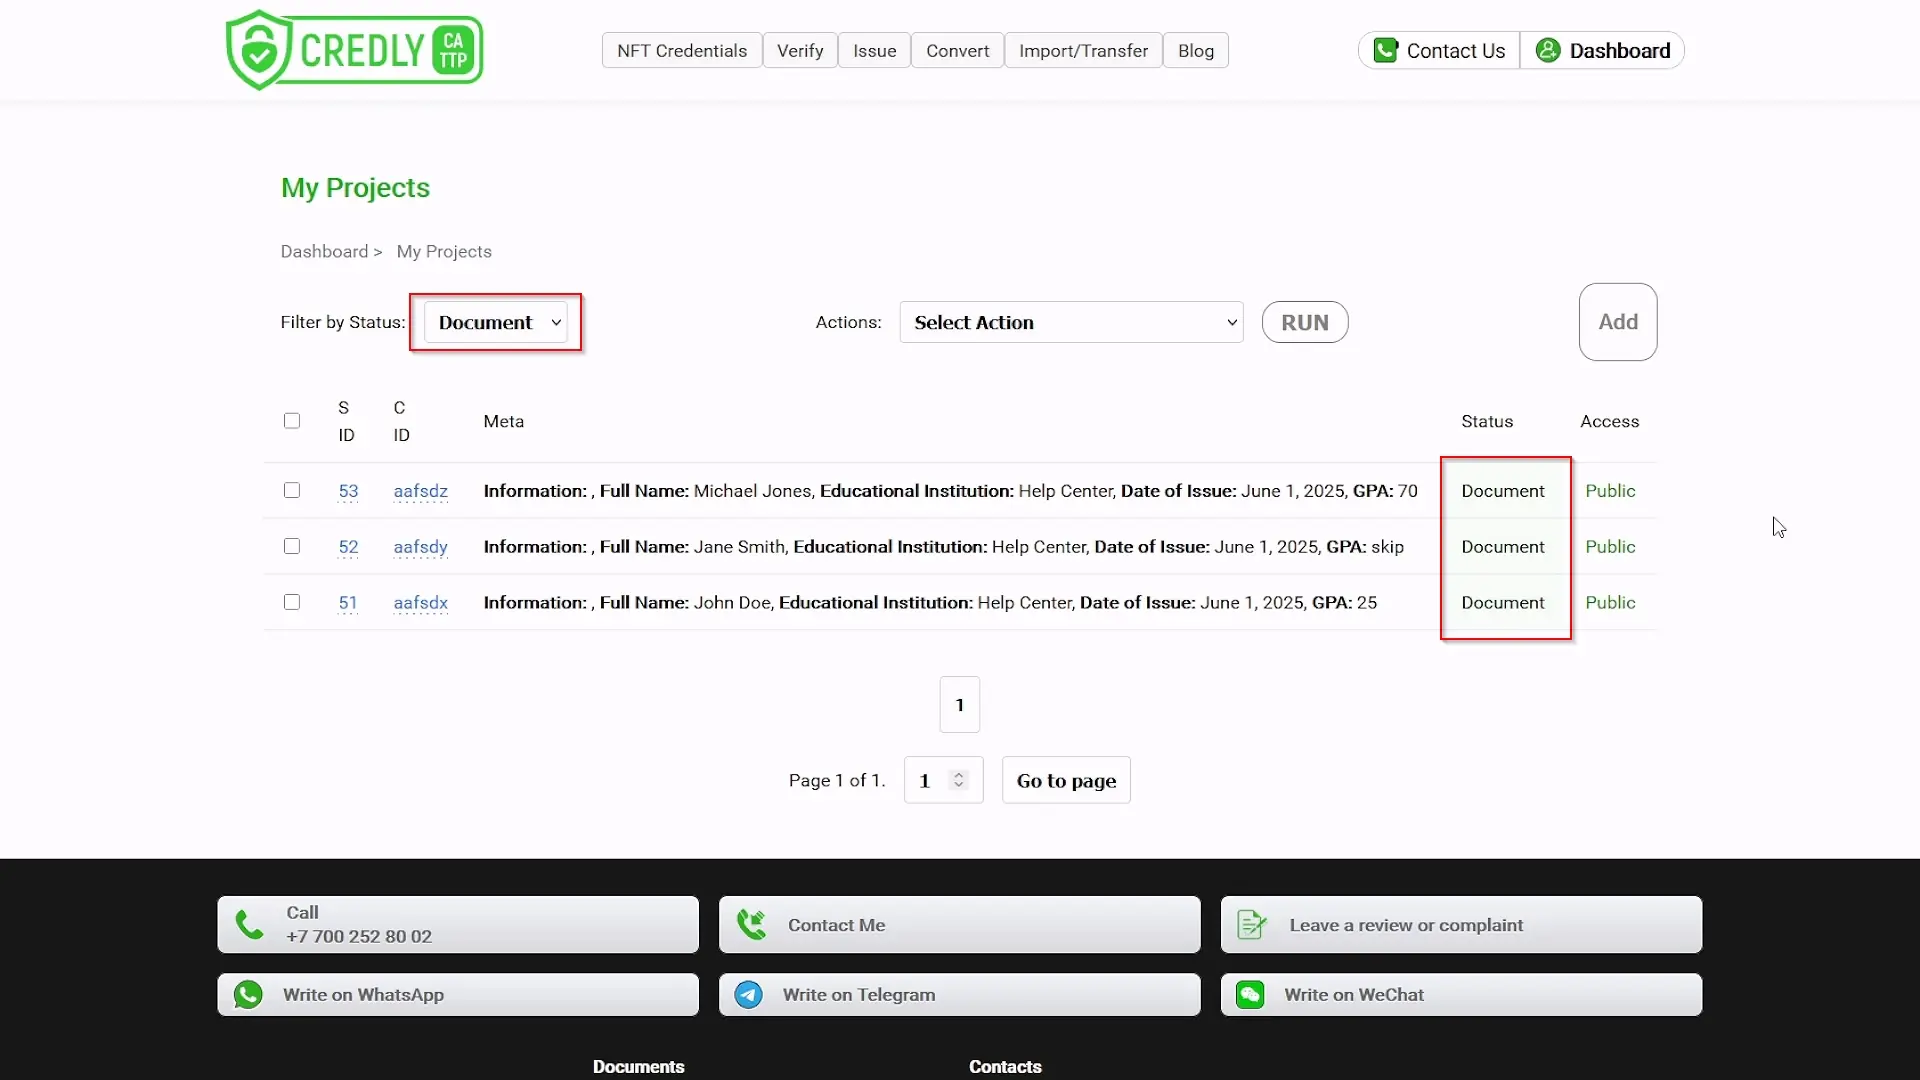
5.7. The "My Projects" Page:
- This page (titled "My Projects" with breadcrumbs like "Dashboard / My Projects") displays a comprehensive list of all your projects.
- You can "Filter by Status:" and use the "Actions:" dropdown for bulk operations. The "Add" button here also allows for manual project creation.
-
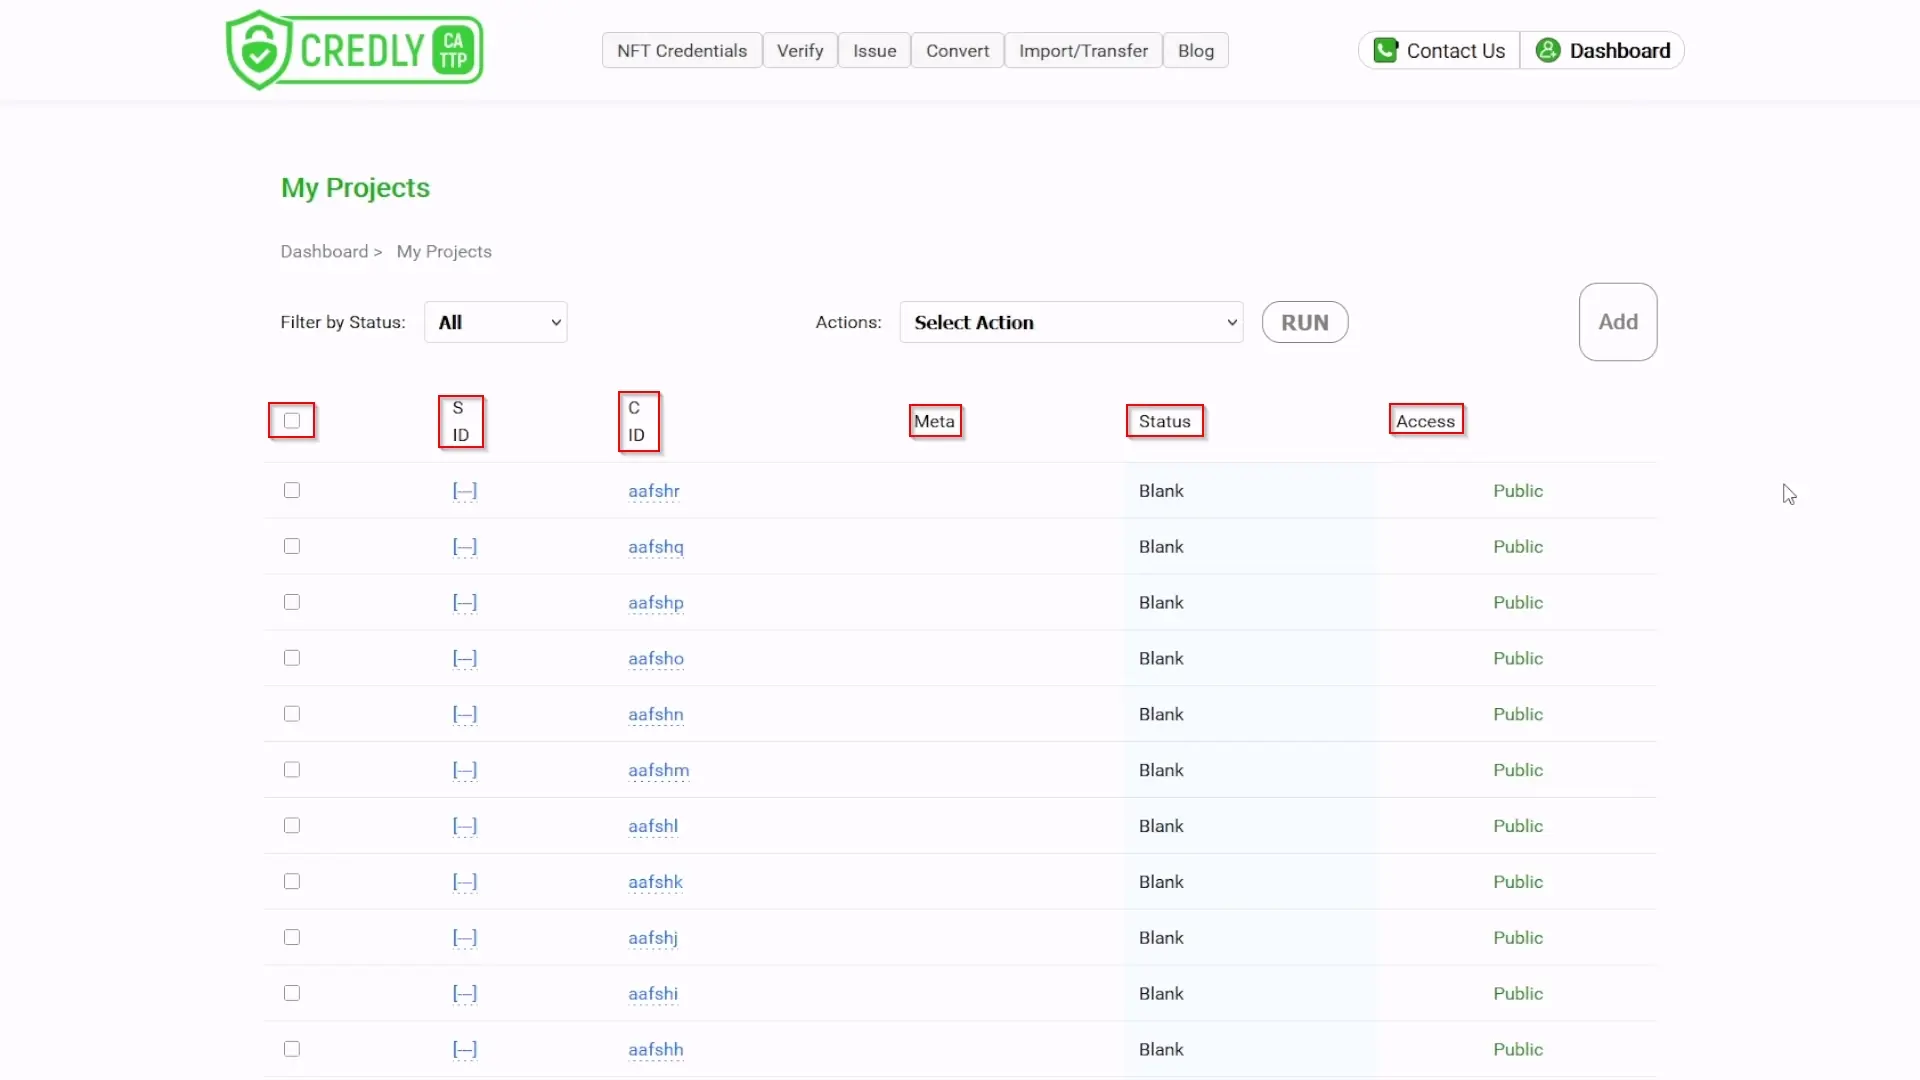
5.8. Understanding the Projects Table (on "My Projects" page):
- Checkbox Column (First): Used for selecting projects for bulk actions.
- S ID (Service ID): A custom identifier you can assign for your internal reference, especially useful during import. Click this to edit the project.
- C ID (Credly ID): The unique identifier for your project on the Credly.study platform. Click this to view how the project/credential looks live.
- Meta (Metadata): The textual data of the document.
- Status: The current status of the project (e.g., Blank, Draft, Signed, Document).
- Access: The visibility/access level of the document (e.g., Public, By Link).
- The table will be paginated if you have many projects (e.g., "Page 1 of 1.").
-
5.9. Quick Edit: To quickly edit a project, click on its value in the "S ID" column.
-
5.10. Quick View: To see how a project or issued credential will look on the website, click on its value in the "C ID" column.
Step 6: Prepare for Bulk Import - Download Template
Goal: Download the spreadsheet template for efficient and intuitive bulk project creation.
Procedure:
-
Navigate to Dashboard: Go to your "Dashboard".
-
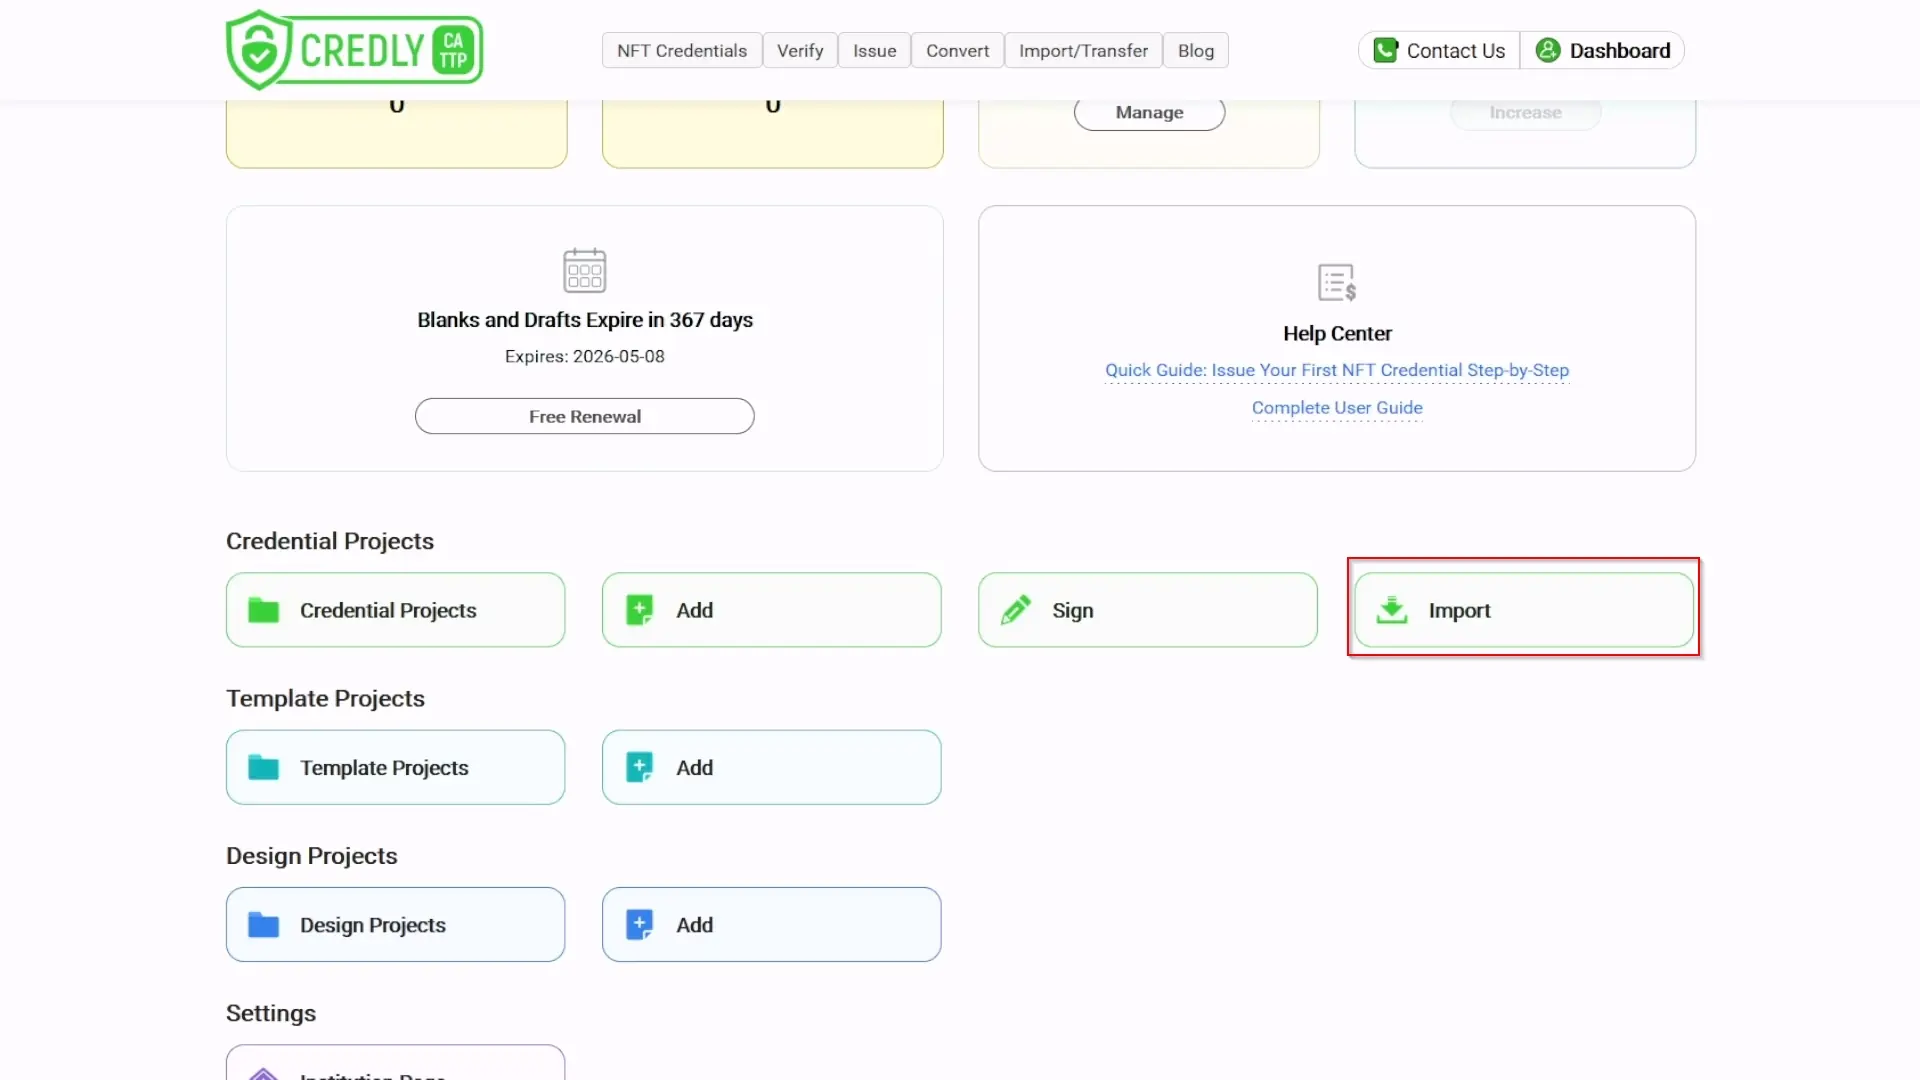
Access Import Function: Click the "Import" button (found in the "Credential Projects" section of your Dashboard). This takes you to the "Import projects" page.
-
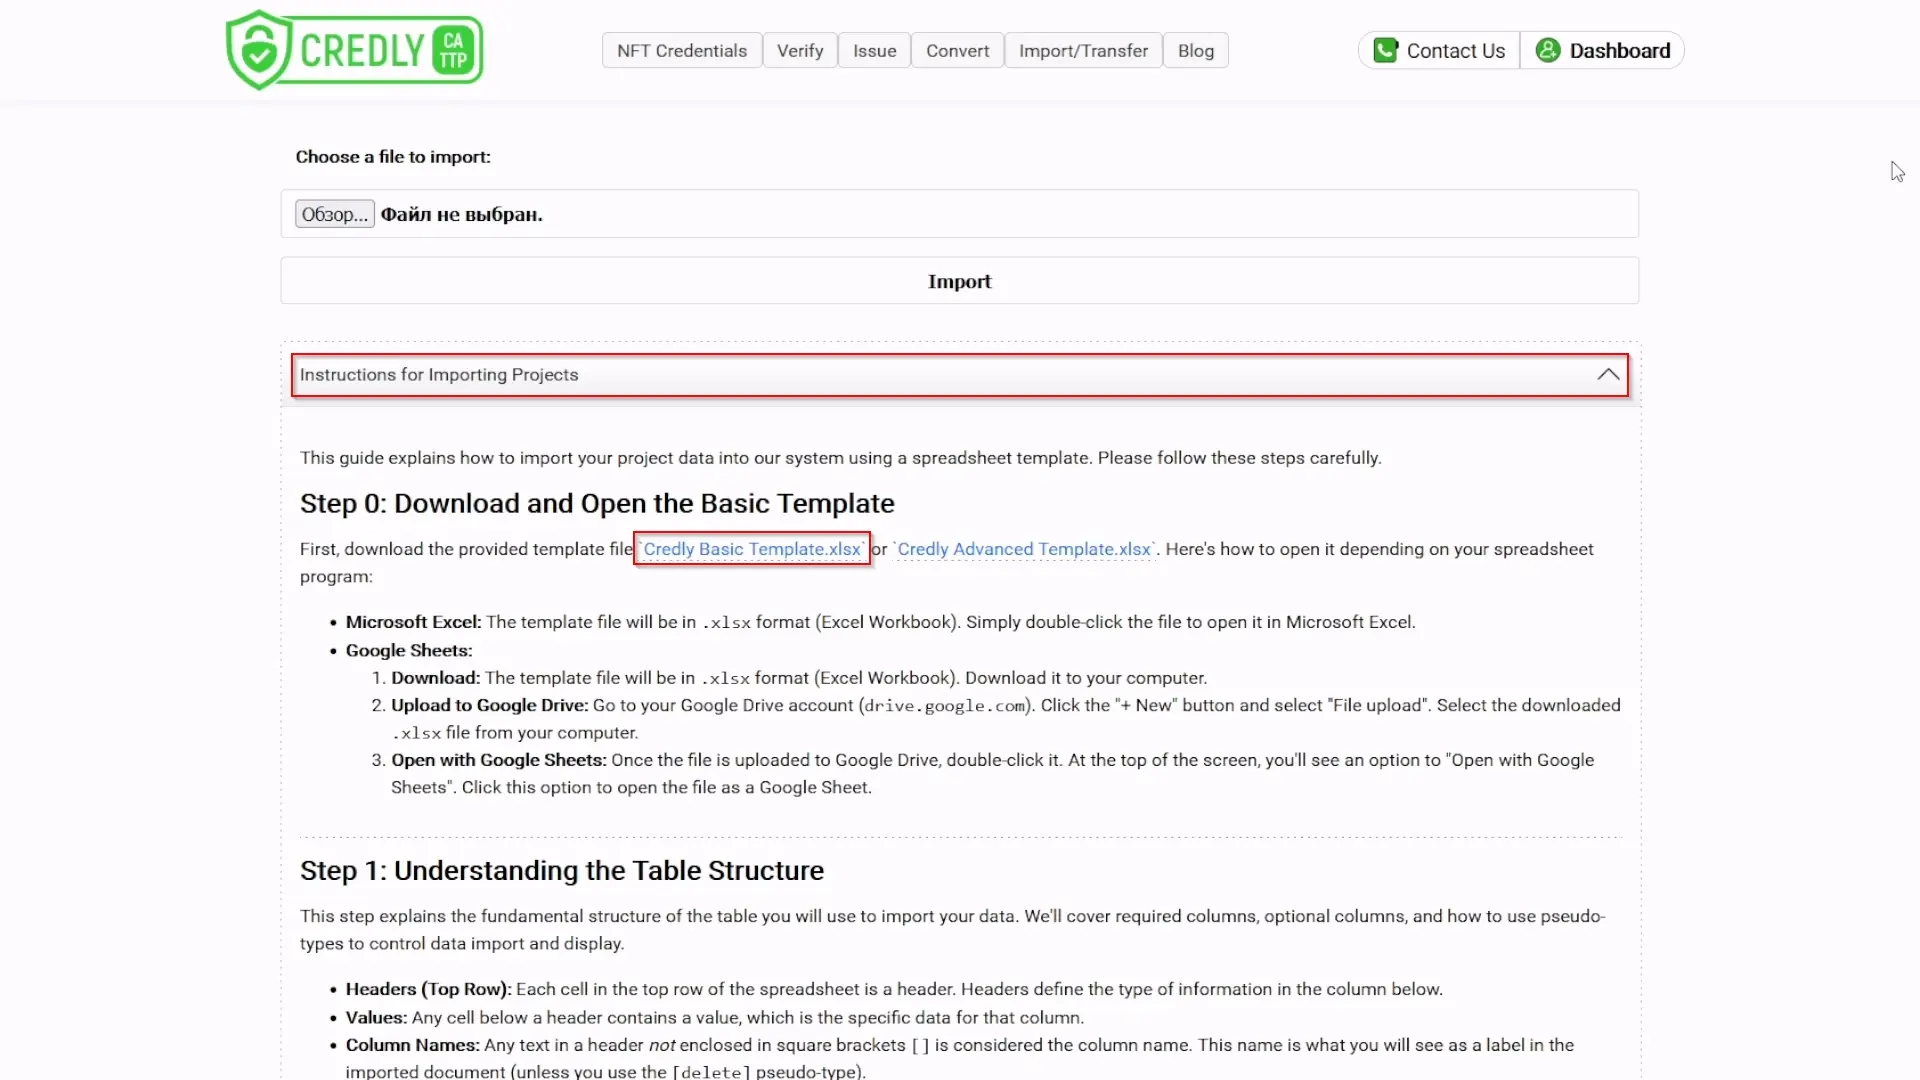
View Instructions: On the import page, expand the accordion or section titled "Instructions for Importing Projects". This section contains detailed guidance (Steps 0-16 in the full instructions) on template structure, pseudo-types, required columns, and exporting. It is highly recommended to read these on-page instructions carefully before your first import.
-
Download Template: In "Step 0: Download and Open the Basic Template" (within the instructions), click to download the
Credly Basic Template.xlsxfile. (AnAdvanced Templatemay also be available). Open it using Microsoft Excel or Google Sheets as per the detailed on-page instructions for opening with either program.

Step 7: Fill in the Import Template
Goal: Populate the downloaded template with your credential data, following the structure outlined in the on-page "Instructions for Importing Projects".
Procedure:
-
Understanding Template Columns (Key Points from Full On-Page Instructions):
- The first row of the spreadsheet contains headers. Text not enclosed in square brackets
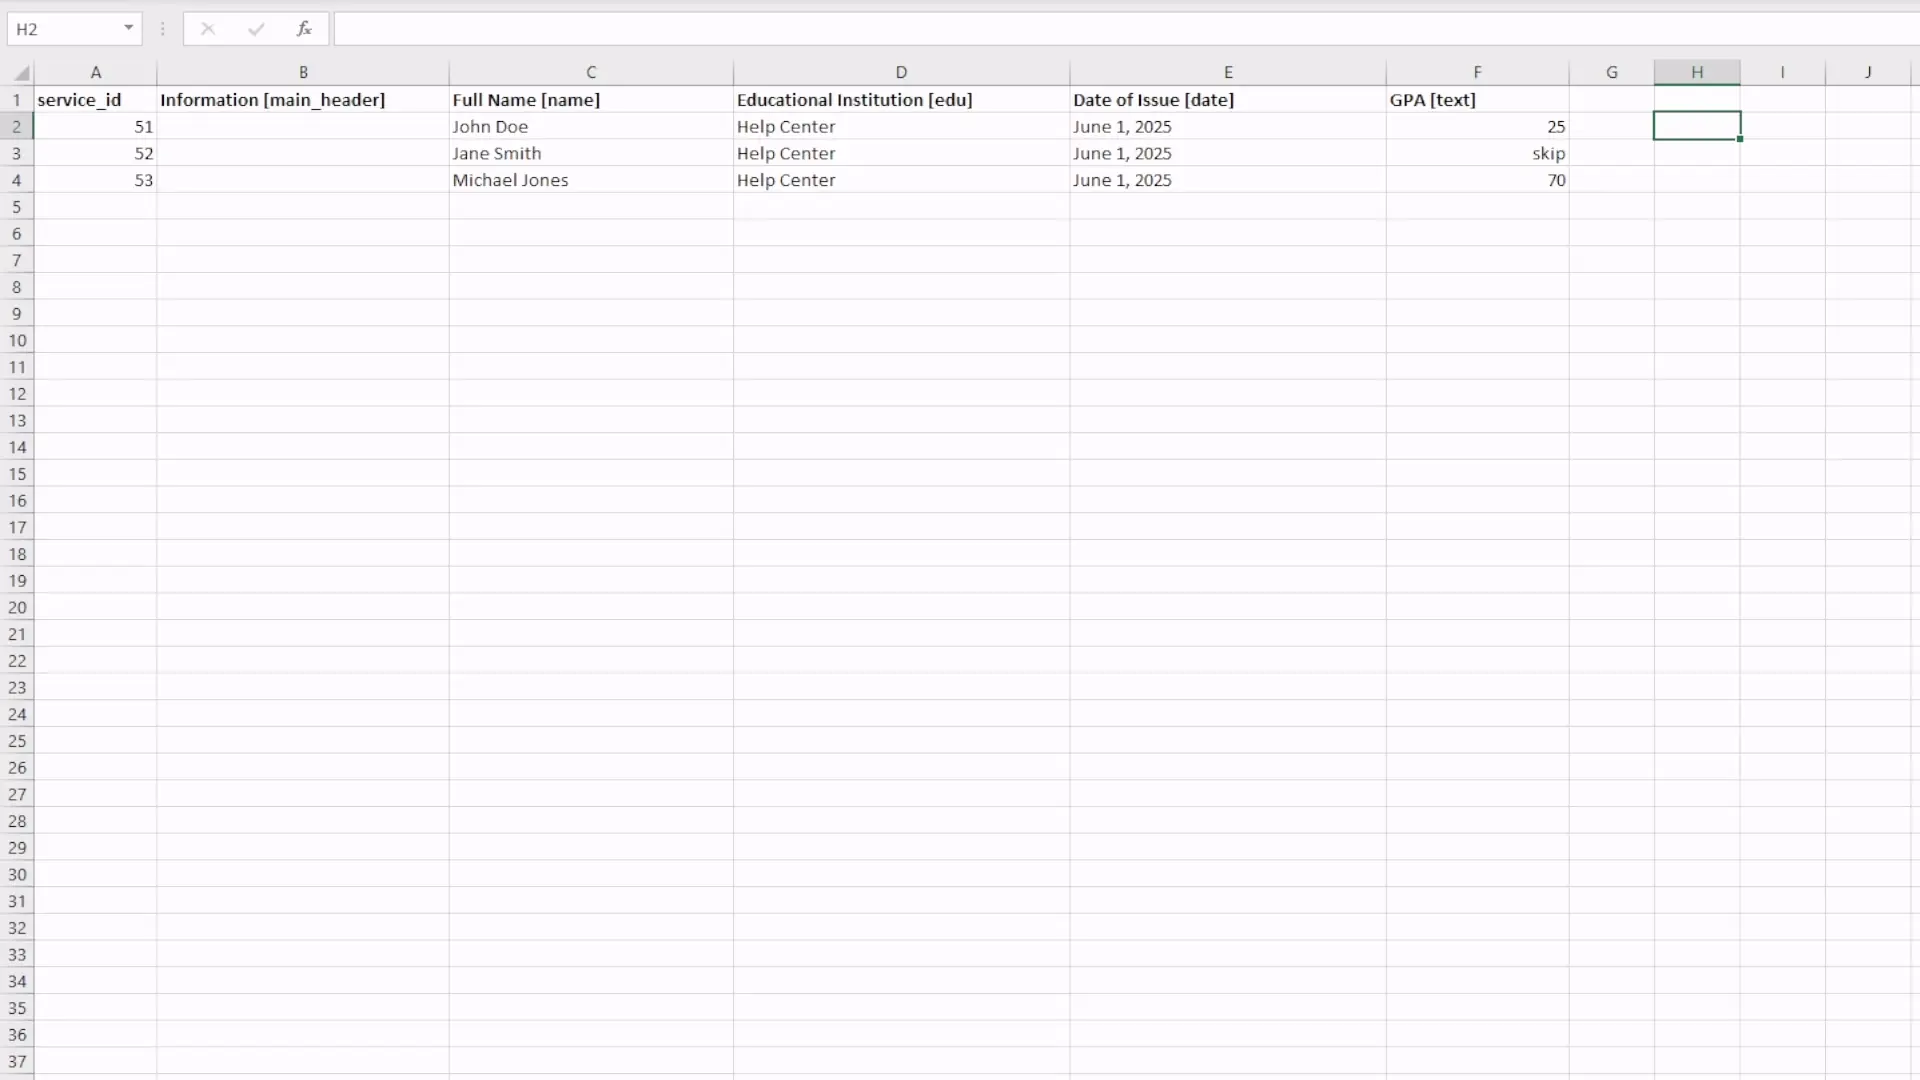
[]is the column name displayed on the credential; text within square brackets is the pseudo-type dictating how data is processed (e.g.,Student Name [name]). - Every column requires a pseudo-type, either explicitly stated or implied (defaulting to
[text]). - Required Columns (must contain valid data; placeholders like "-" are not allowed):
service_id: This must be the first column. It's a unique identifier for each record (e.g., student ID). Use only letters, numbers, and hyphens. It is not a pseudo-type (no brackets).[main_header]: Defines the main heading for the document's data section (e.g.,Document Information [main_header]). The cells below this header in this column must be empty.[name]: For the recipient's full name (e.g.,Full Name [name]).[edu]: For the name of your educational institution (e.g.,Educational Institution [edu]).[date]: For a relevant date, like the issue date (e.g.,Date of Issue [date]).
- Optional Columns (can use "-" as a placeholder if data is missing/not applicable):
[header]: Creates sub-headings within the document (cells below this header in this column must be empty).[text]: The default type for displaying data as label-value pairs.[delete]: Marks a column to be completely ignored during import (useful for internal notes in your spreadsheet).[hash]: For storing unique identifiers in a non-human-readable SHA256 hashed format (not for secure hashing of sensitive data like passwords).
- Data Consistency: All cells in required columns must have data. For optional columns, cells must either have data or a "-" placeholder. All rows must have the same number of cells (columns).
- For a comprehensive understanding, please refer to Step 1: Understanding the Table Structure, Step 2: Available Pseudo-types, Step 8: Required Columns, and Step 9: Required Cell Values and Consistency in the on-page "Instructions for Importing Projects".
- The first row of the spreadsheet contains headers. Text not enclosed in square brackets
-
Populate
service_id: In the first column, assign a uniqueservice_idto each record. -
Populate Required Columns: Fill in the headers for
[main_header],[name],[edu], and[date]columns, and then the corresponding data for each record. Remember cells under[main_header]must be empty. -
Add Optional Columns: Add any other necessary information using
[text],[header], etc., as needed. For example, to add a GPA: create a column headerGPA [text]and fill in the values.
-
Review and Save: Carefully review all data in your spreadsheet. Ensure it's accurate, required fields are filled, and formatting (like empty cells for headers) is correct. Save your spreadsheet file (e.g., as
.xlsx). (This corresponds to Step 10 in the full on-page instructions).
Step 8: Export Template to .txt or .tsv Format
Goal: Convert your spreadsheet into a plain text format suitable for import, protecting it from accidental changes by spreadsheet editors.
Procedure:
-
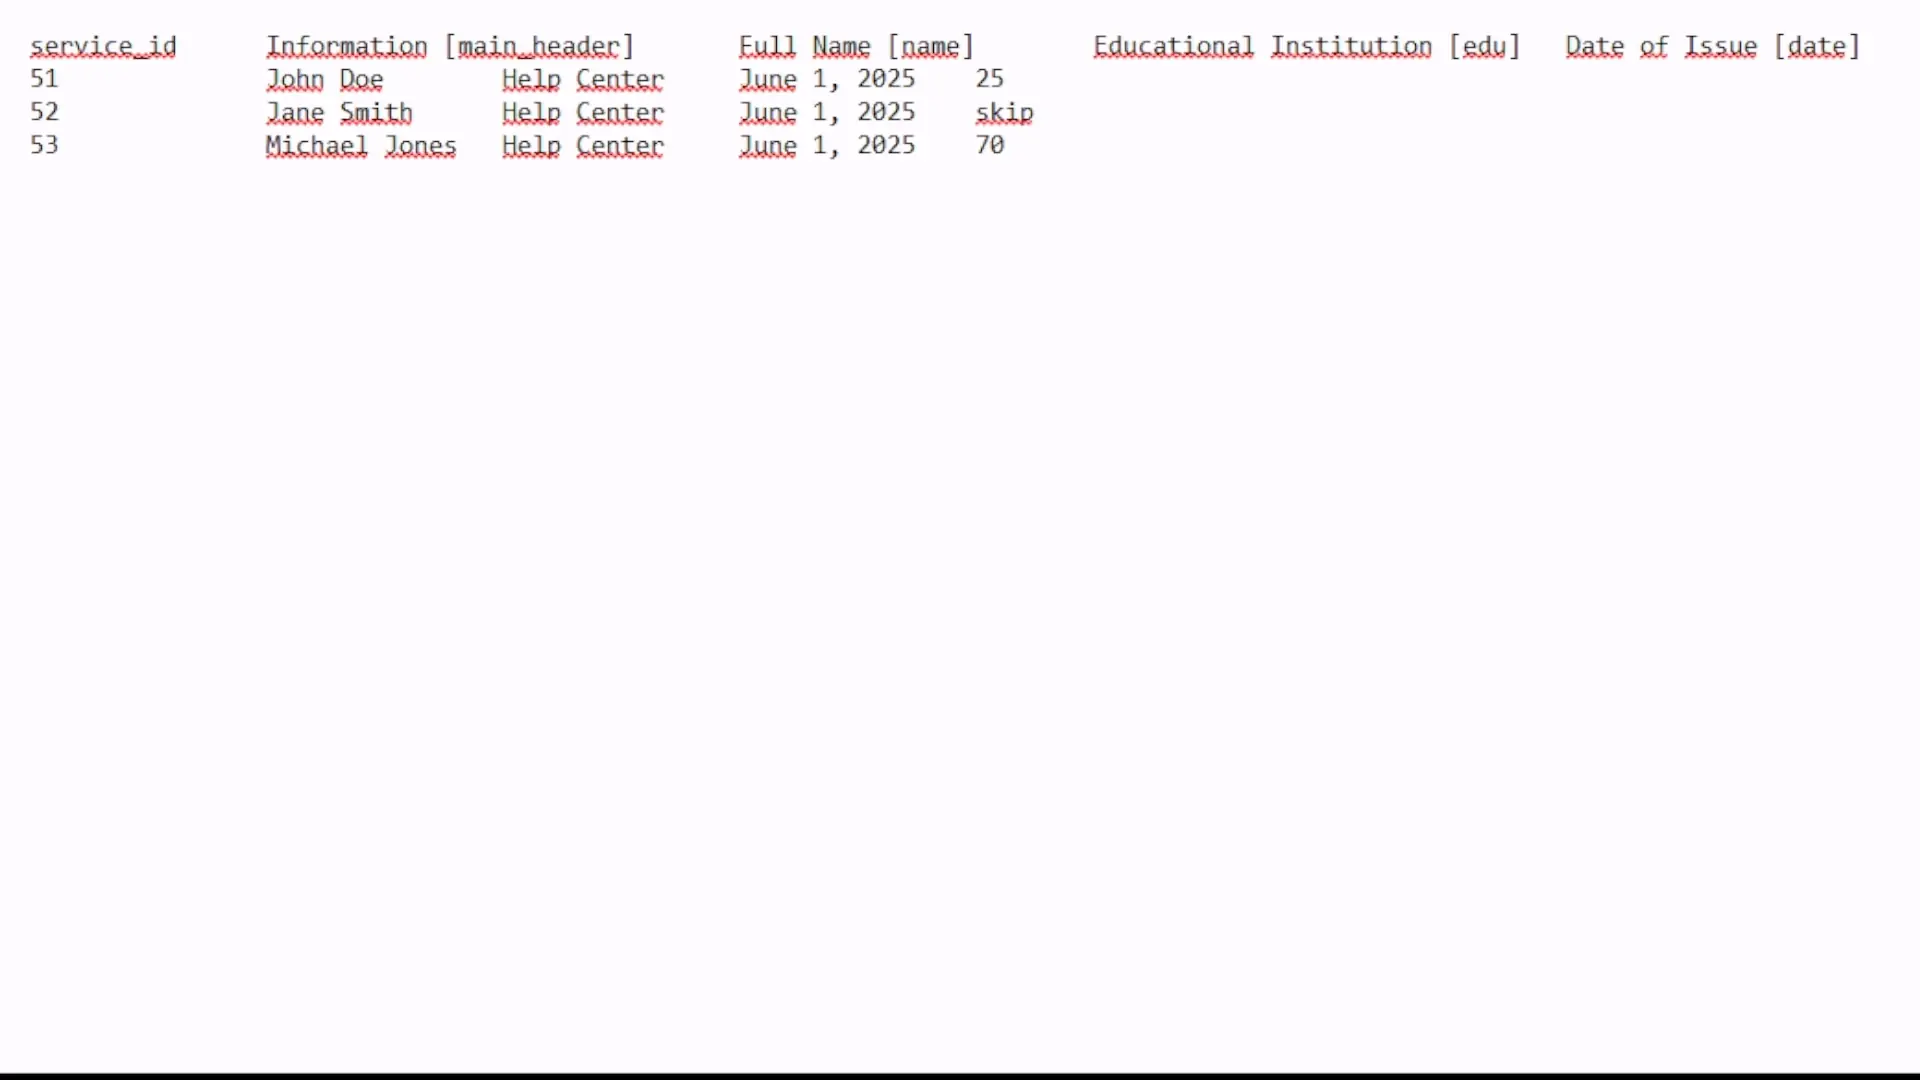
Follow On-Page Export Instructions (Step 11: Exporting the Table):
- Microsoft Excel: Typically,
File -> Export -> Change File Type -> Text (Tab delimited) (*.txt). The instructions also mention "Unicode Text," which is a good option. - Google Sheets:
File -> Download -> Tab-separated values (.tsv, current sheet). - For other spreadsheet programs, aim for UTF-8 or UTF-16 encoding, Tab characters (
\t) as delimiters, and a.txtor.tsvfile extension.
- Microsoft Excel: Typically,
-
Close Excel File (Important for Excel users - Step 12): If you used Excel, close the
.xlsxfile after exporting to the text format. This helps prevent potential inconsistencies. -
Check File Size (Step 13): The exported file should not exceed 1MB. If it's larger, you'll need to split your data into multiple smaller files and import them separately.
-
Verify Exported File (Step 14): Open the exported
.txtor.tsvfile in a simple text editor (like Notepad on Windows or TextEdit on Mac). Check that the data is structured correctly (tab-separated, correct values) and appears as you intend it to. If you find errors, correct them in your original spreadsheet and re-export.
Step 9: Import Your Data File
Goal: Upload your prepared .txt or .tsv file to create Draft projects.
Procedure:
-
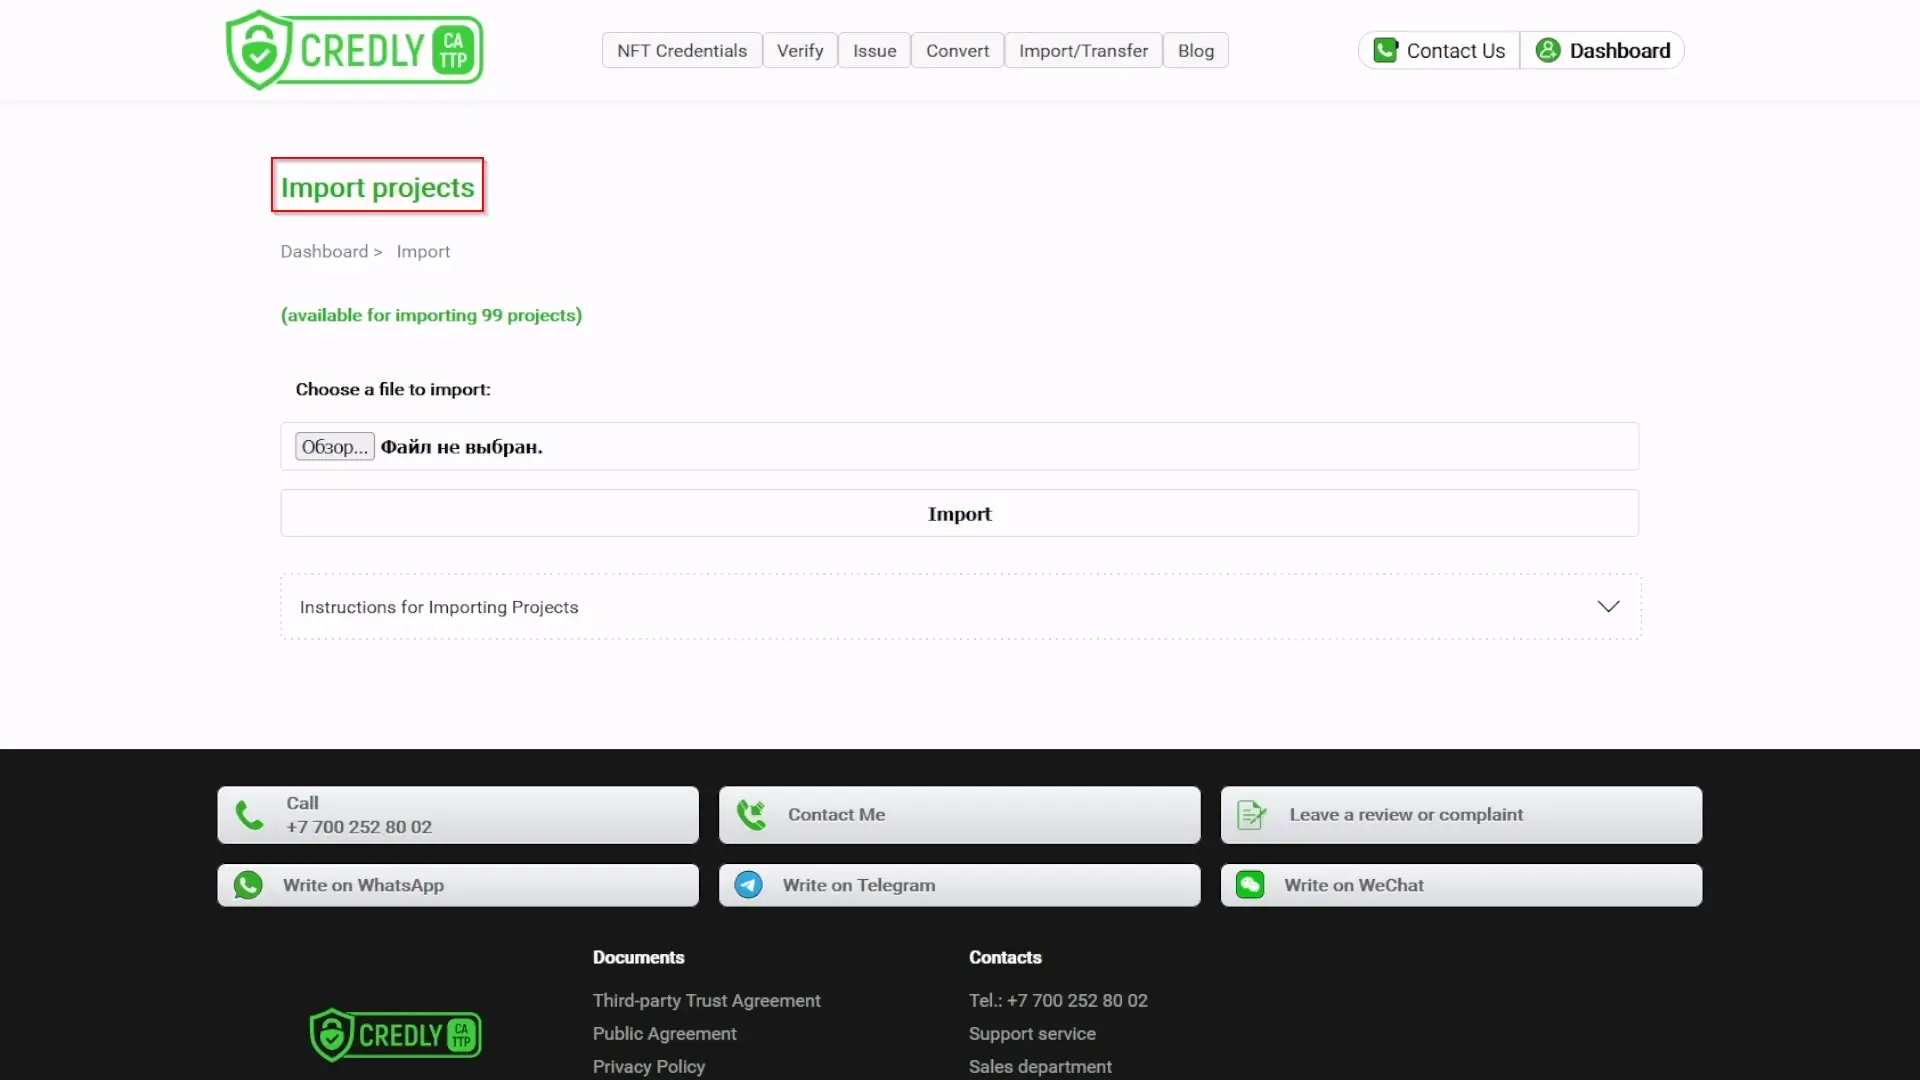
Return to Import Page: Navigate back to the "Import projects" page on Credly.study (Dashboard -> Import).
-
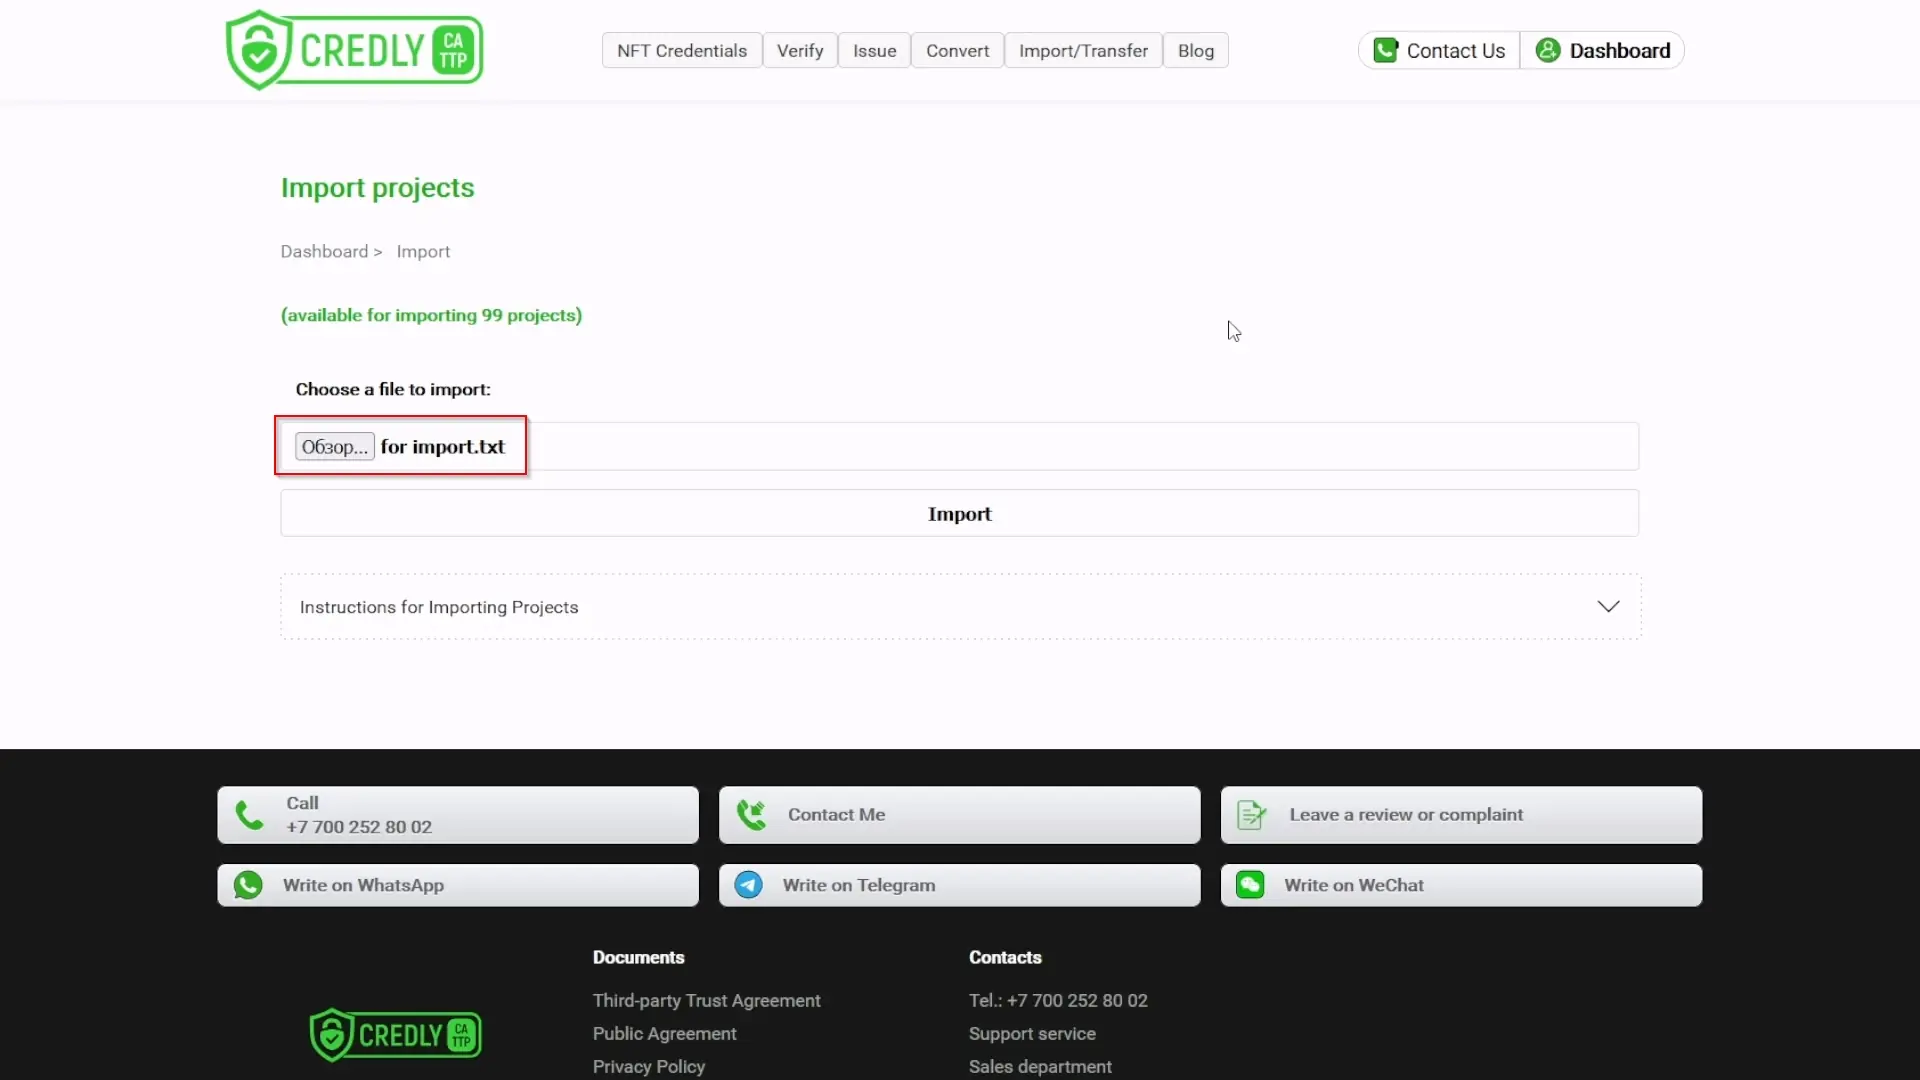
Select File (Step 15: Import):
- Under "Choose a file to import:", click the "Browse" (or "Choose File") button.
- Locate your exported
.txtor.tsvfile on your computer and select it.
-
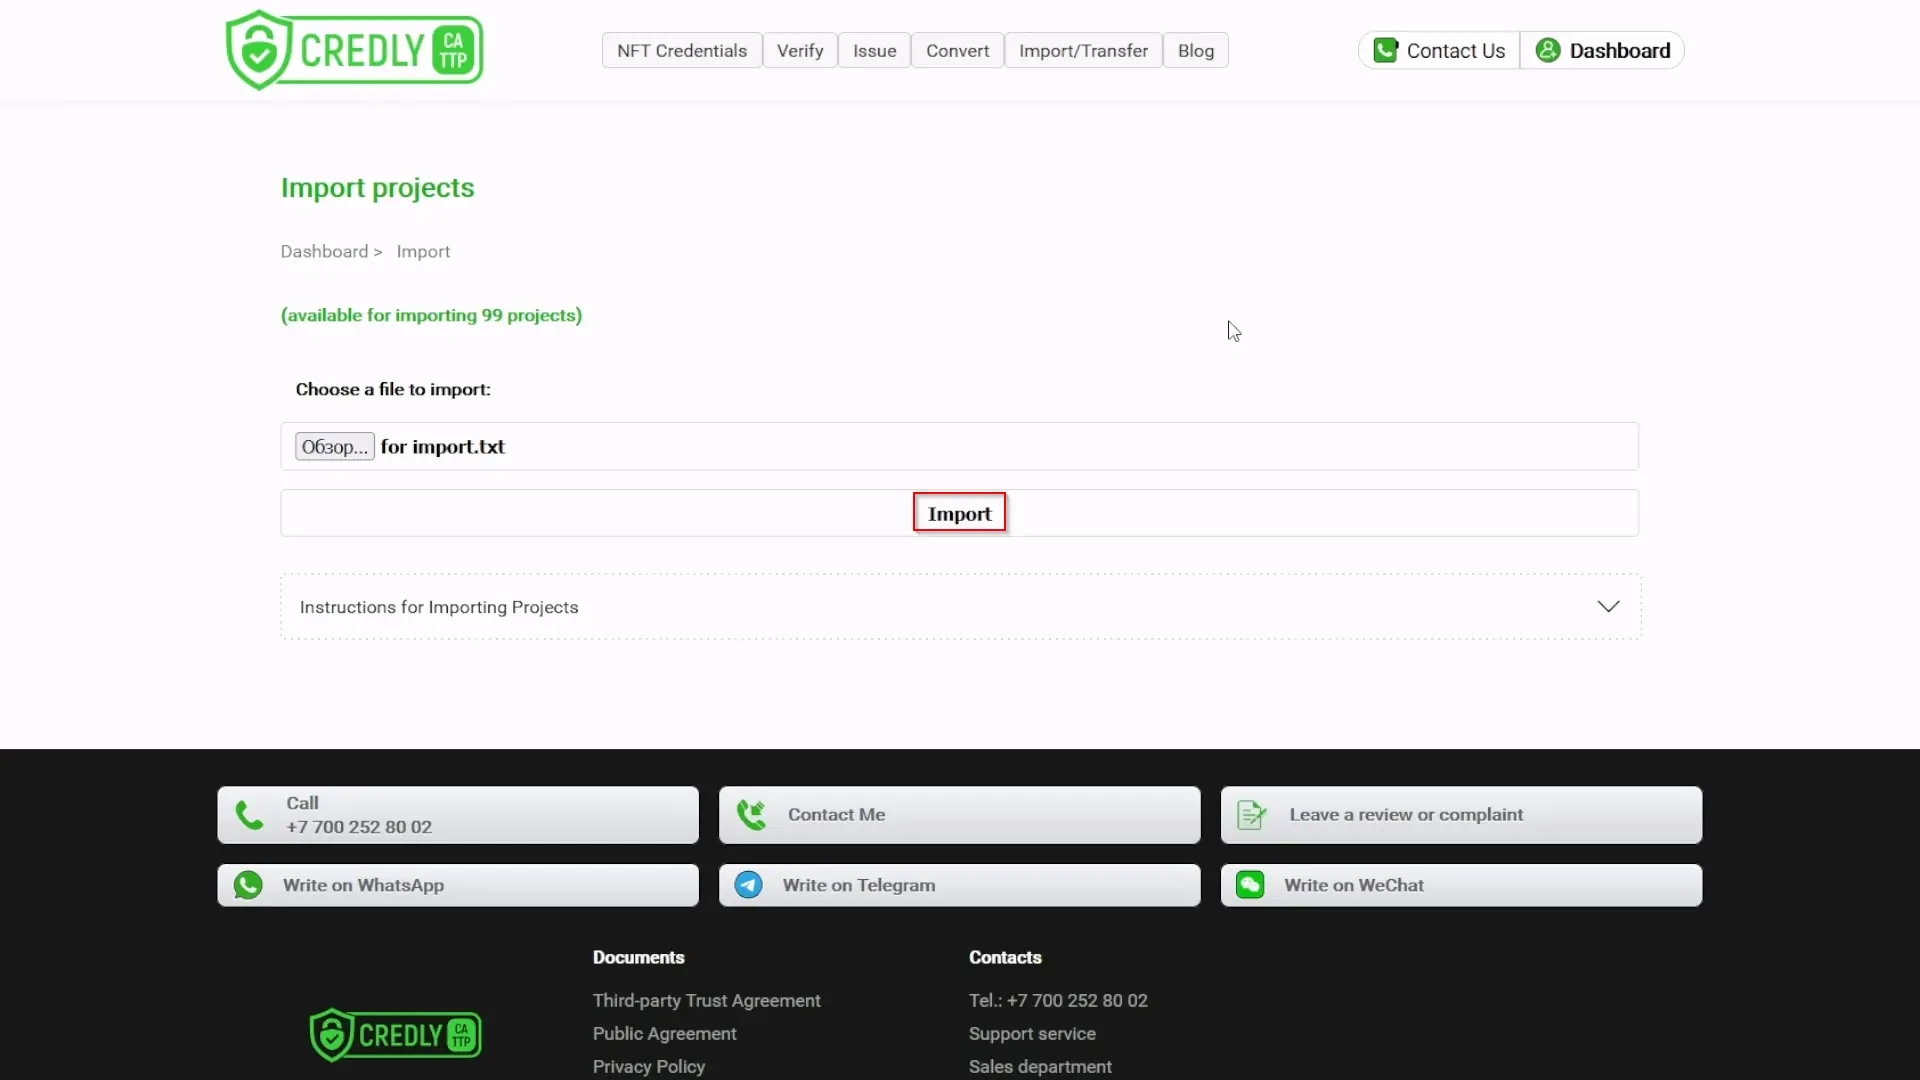
Initiate Import: Click the "Import" button.
-
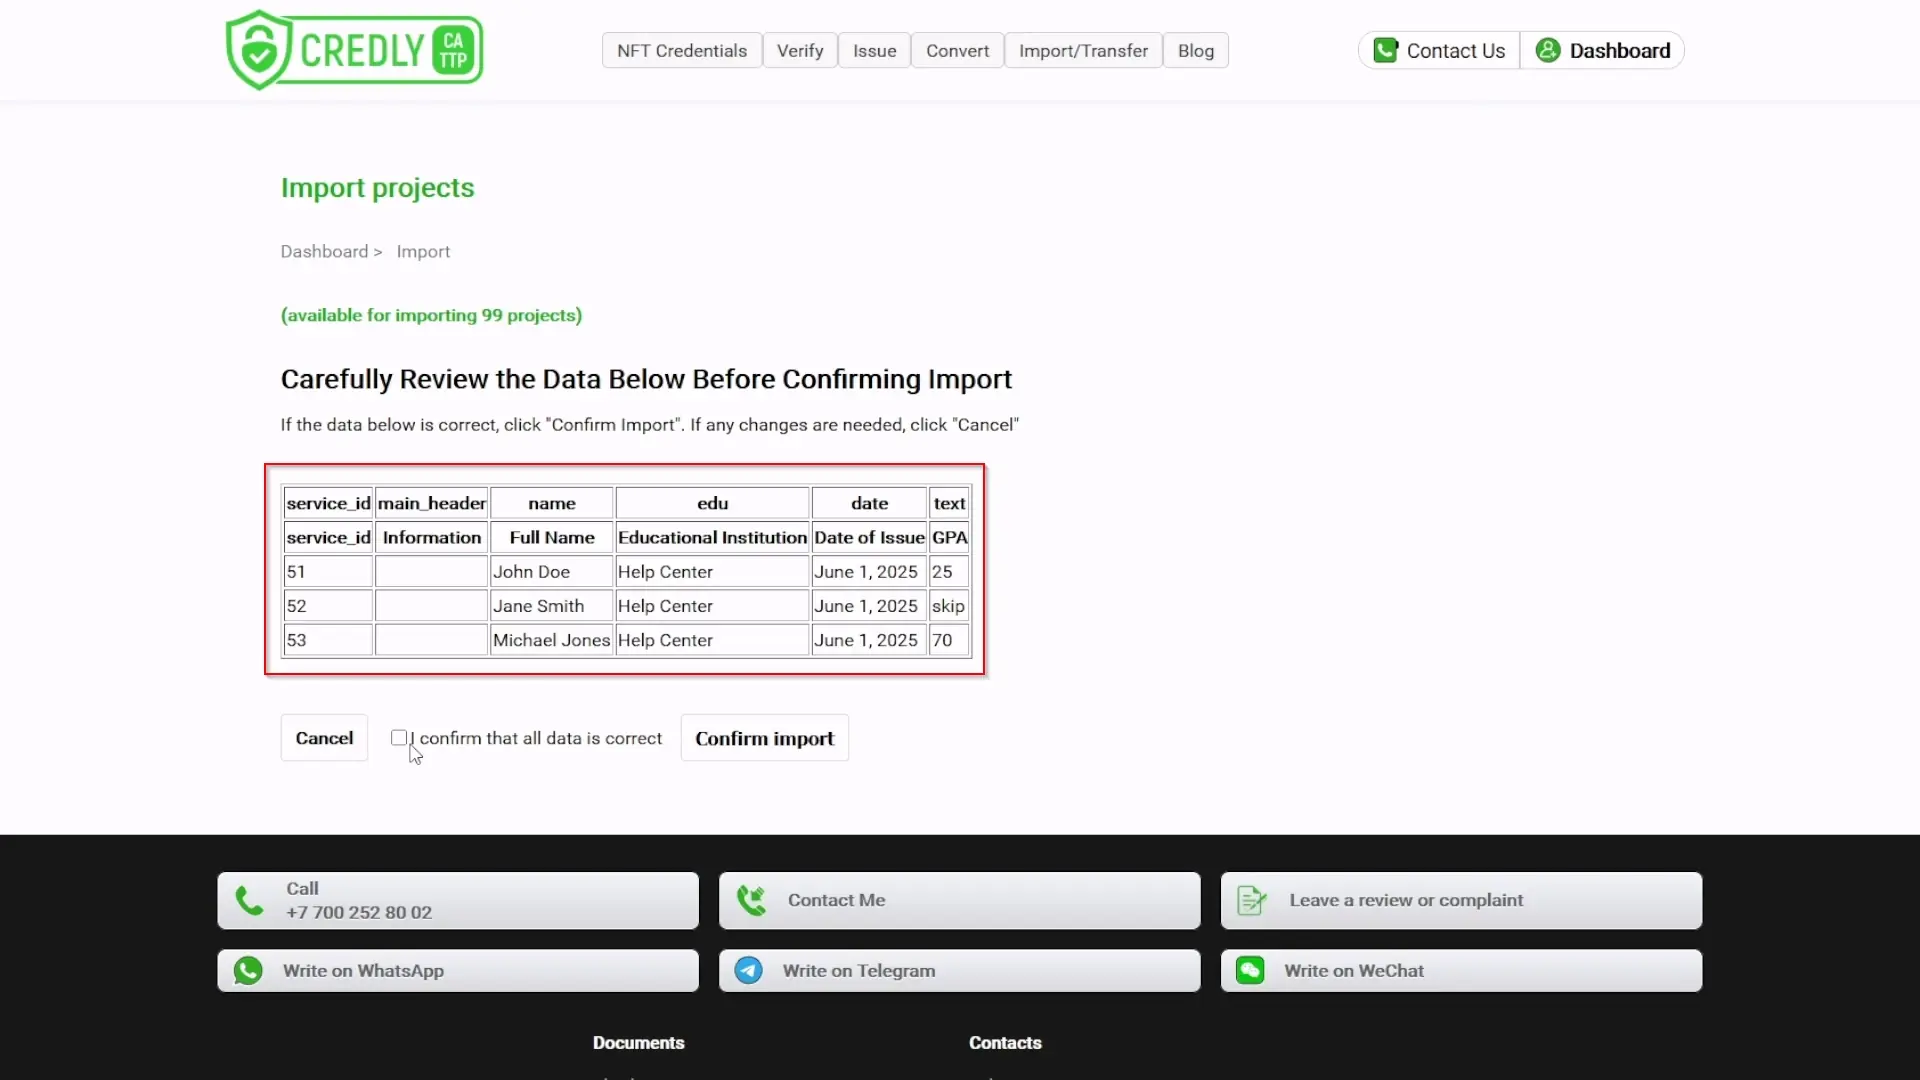
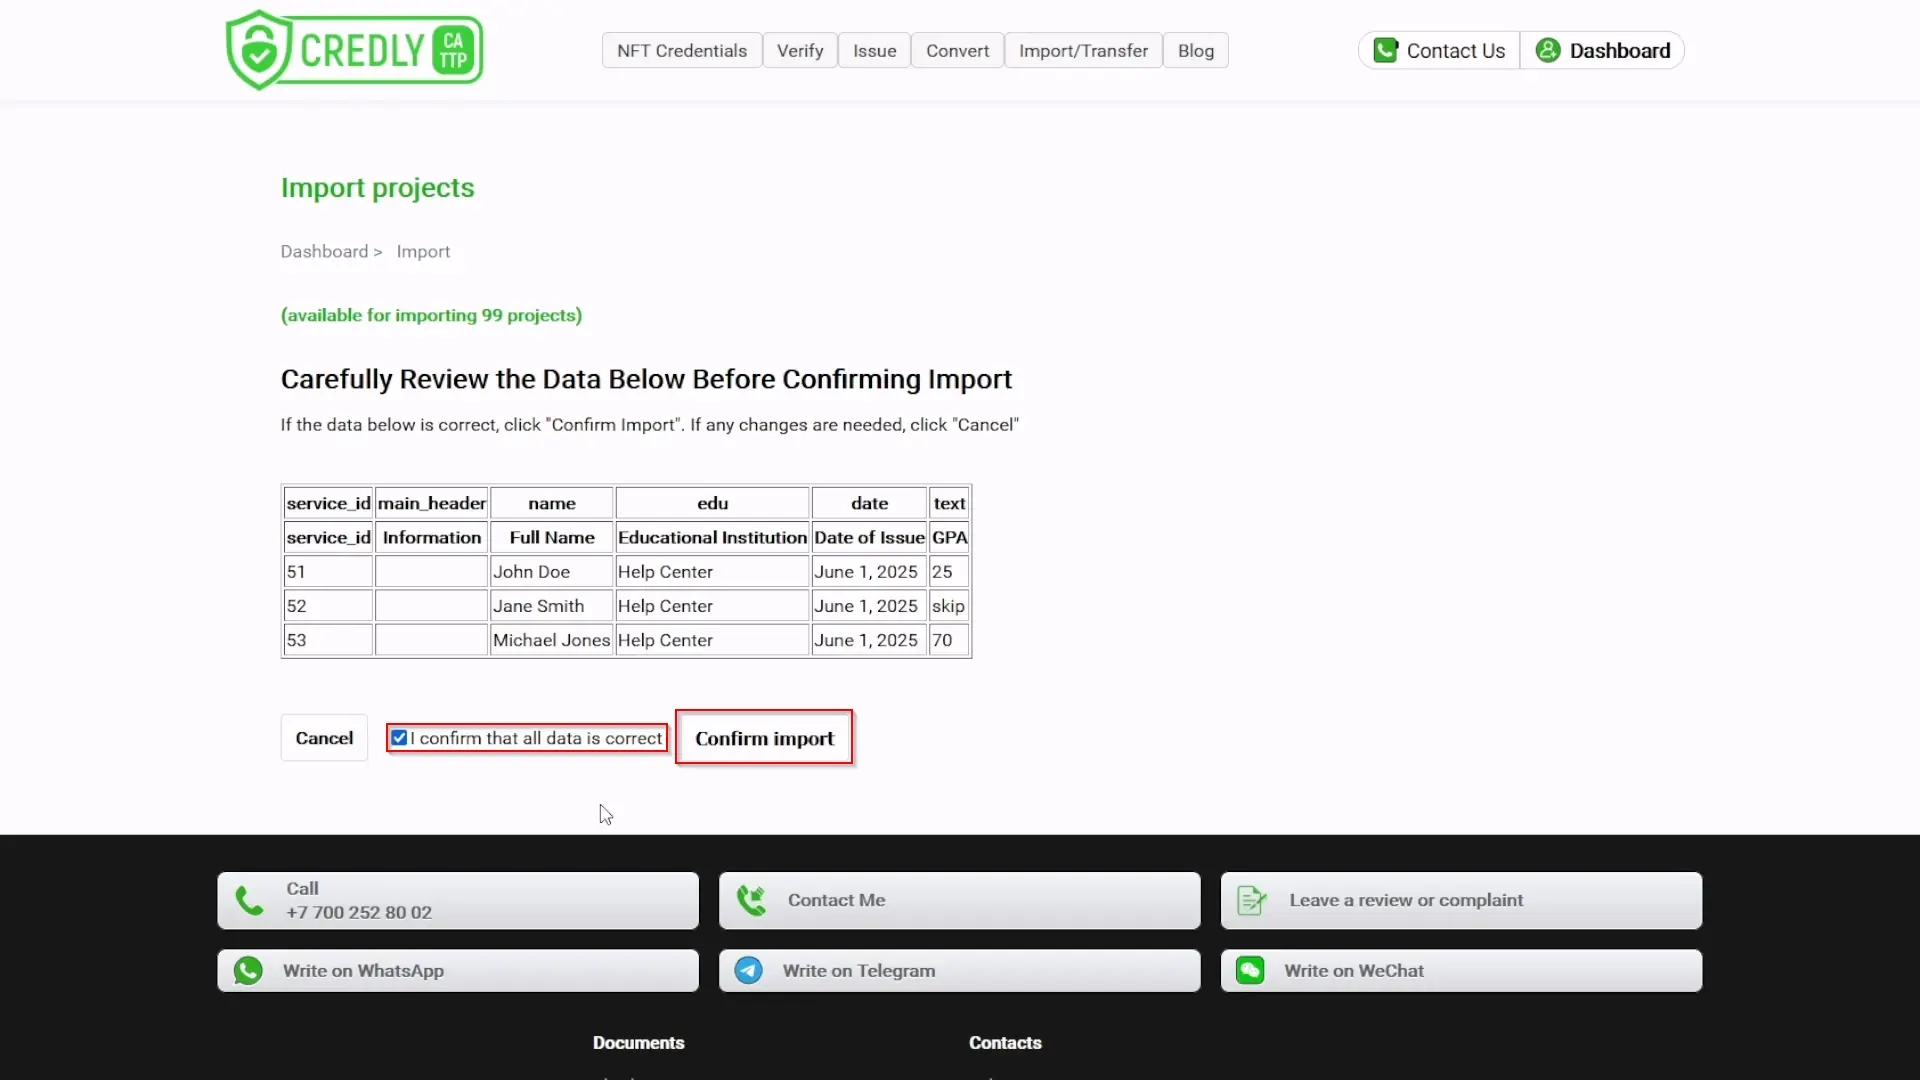
Review Import Preview (Step 16: Preview and Confirm): The system will display a preview of the data to be imported. Carefully review this to ensure it matches your expectations and that all columns and data appear correctly.
-
Confirm Import:
- If everything in the preview looks correct, tick the checkbox (usually stating something like "I confirm that all data is correct").
- Click the "Confirm Import" button.
- Wait for a success message indicating the import is complete.
- If there are any errors in the preview, click the "Cancel" button, go back to your original spreadsheet to correct the errors, re-export the file (starting from Step 8), and then try uploading it again.

-
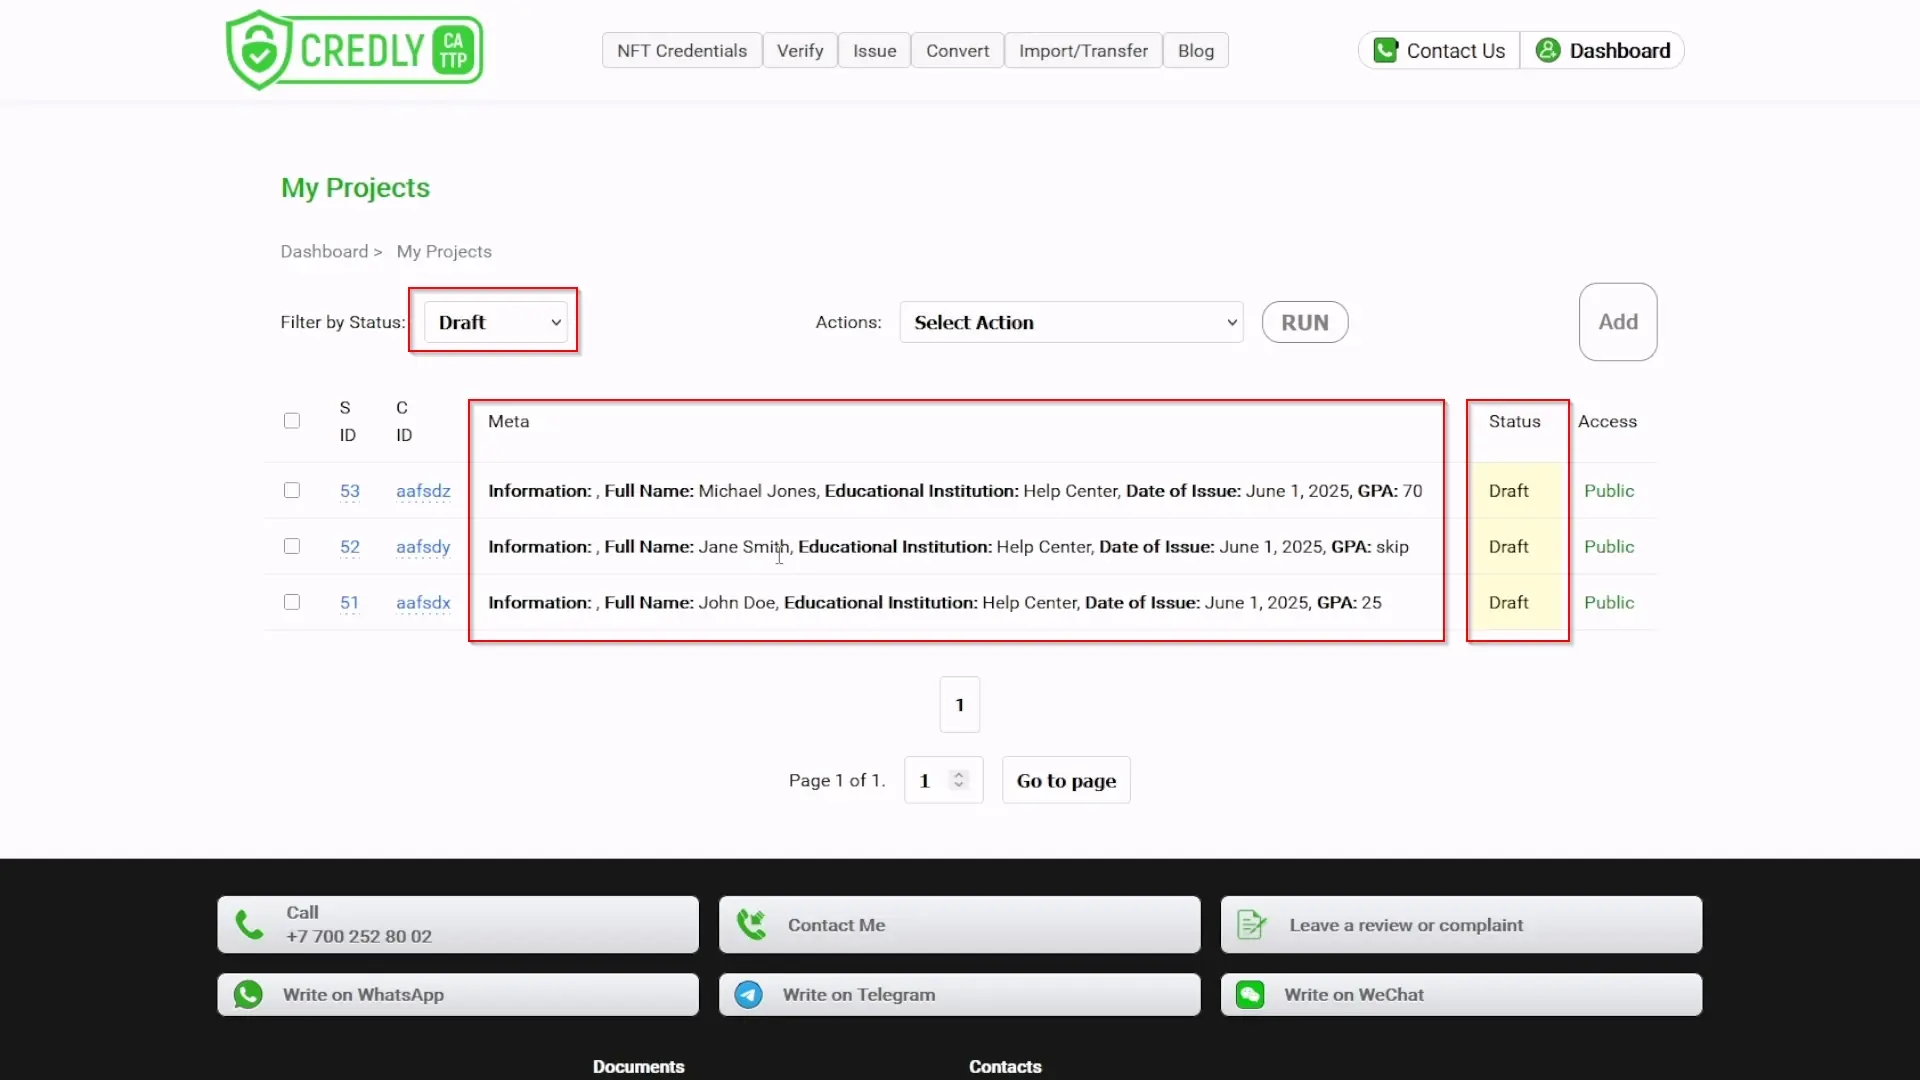
View Imported Projects:
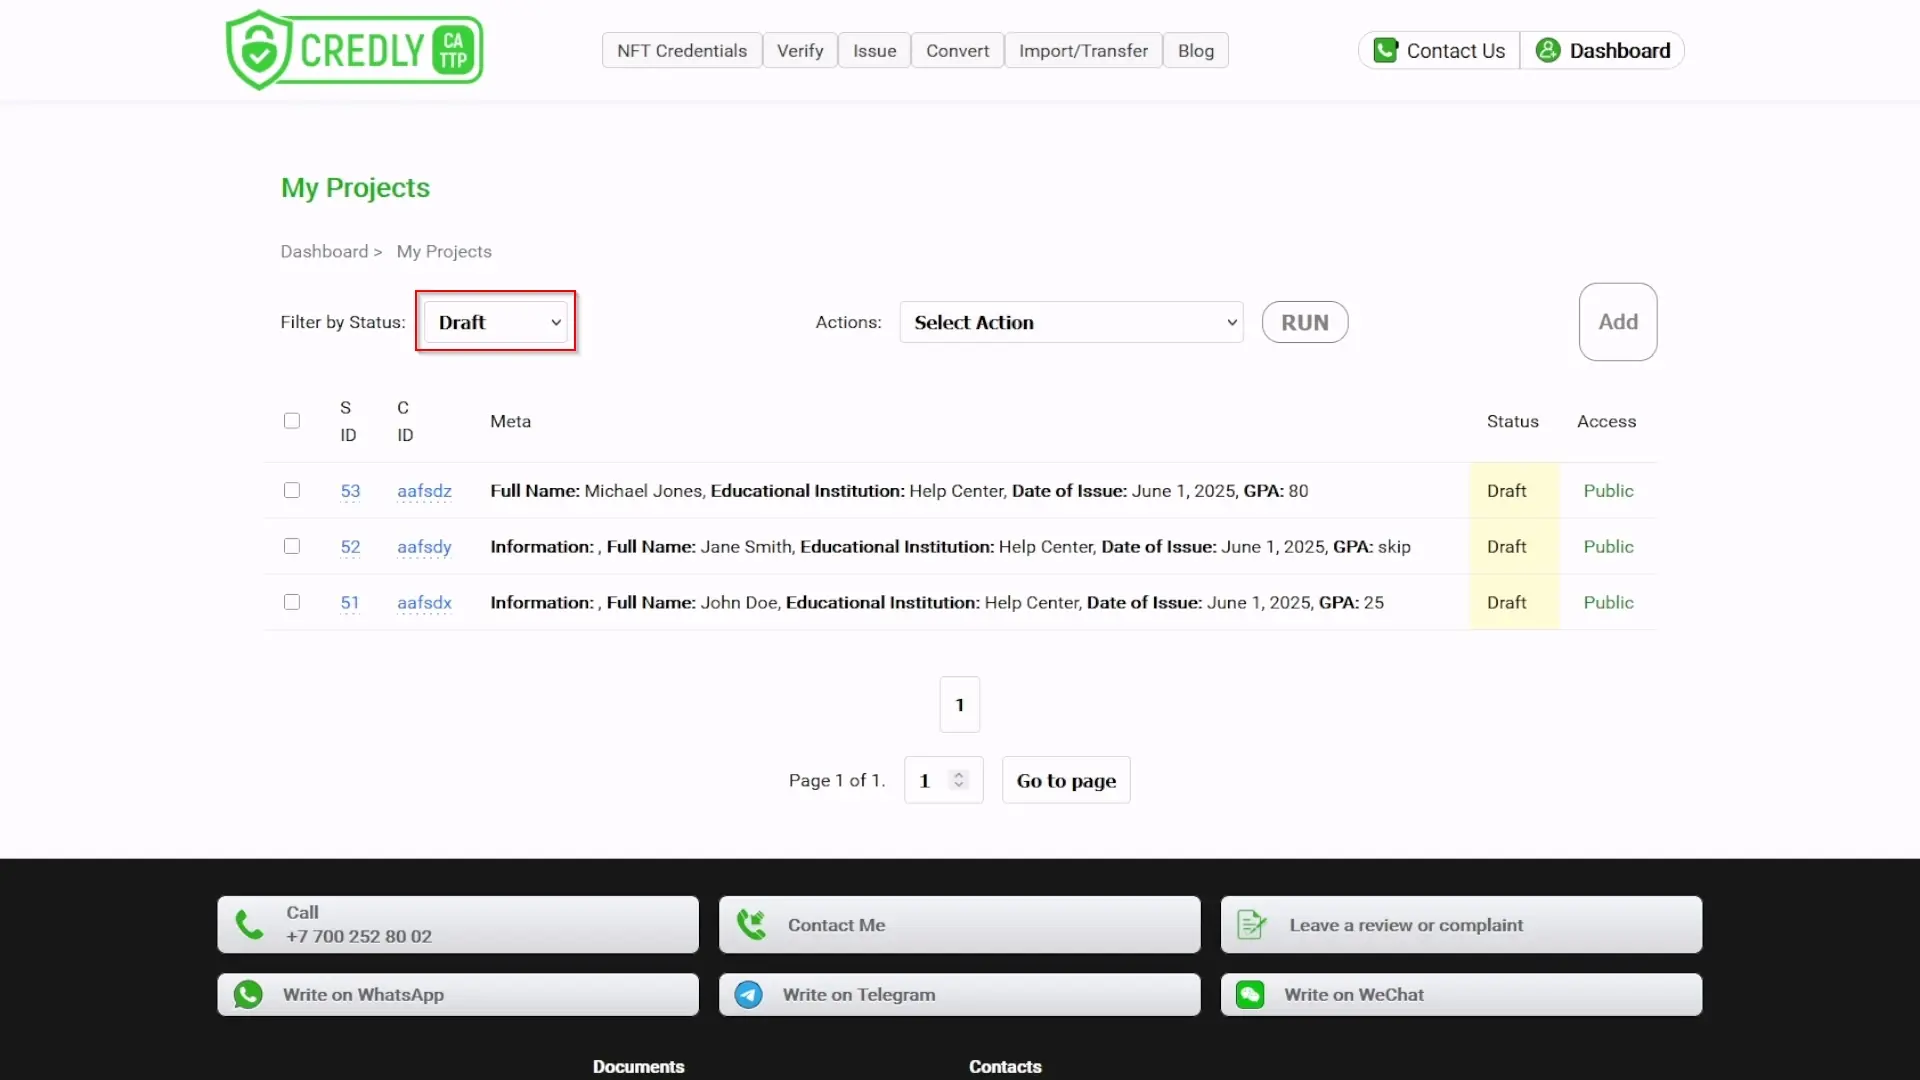
- Navigate to the "My Projects" page (accessible via the "Credential Projects" button on your Dashboard). Your Dashboard metrics for "Blank" projects will decrease, and "Draft" projects will increase by the number of successfully imported records.
- On the "My Projects" page, use the "Filter by Status:" dropdown and select
Draftto view your newly imported projects. - Verify that their metadata (S ID, C ID, Meta, Status, Access) matches your imported data.
Step 10: Review and Edit Draft Projects
Goal: Inspect the newly created Draft projects and make any necessary corrections.
Procedure:
-
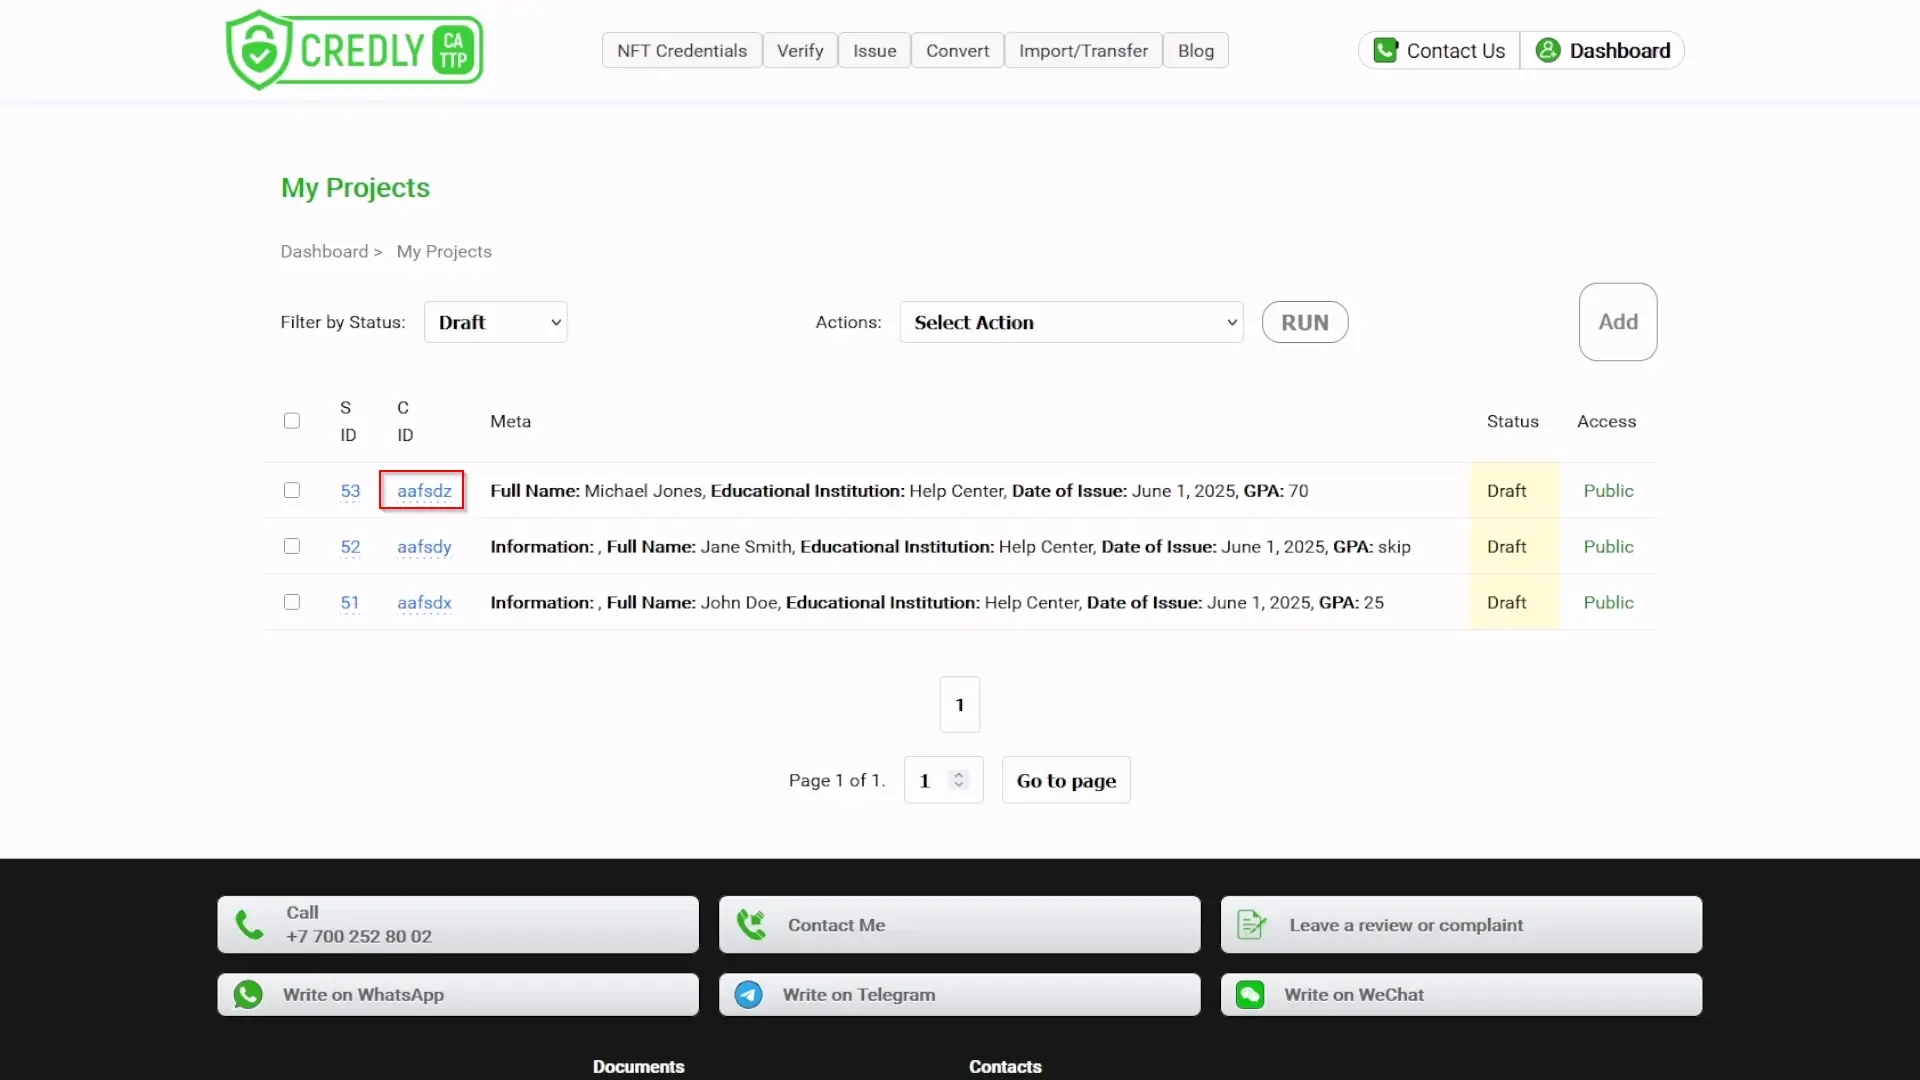
View a Project Live:
- On the "My Projects" page (with the
Draftfilter active), click on the C ID of one of your newly imported projects. - This will open a preview of how the credential will look. Notice how the mandatory fields and any optional fields you included are populated according to the default design template. (Note: Your institution might be able to create custom design templates later for a more branded look).
- On the "My Projects" page (with the

-
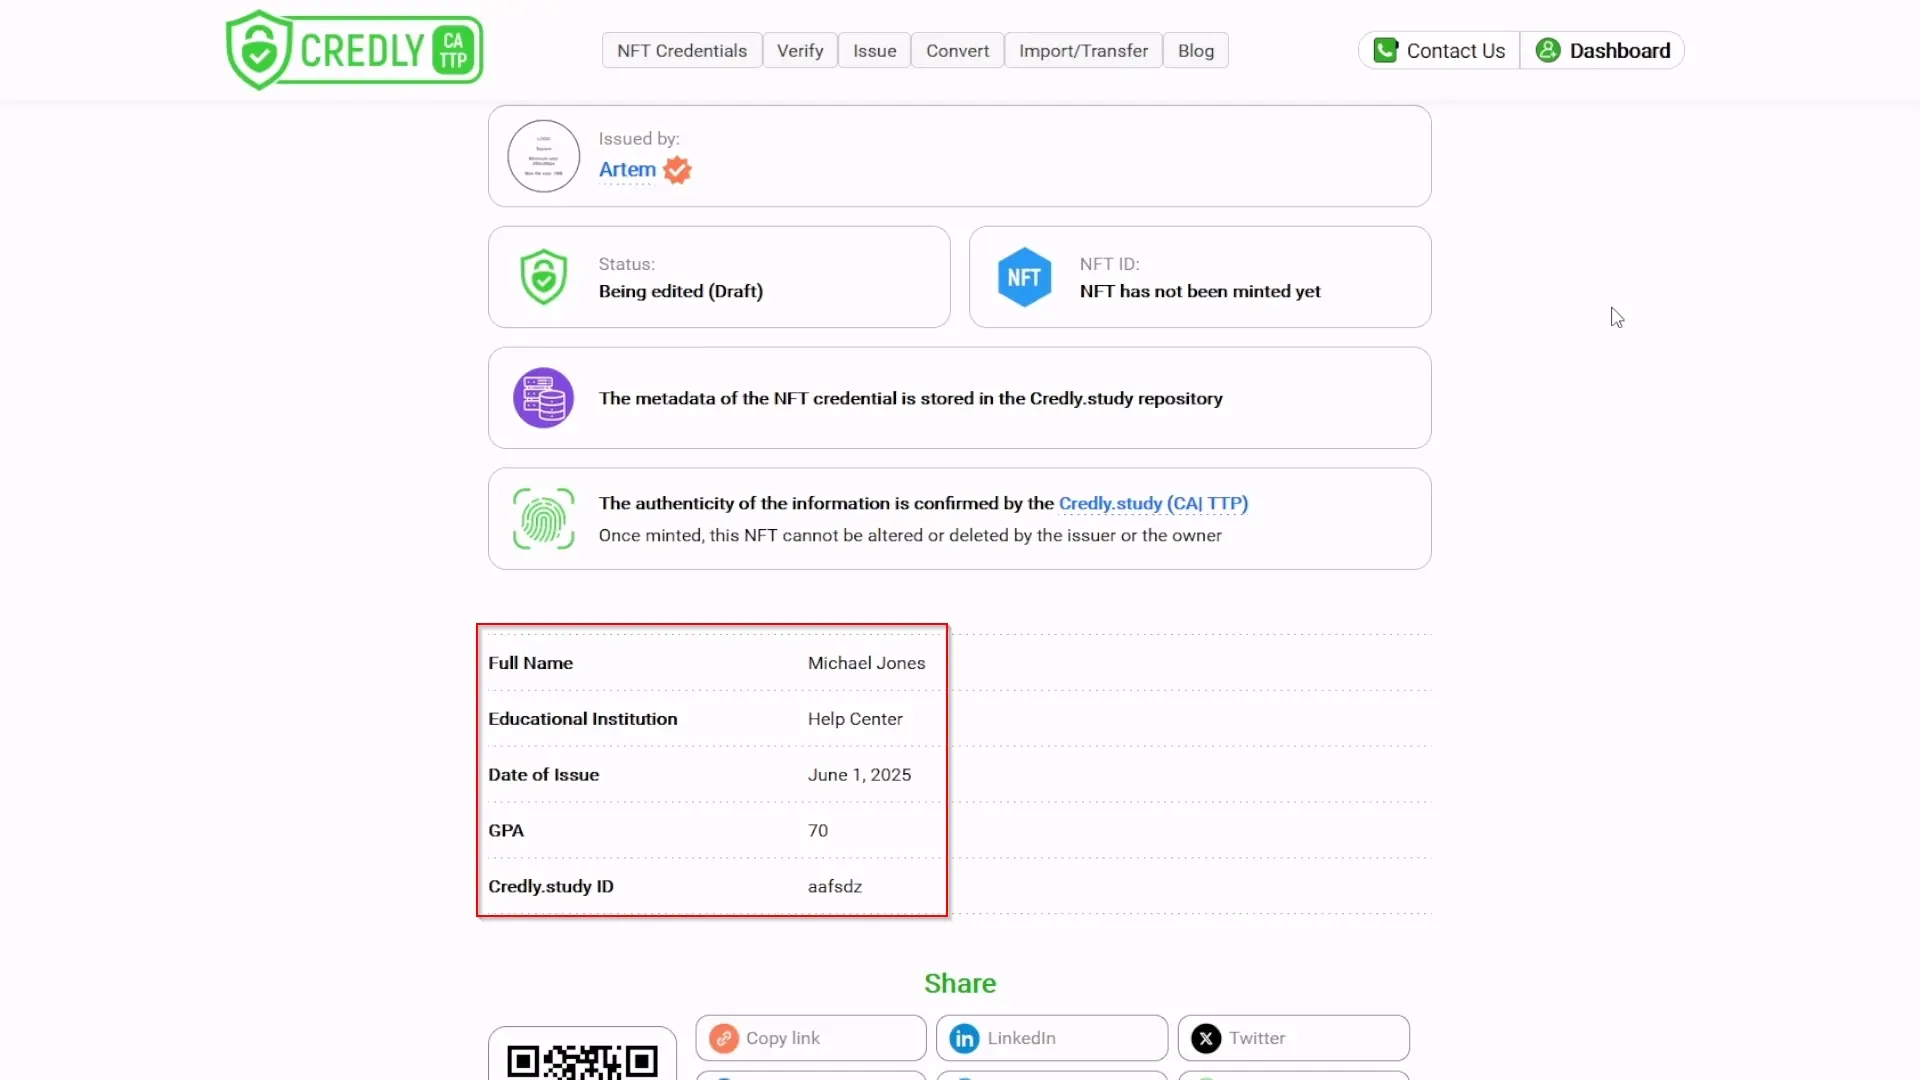
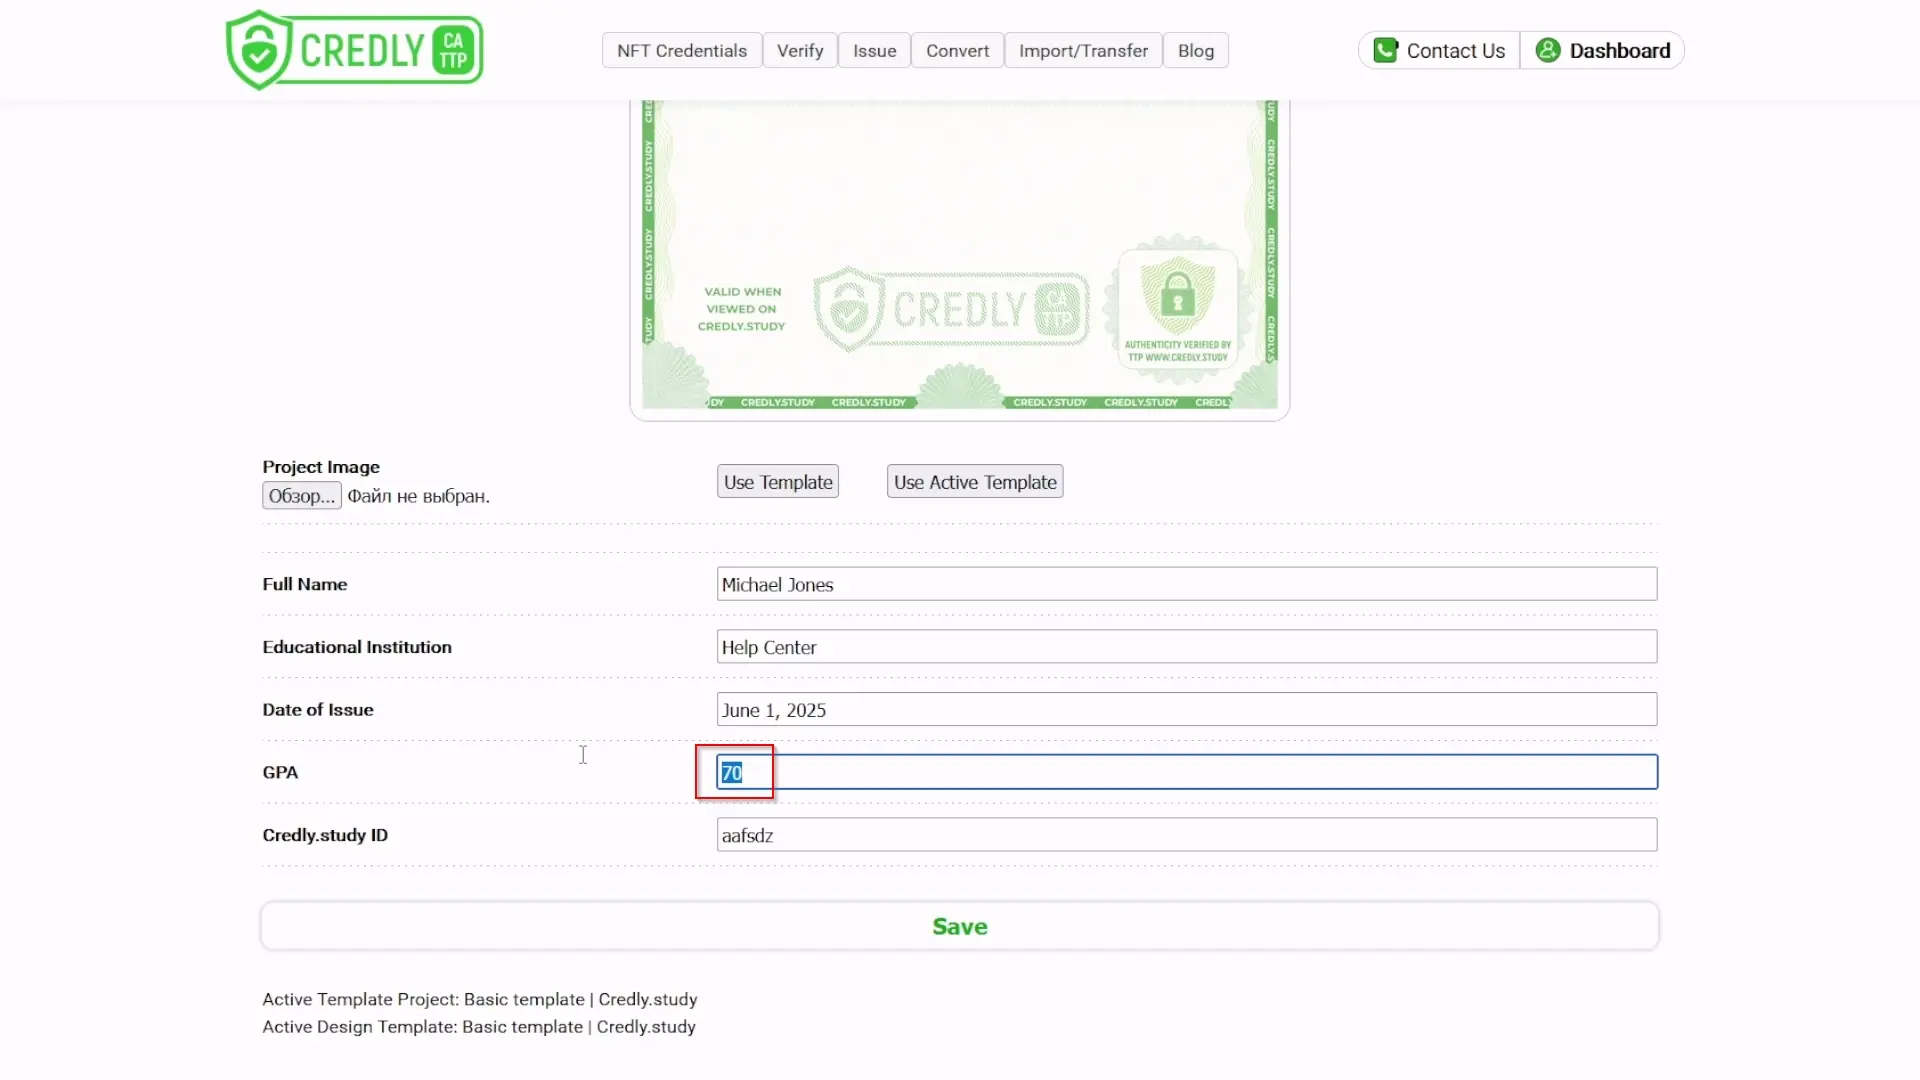
Check Metadata: Scroll down the preview page. You should see all the metadata you imported, plus an automatically generated Credly.study ID.
-
Example Correction (GPA):
- Let's say you notice an error in the preview. For example, a student's GPA should be 80 but was imported as 70.
- Close the project preview page.
-
Edit the Project:
- Back on the "My Projects" page, find the project you want to correct.
- Click on its S ID to open the project editing page.

-
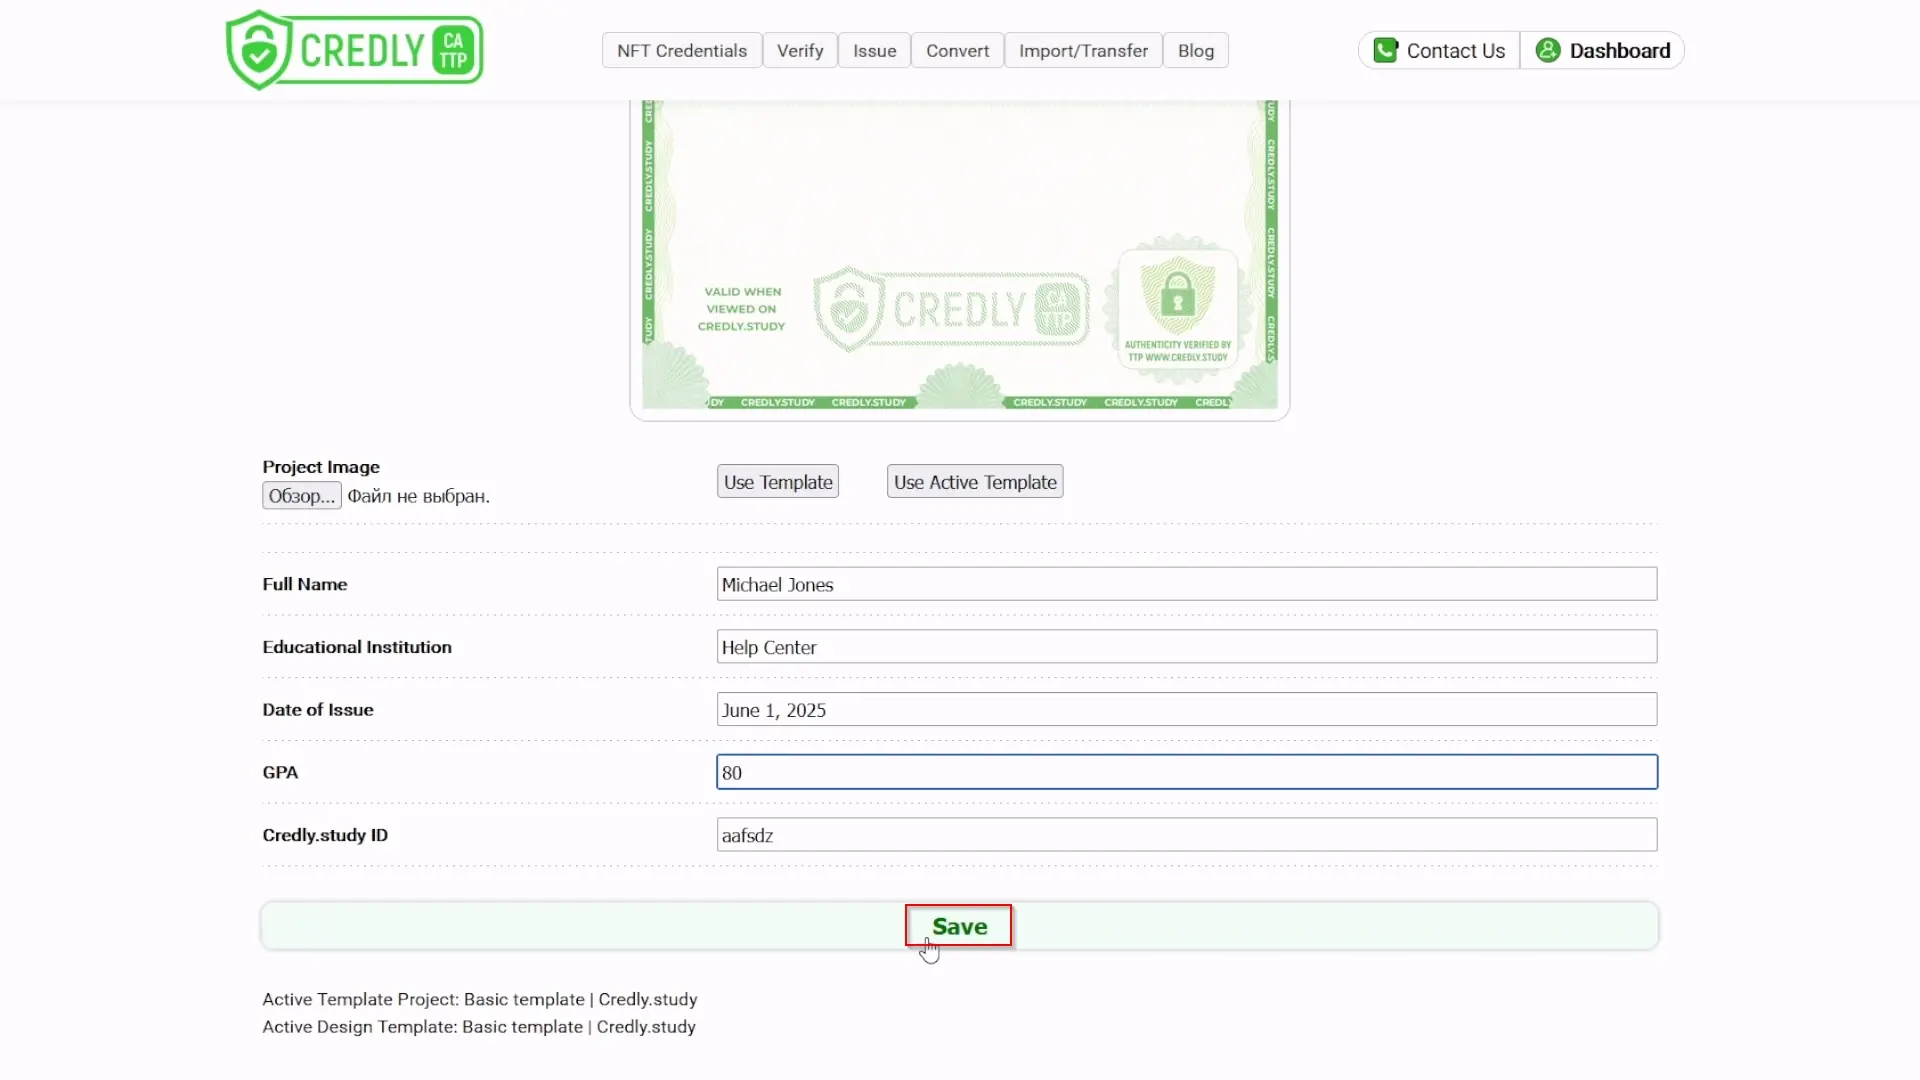
Make Changes: Locate the GPA field (or whichever field needs correction) and change its value (e.g., from 70 to 80).
-
Save Changes: Click the "Save" button.
-
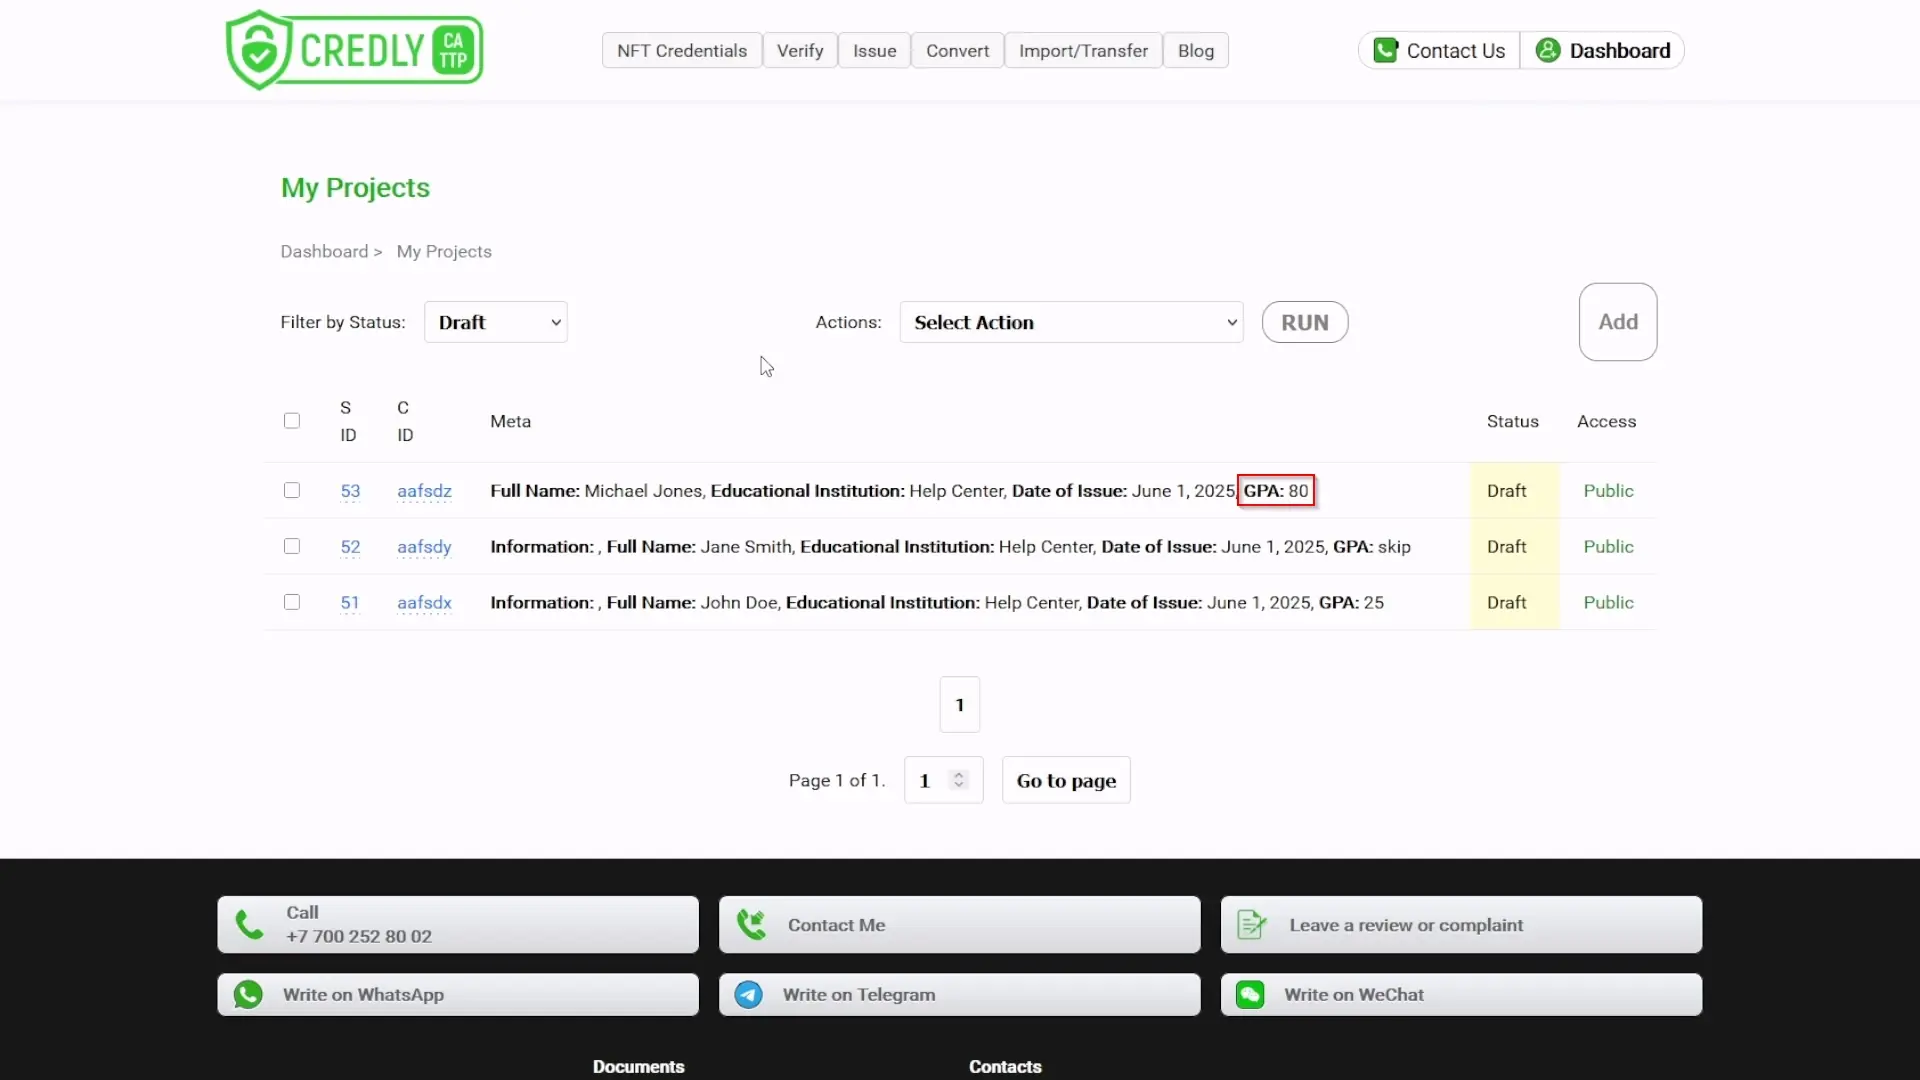
Verify Change: Return to the "My Projects" list (you might need to reapply the
Draftfilter). Check the metadata for the edited project to ensure the change (e.g., GPA now showing 80) is reflected. You can also click the C ID again to preview.
Step 11: Resetting Drafts and Re-importing (Optional)
Goal: Learn how to correct major import errors by resetting Draft projects back to Blank and re-importing.
Procedure:
-
Scenario: You realize you imported the wrong file entirely, or there are widespread errors across many projects. Manually editing each project might be too time-consuming.
-
Best Practice: It's often more efficient to correct the master spreadsheet, re-export it, and then re-import the corrected data.
-
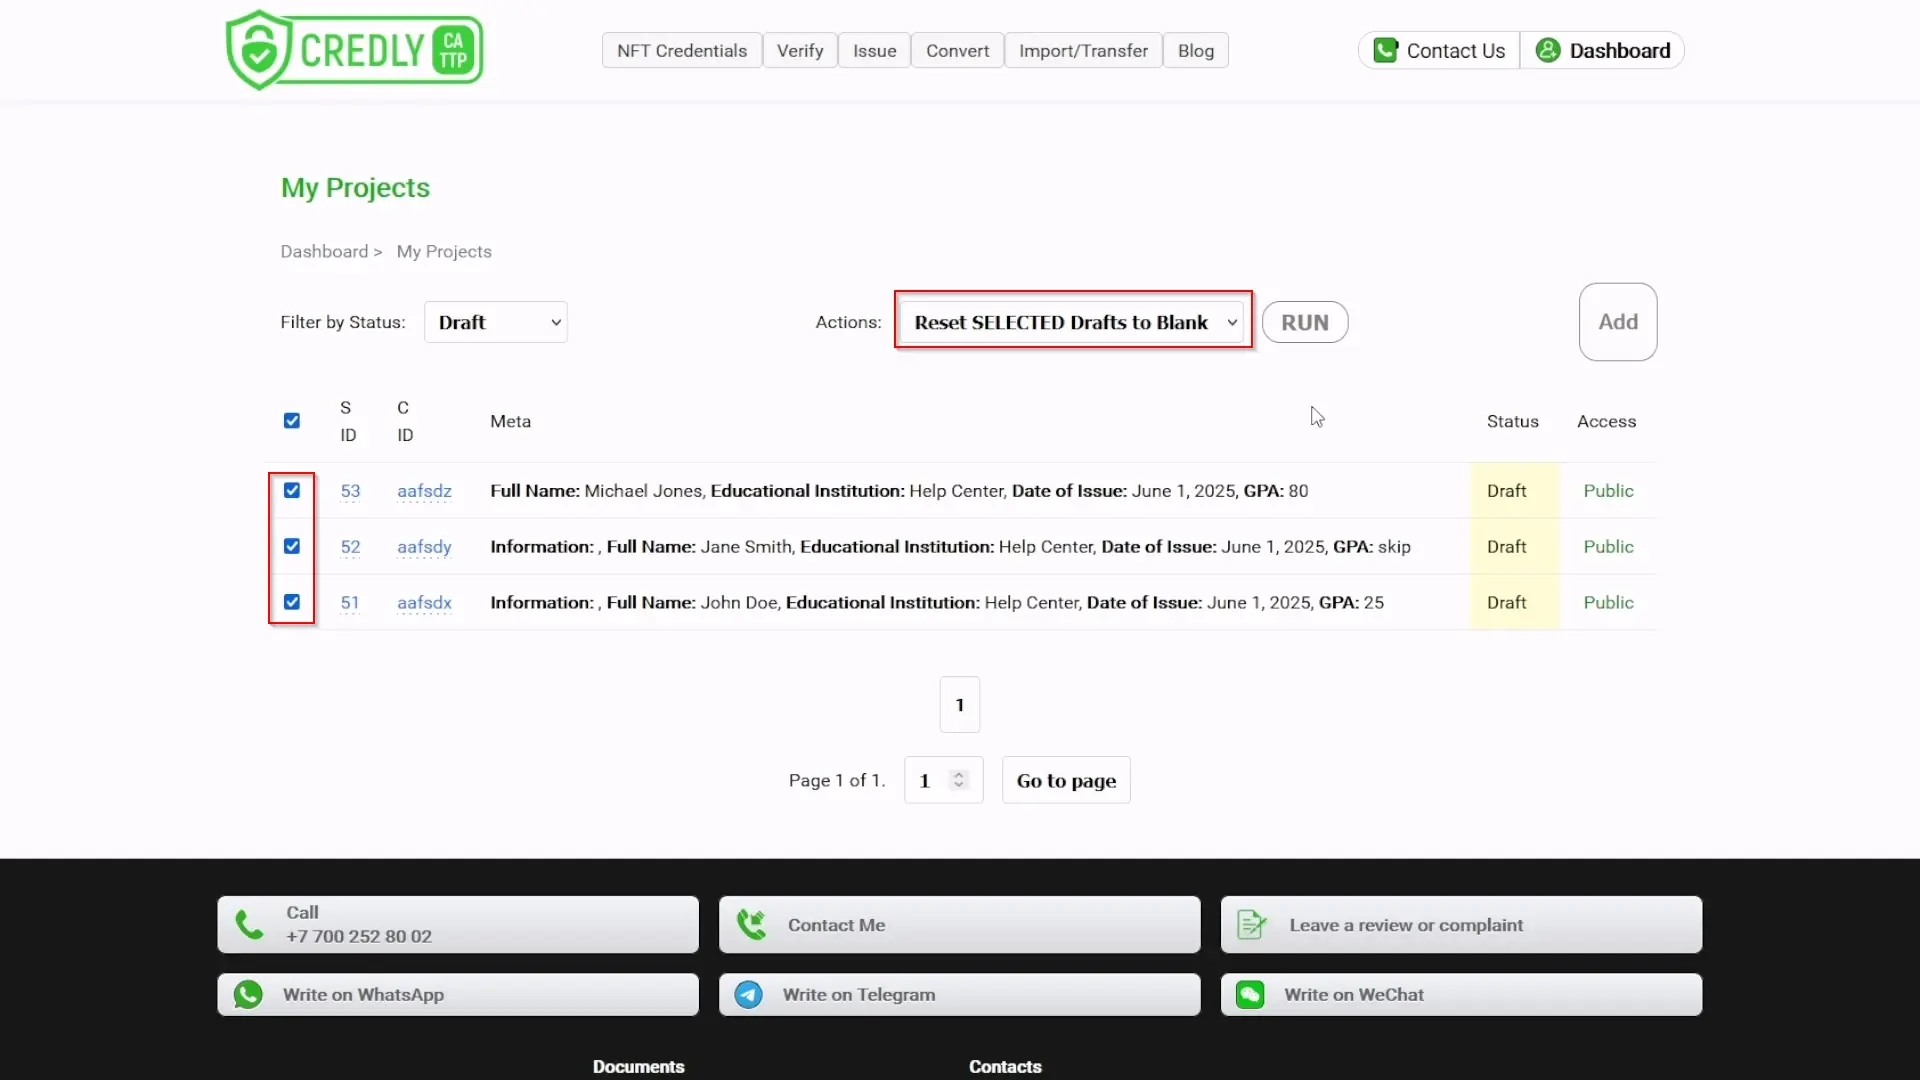
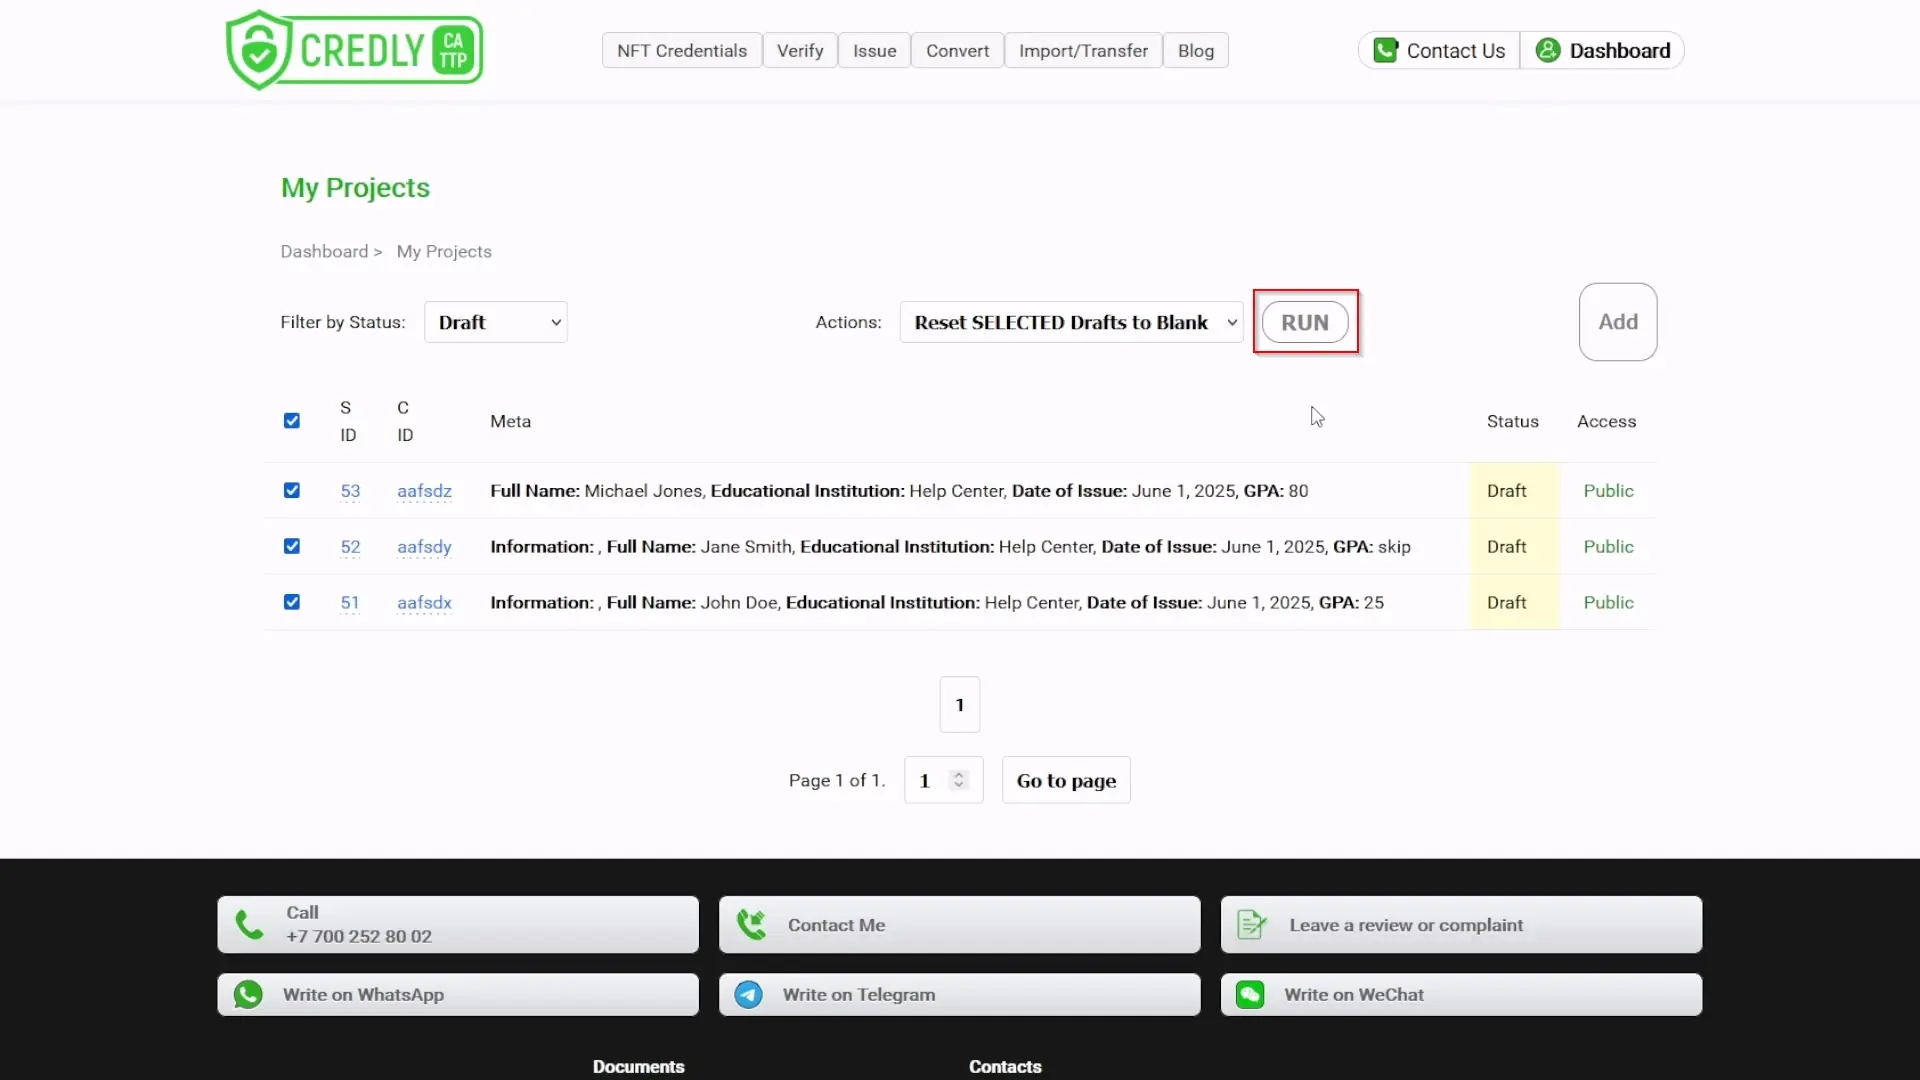
Reset Drafts to Blank:
- On the "My Projects" page, ensure the
Draftfilter is active to display the projects you want to reset. - Select the
Draftprojects you want to reset by ticking their checkboxes in the first column. - Find the "Actions:" dropdown menu.
- Select an option like "Reset SELECTED Drafts to Blank".
- Click the "Run" (or "Apply") button.
- On the "My Projects" page, ensure the
-
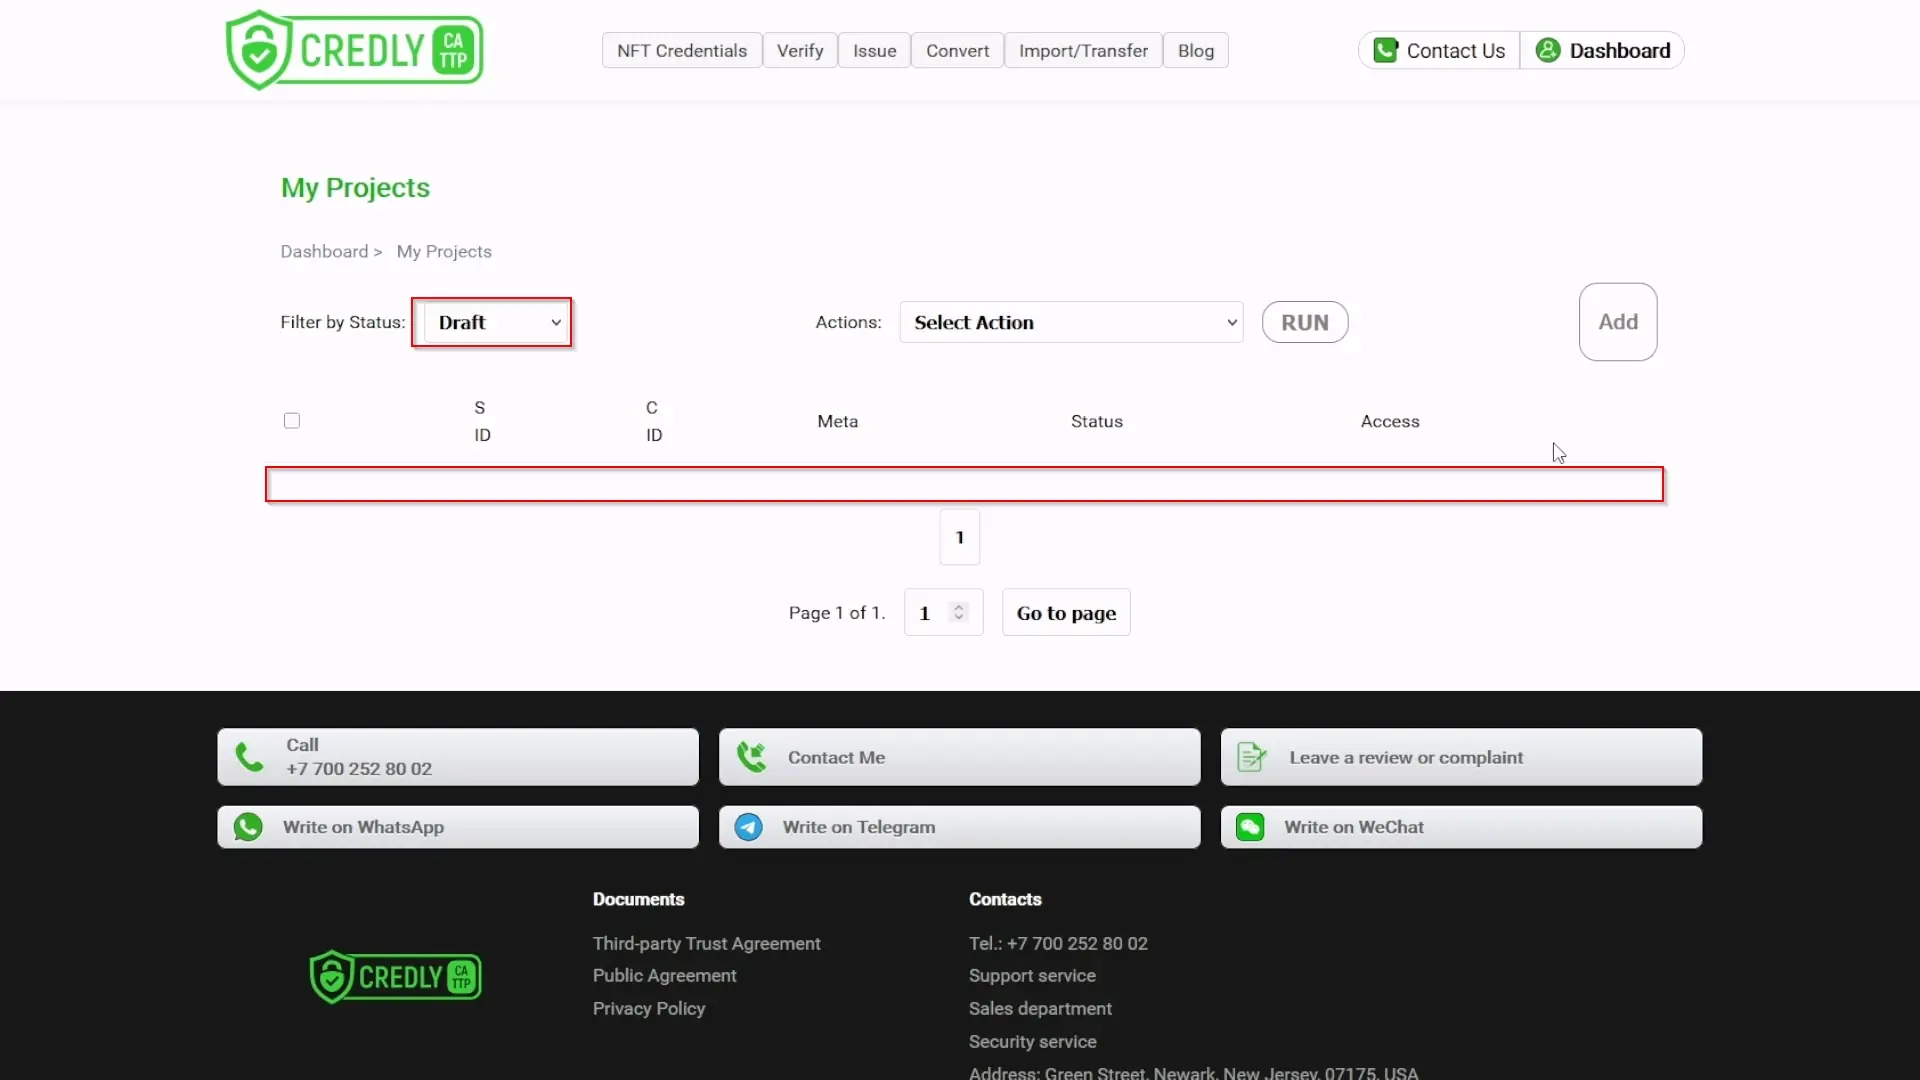
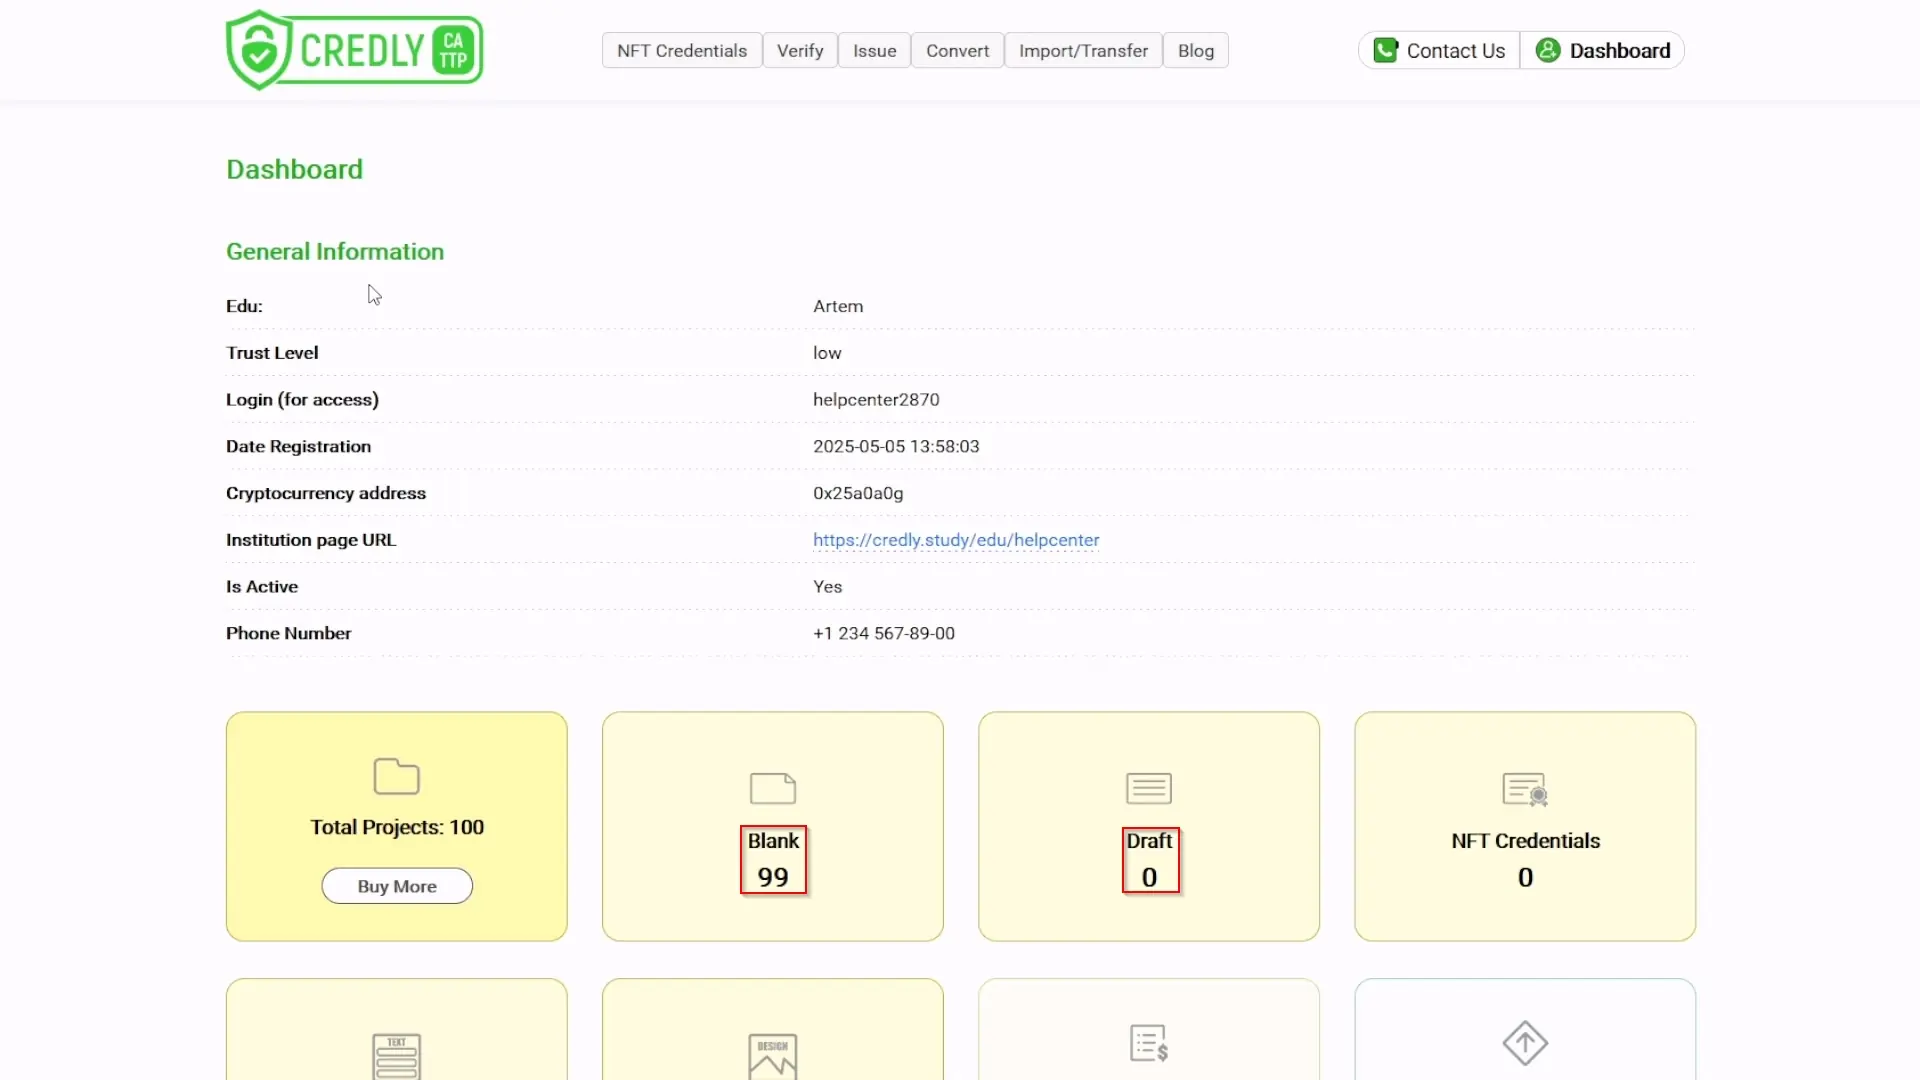
Verify Reset:
- Keep the
Draftfilter active. You should see that the selected projects are no longer listed asDrafts. Your Dashboard metric for "Draft" projects will decrease, and the "Blank" projects metric will increase accordingly. - If you switch the filter on the "My Projects" page to
Blank, you should see these projects have reverted toBlankstatus, and their previous (incorrect) data has been removed. - Note: Only projects with
Draftstatus can typically be reset in this manner.
- Keep the
-
Re-import: Now, you can repeat the import process (Steps 7-9) with your corrected data file.
Step 12: Using Custom Images for Projects (Optional)
Goal: Enhance your credentials by assigning custom images to individual projects, overriding the default design.
Procedure:
-
Preparation: Your
Draftprojects look good with the imported data and are almost ready for signing. However, you can further customize them with unique images. -
Prepare Images:
- Have your custom images ready (e.g., a unique design for each diploma, a photo of the recipient if appropriate and with consent, ensuring compliance with privacy regulations).
- Tip: For convenience, you can name your image files according to the
S IDof the projects they belong to (e.g., if John Doe's project S ID is51, name his image51.jpgor51.png). This makes matching images to projects easier.
-
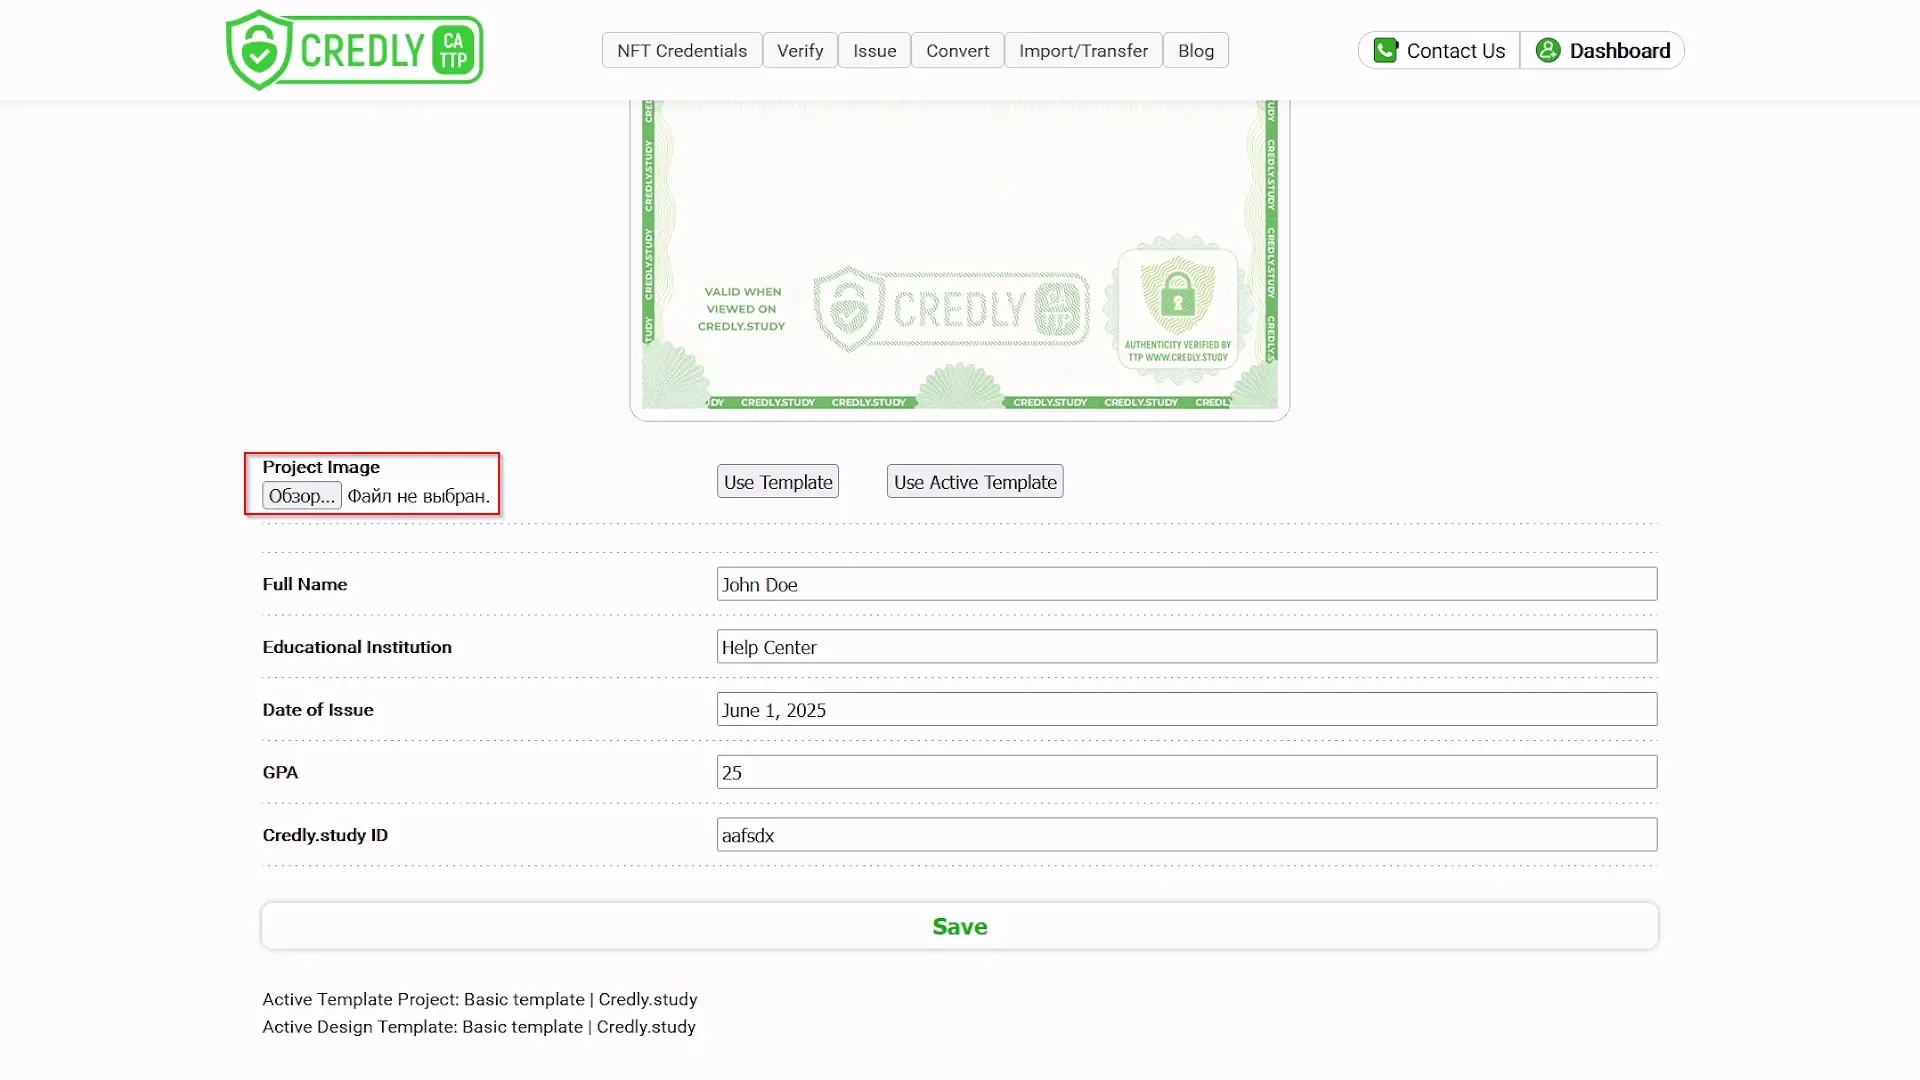
Assign Image to a Project:
- On the "My Projects" page (filter for
Draftsif needed), click the S ID of the project you want to modify. This will take you to its editing page. - On the project editing page, look for a section like "Project Image".
- Click the "Browse" (or "Choose File" / "Upload") button next to it.
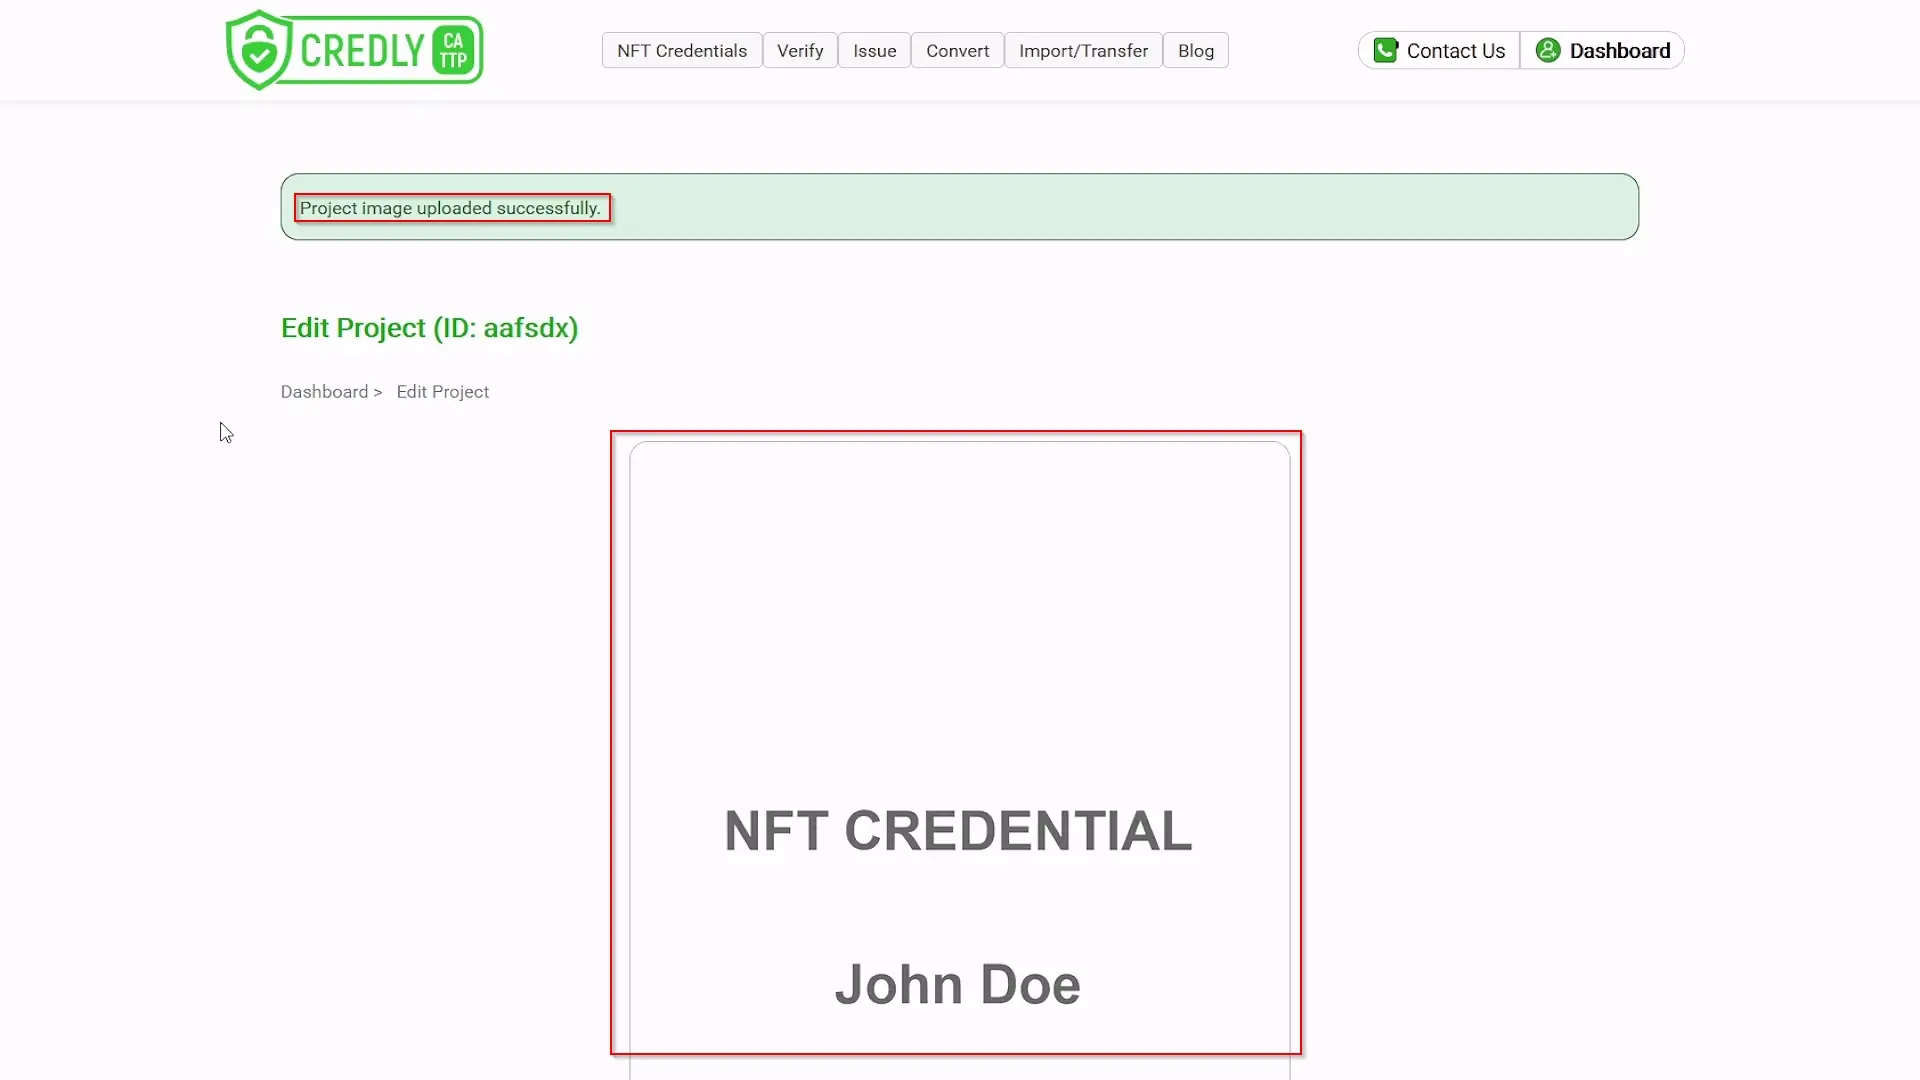
- Select the desired image file from your computer. The image should upload and associate with the project (often automatically upon selection, and a preview might appear).
- On the "My Projects" page (filter for
-
Repeat for Other Projects: Repeat the process for any other
Draftprojects you wish to assign custom images to. -
Verify: You can preview the projects (by clicking their C IDs from the "My Projects" list) to see how they look with the new custom images.
-
Your projects should now be fully customized with your chosen images and ready for the final step of signing!
Step 13: Signing Projects to Issue NFTs
Goal: Finalize your Draft projects by signing them, which queues them for NFT issuance on the blockchain.
Procedure:
-
Understanding Signing:
- To create an NFT document from a
Draftproject, you must "sign" it. - Important: Once a project is signed, it cannot be modified. All its data and custom image (if any) are locked in.
- A signed project is placed in a queue to be minted (recorded) on the blockchain. It typically cannot be removed from this queue.
- After successful blockchain minting, it becomes an NFT credential with
Documentstatus.
- To create an NFT document from a
-
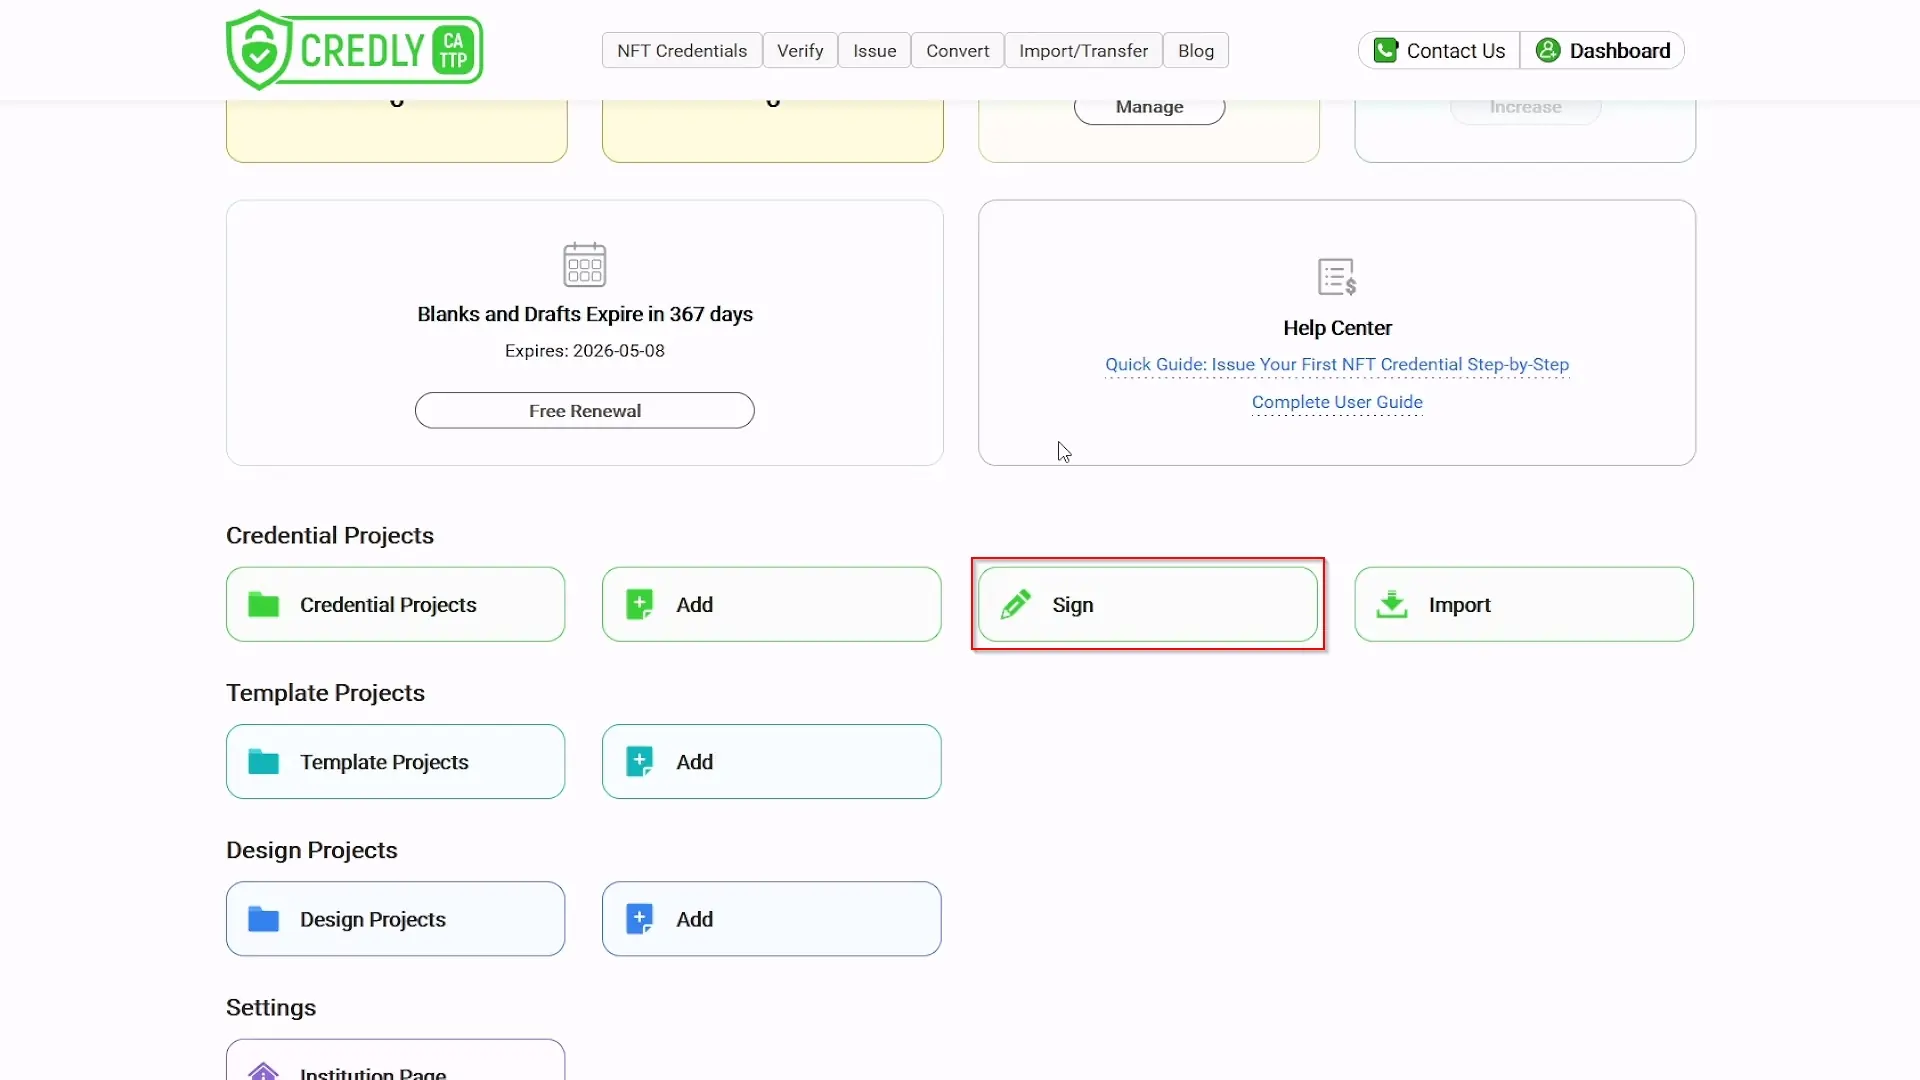
Navigate to Signing Area:
- You can often sign projects directly from the "My Projects" list (after filtering for
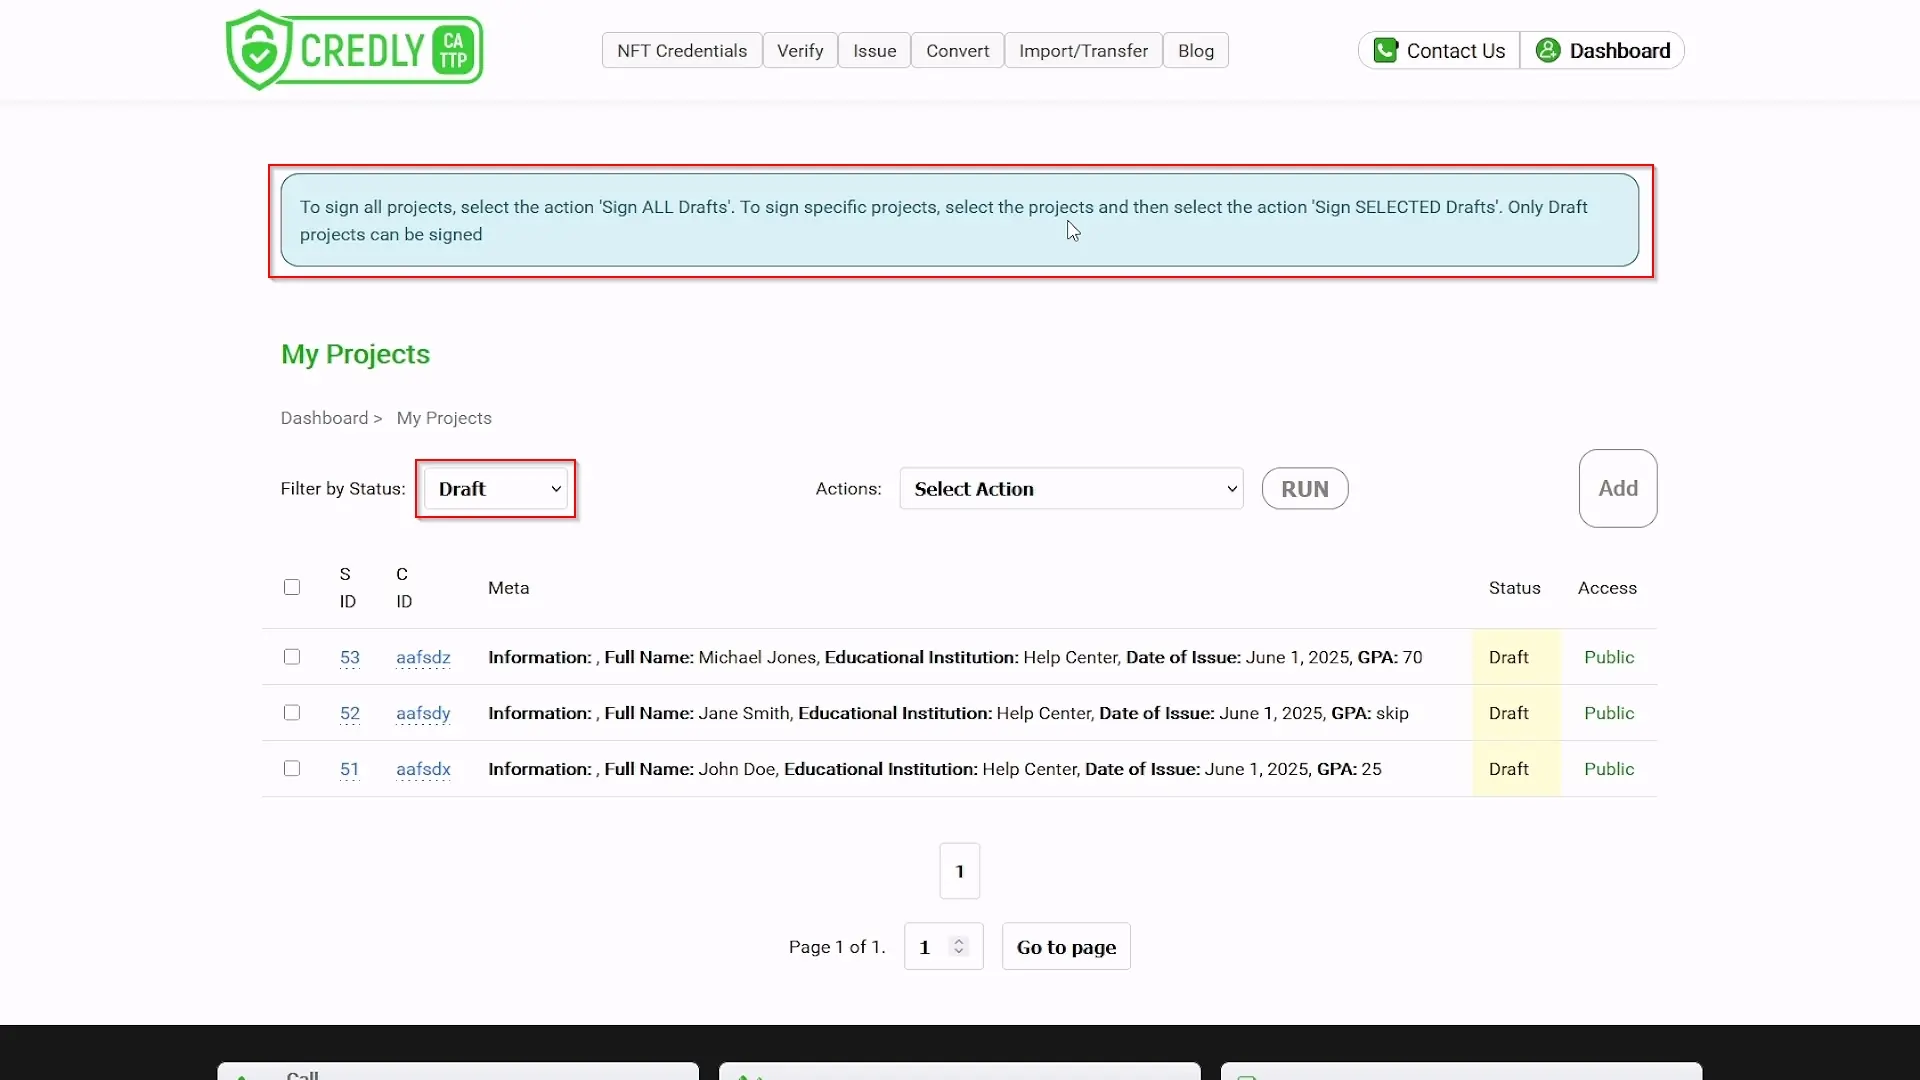
Draftstatus). - Alternatively, go to your "Dashboard" and click the "Sign" button (located in the "Credential Projects" section). This will usually take you to a page listing projects eligible for signing (i.e., those in
Draftstatus), often with theDraftfilter pre-applied and helpful tips.
- You can often sign projects directly from the "My Projects" list (after filtering for
-
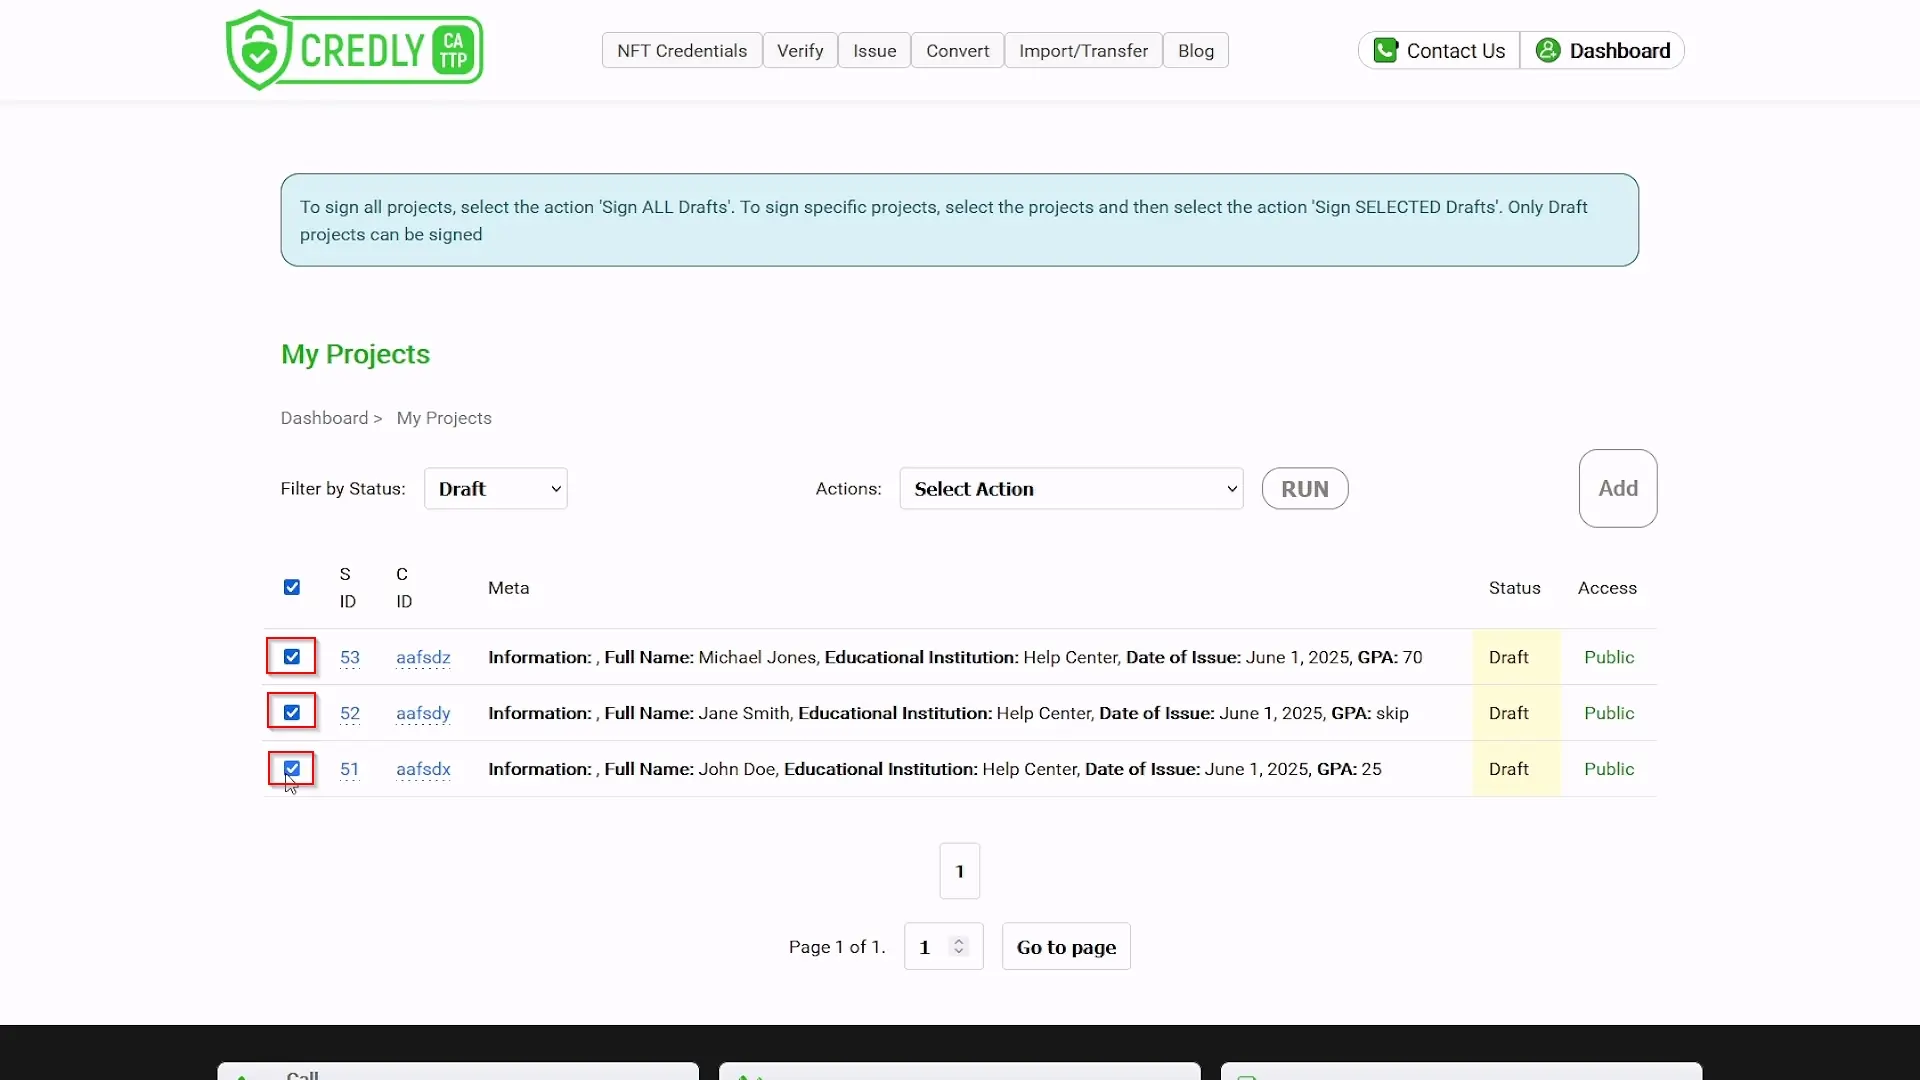
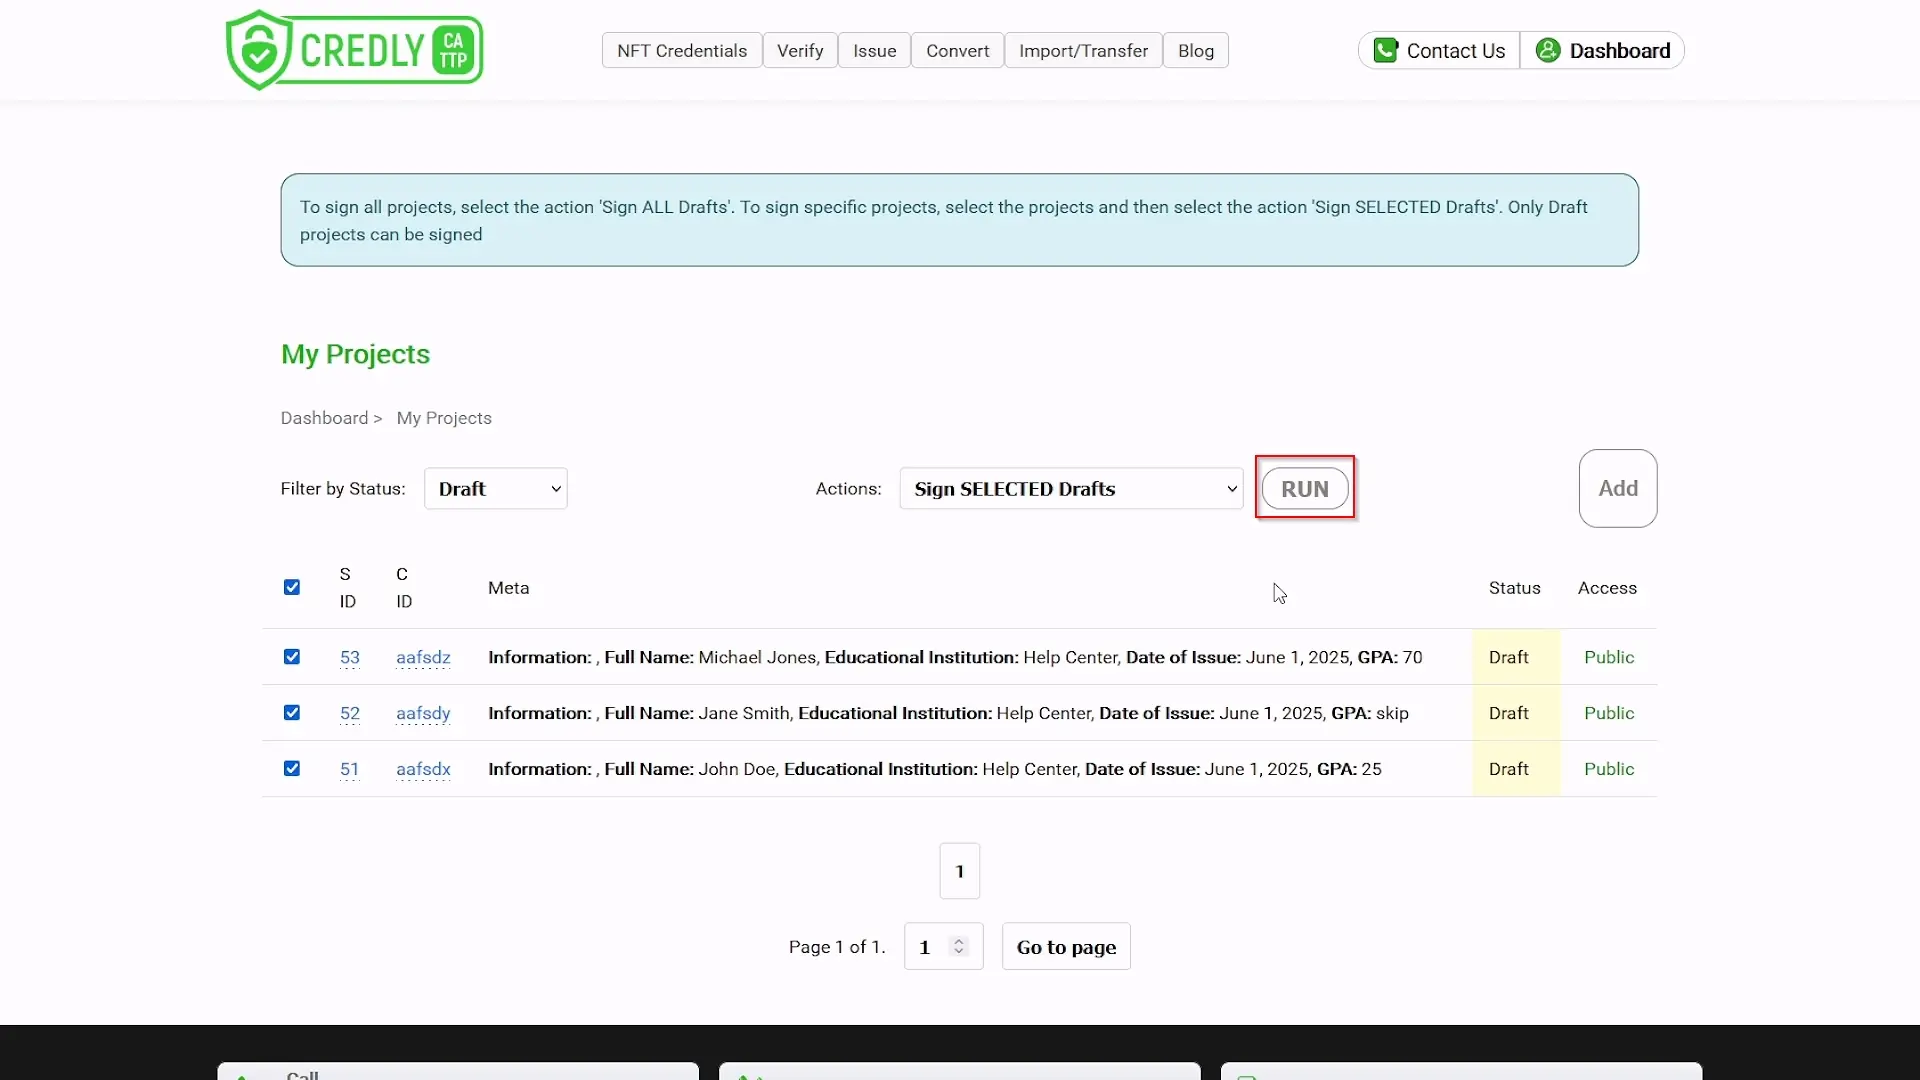
Select Projects to Sign:
- On the project listing page (with
Draftprojects shown), select the projects you want to sign by ticking their checkboxes in the first column.
- On the project listing page (with
-
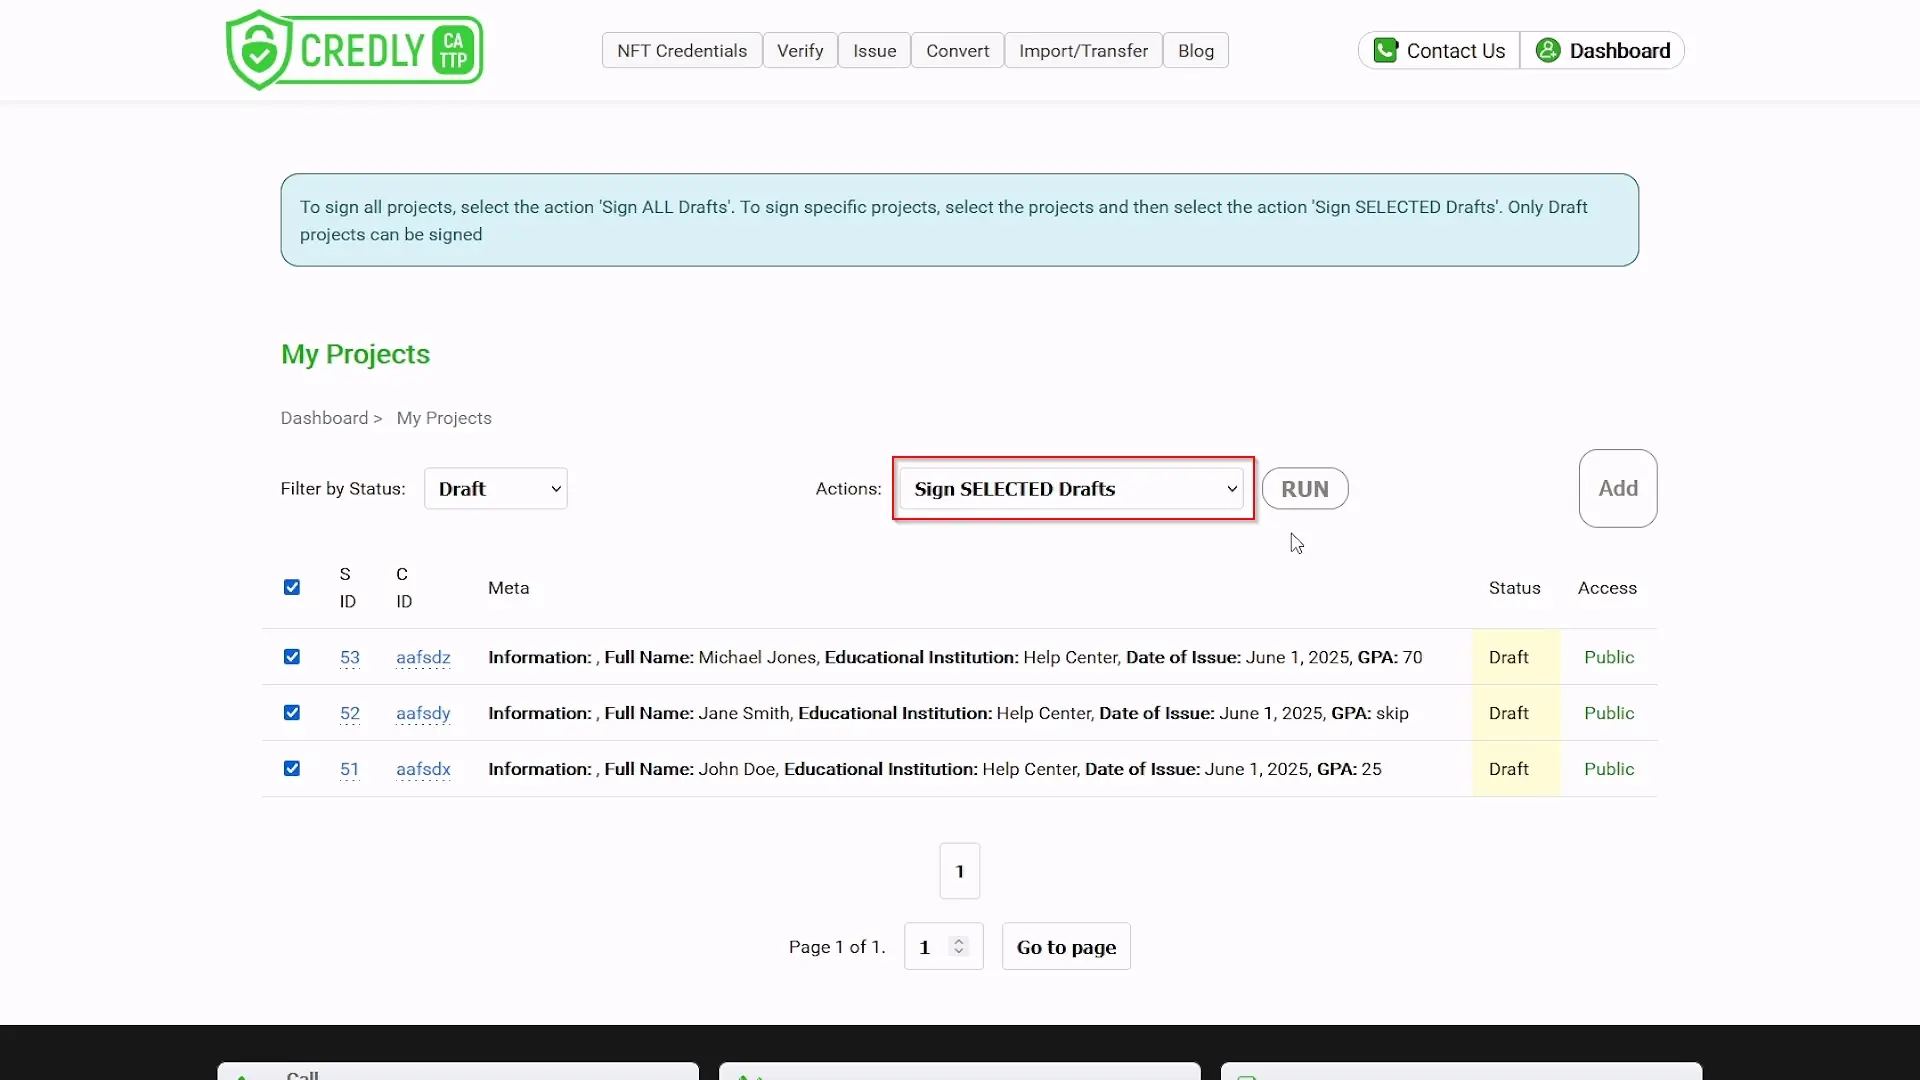
Execute Signing Action:
- Find the "Actions:" dropdown menu.
- Select an option like "Sign SELECTED Drafts".
- Click the "Run" (or "Apply") button.
-
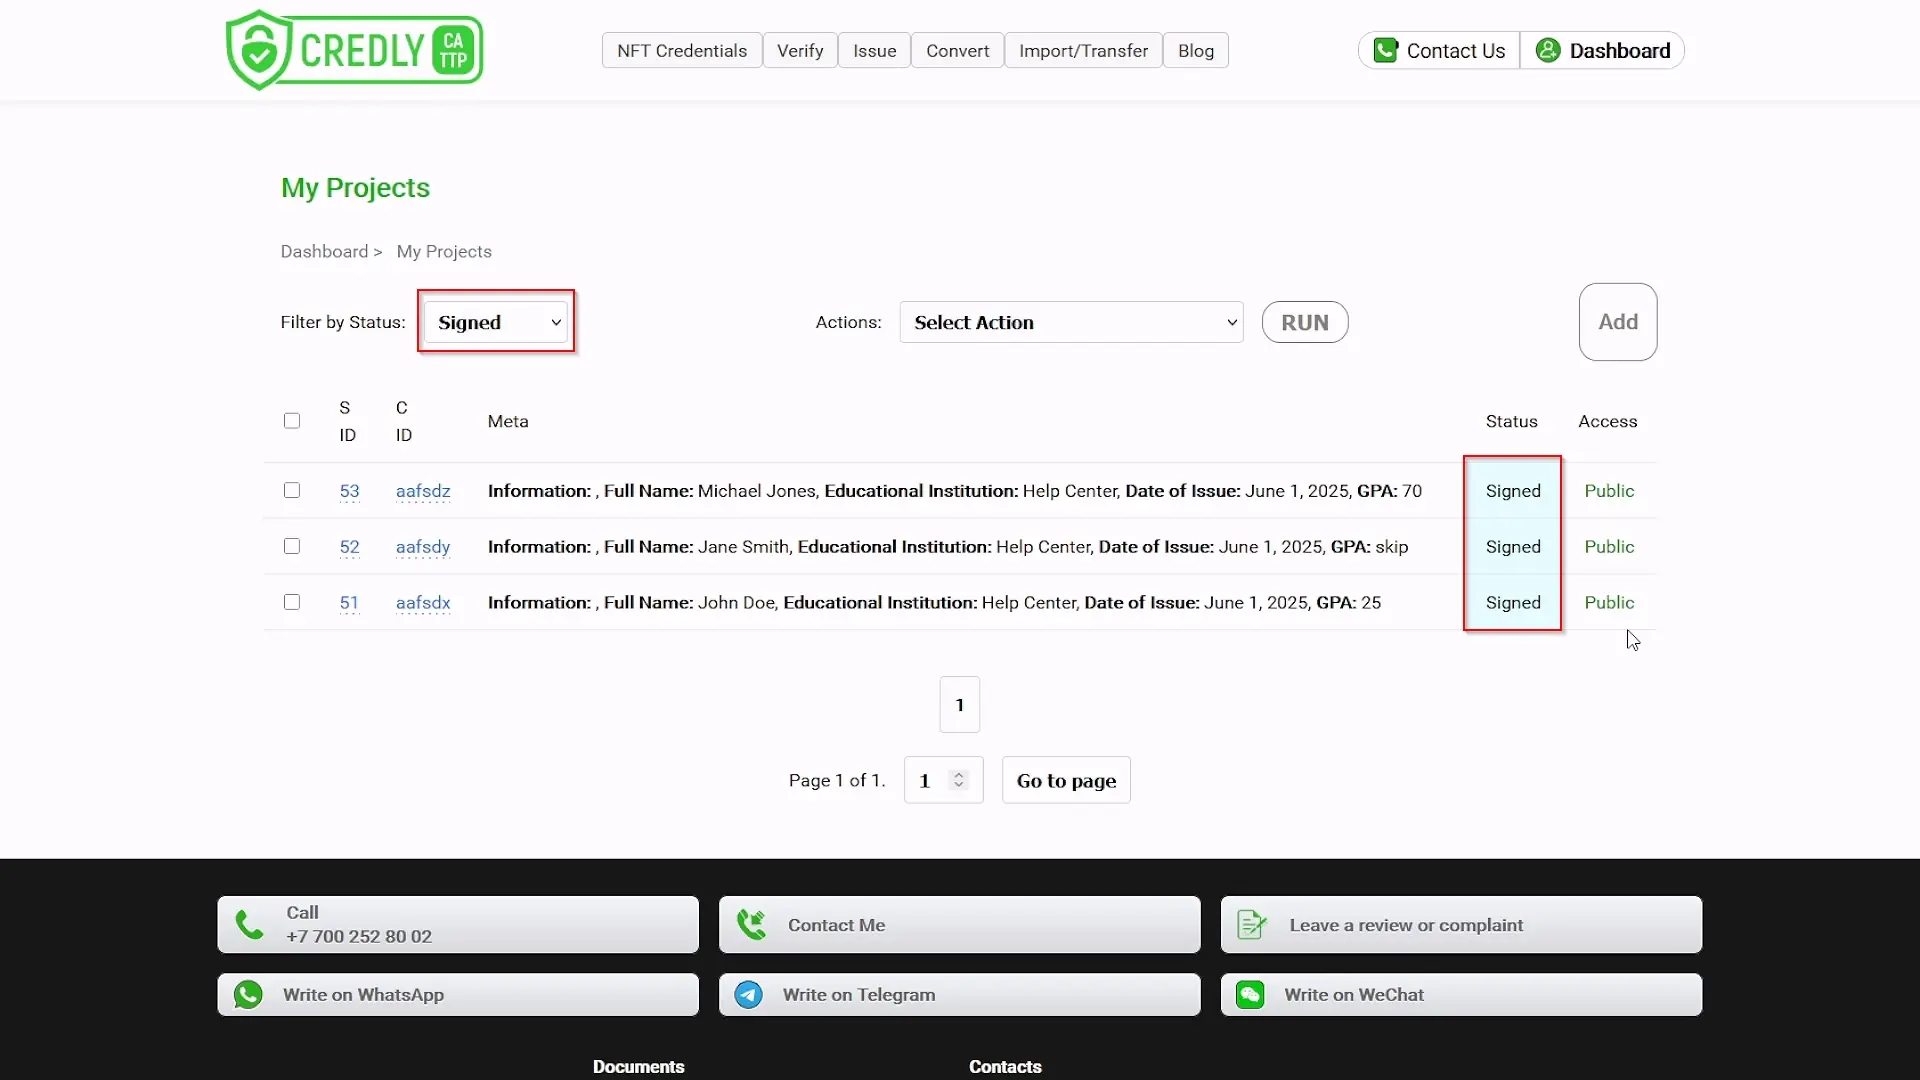
Verify Status Change:
- On the "My Projects" page, change the project filter to "Signed".
- You should see your selected projects now listed with the
Signedstatus. All editing actions for these projects (like clicking their S ID) will now be disabled. They are awaiting blockchain processing. - Your Dashboard metrics will also update: the
Draftcount will decrease, and aSignedcount might appear temporarily, or theNFT Credentialscount will eventually increase once minted.
Step 14: Viewing and Managing Issued NFT Credentials
Goal: Observe your newly minted NFT credentials (now Document status) and understand how to manage their access.
Procedure:
-
Status Update & Dashboard: After a signed project is successfully processed and minted on the blockchain, its status changes from
SignedtoDocument(or a similar term likeNFT CredentialorIssued). On your Dashboard, these successfully minted credentials will contribute to the count shown under the "NFT Credentials [Number]" metric.
-
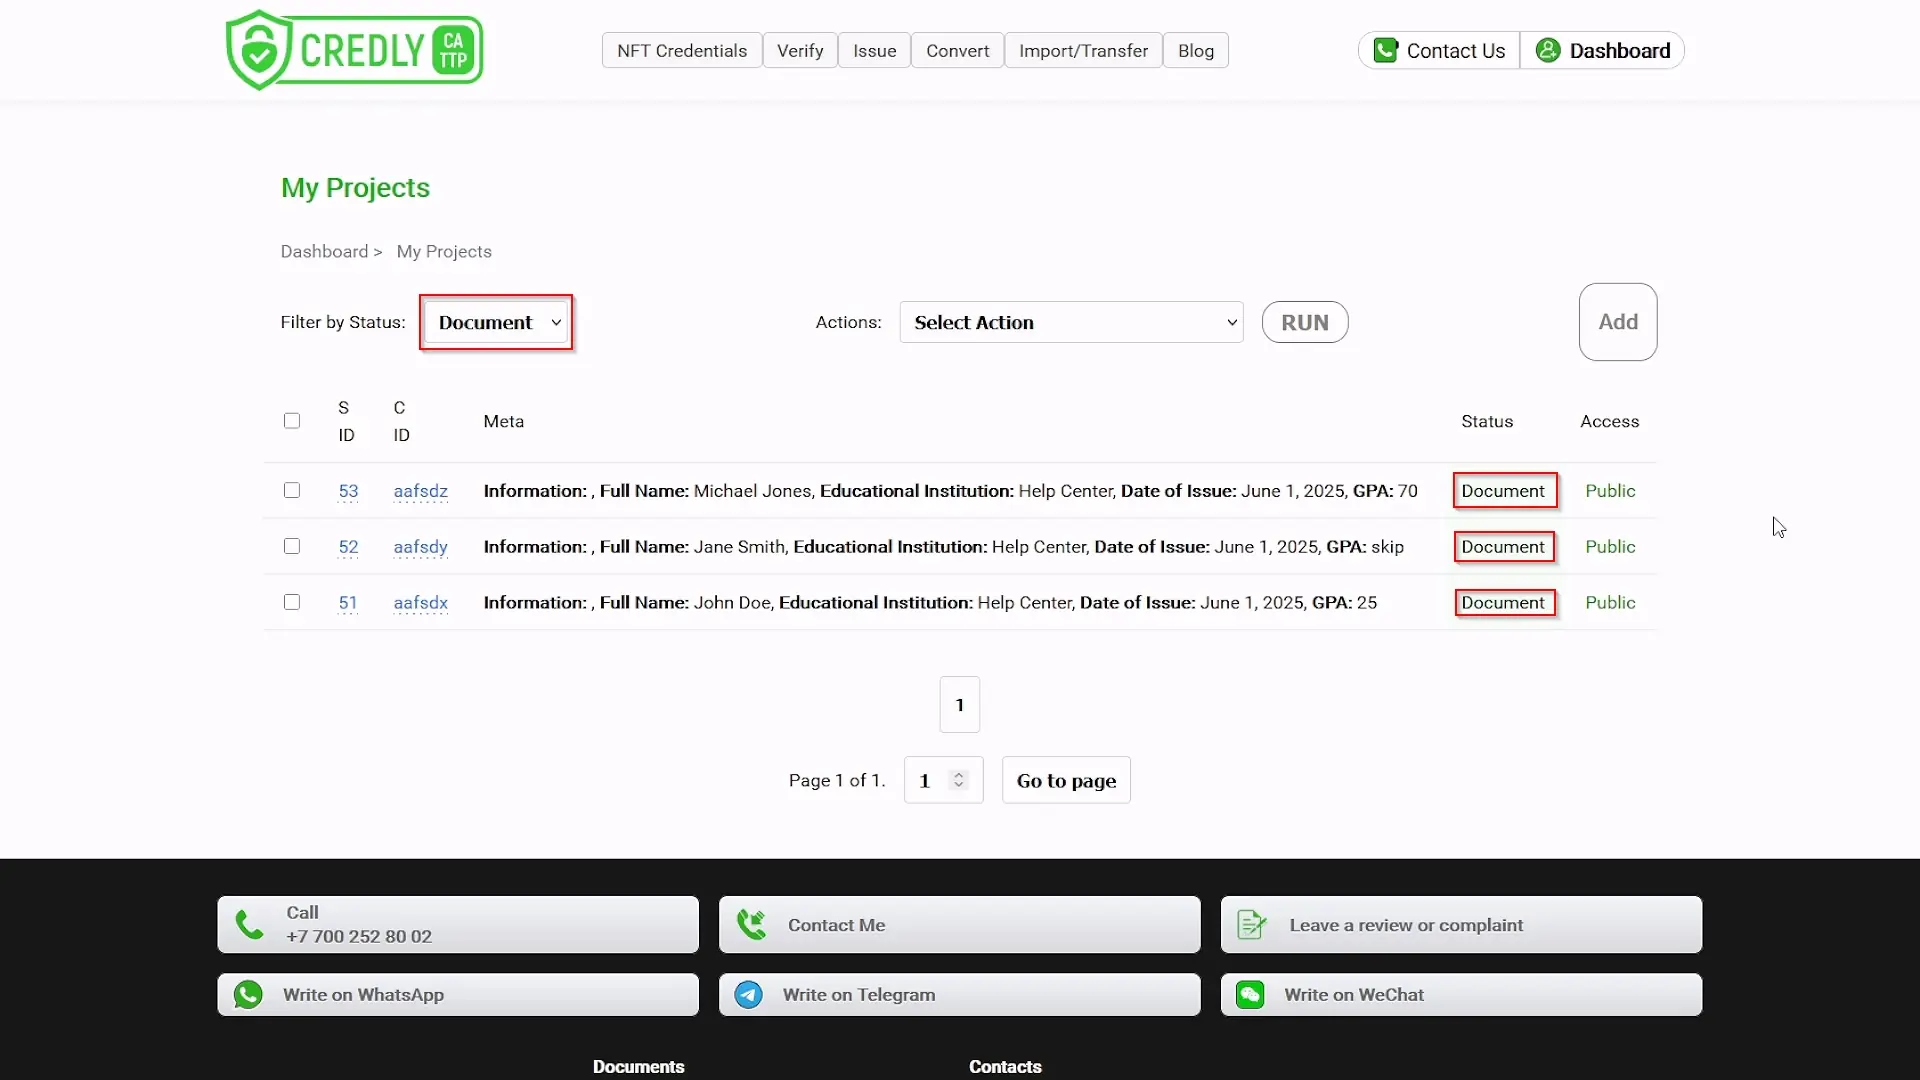
View Issued Credentials:
- Navigate to the "My Projects" page (accessible via the "Credential Projects" button on your Dashboard).
- Use the "Filter by Status:" dropdown and select
Document(orNFT Credential).
-
Confirmation: Your projects should now be listed with the
Documentstatus, indicating they have been successfully minted on the blockchain. You now have verifiable NFT credentials! -
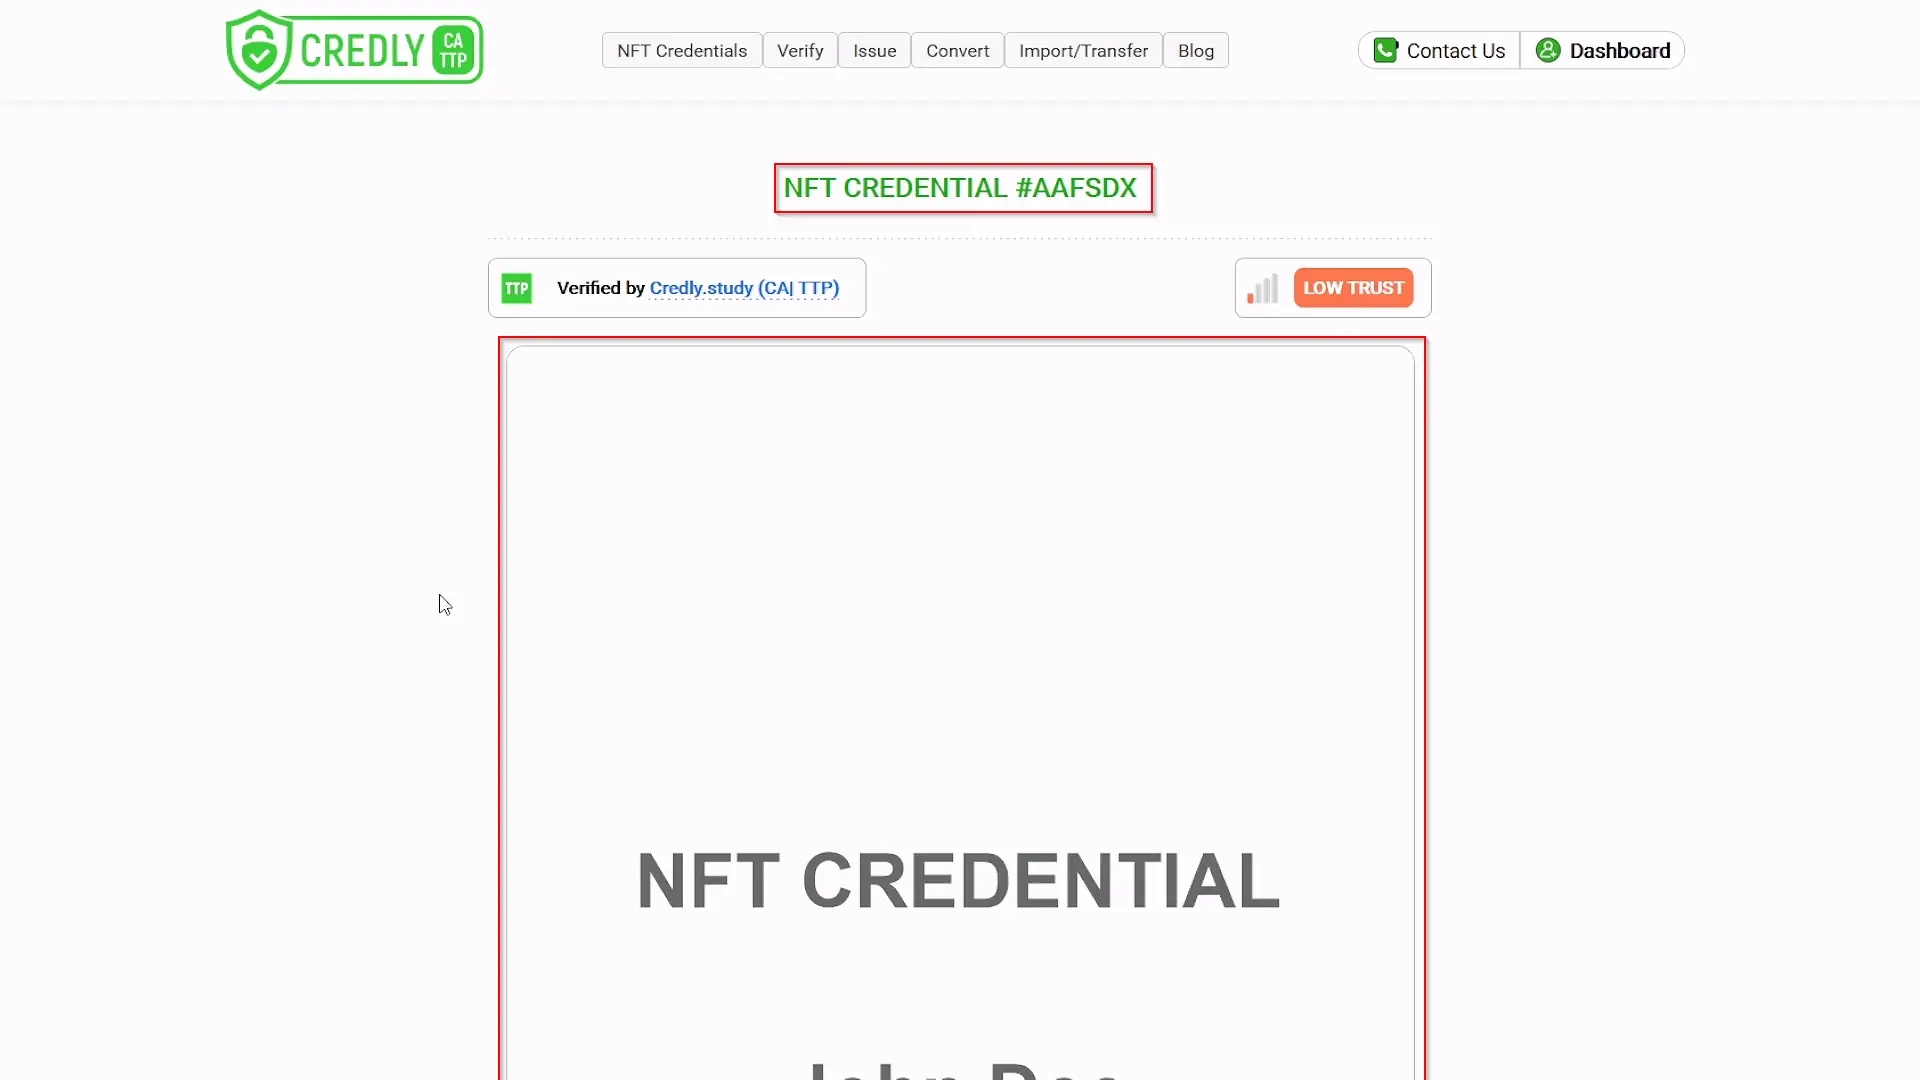
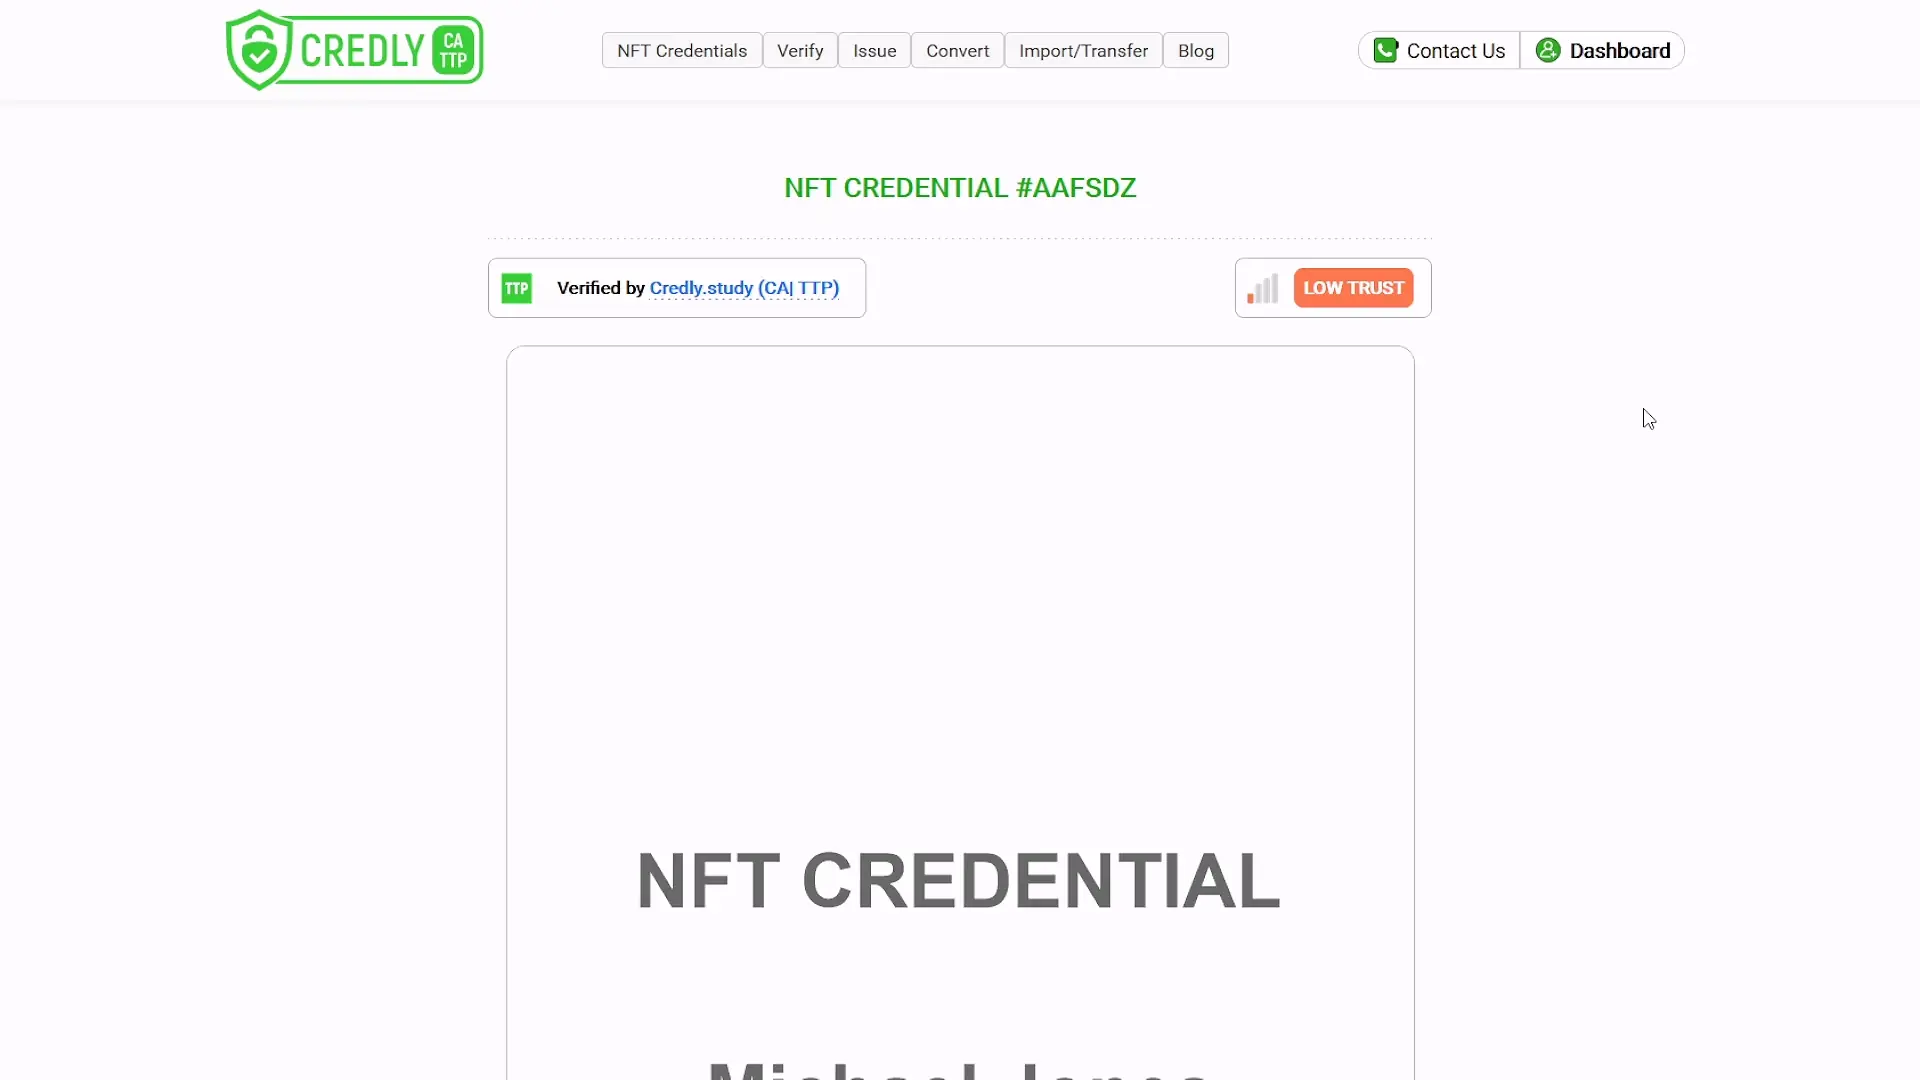
View as a User:
- From the "My Projects" list (filtered for
Documentstatus), click on the C ID of one of yourDocumentstatus projects. - The credential's public viewing page will open, showing exactly what a recipient or verifier would see.
- From the "My Projects" list (filtered for
-
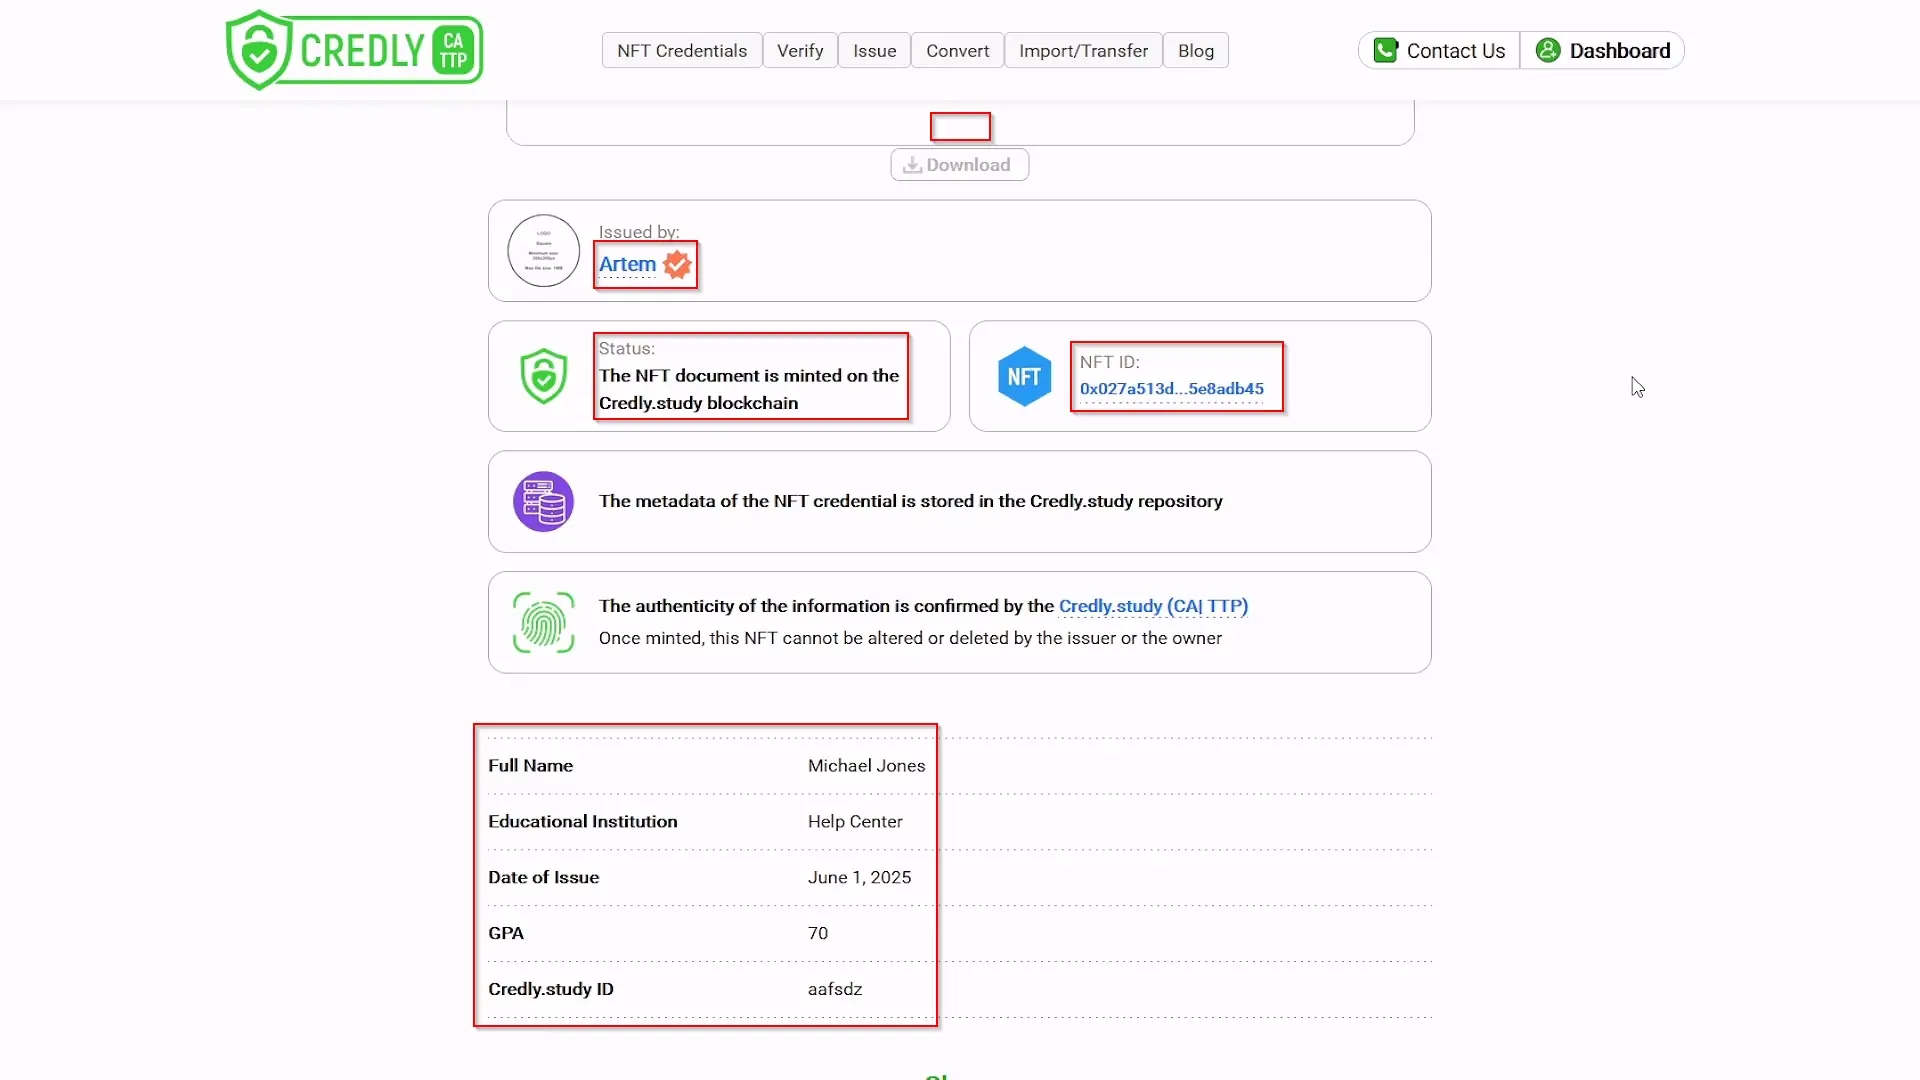
Elements on the Credential Page: You'll typically see:
- The credential image (your custom image if uploaded, or the default design).
- Creator/Issuing institution details (from your Institution Profile).
- Document status (e.g., "Verified," "Issued").
- Blockchain transaction information (providing verifiability).
- All associated metadata (name, date, GPA, etc.).
- "Share" options.
-
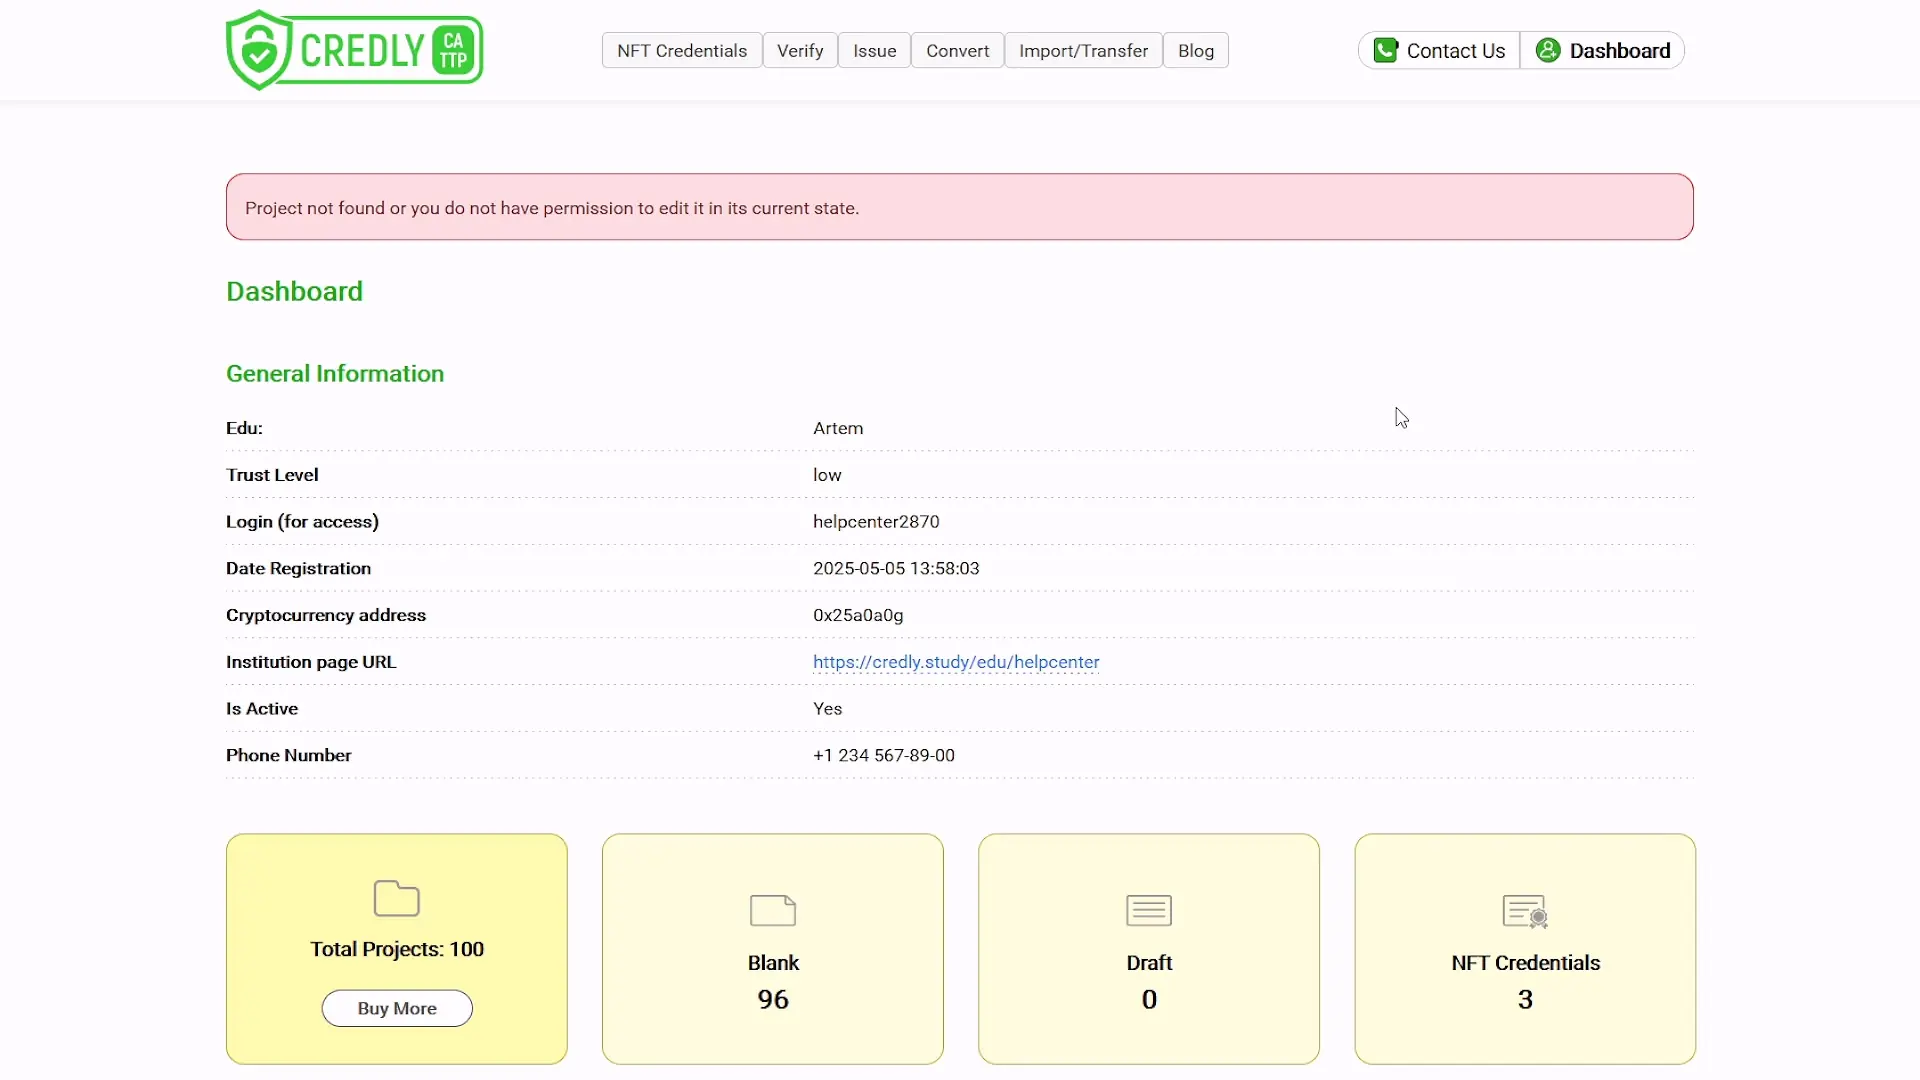
Immutability Confirmation:
- Close the credential view page.
- Back on the "My Projects" list, try clicking the S ID of one of the
Documentstatus projects (as if you were going to edit it). - You will likely receive a message like: "Project not found or you do not have permission to edit it in its current state." This confirms that an issued NFT document cannot be altered, even by its creator, ensuring its integrity and trustworthiness.
-
Copying Credential Link:
- On the "My Projects" page, in the row of the desired
Document, click on its current access level shown in the "Access" column (e.g., "Public", "By Link"). This action often copies the direct, shareable link to that credential to your clipboard.
- On the "My Projects" page, in the row of the desired


-
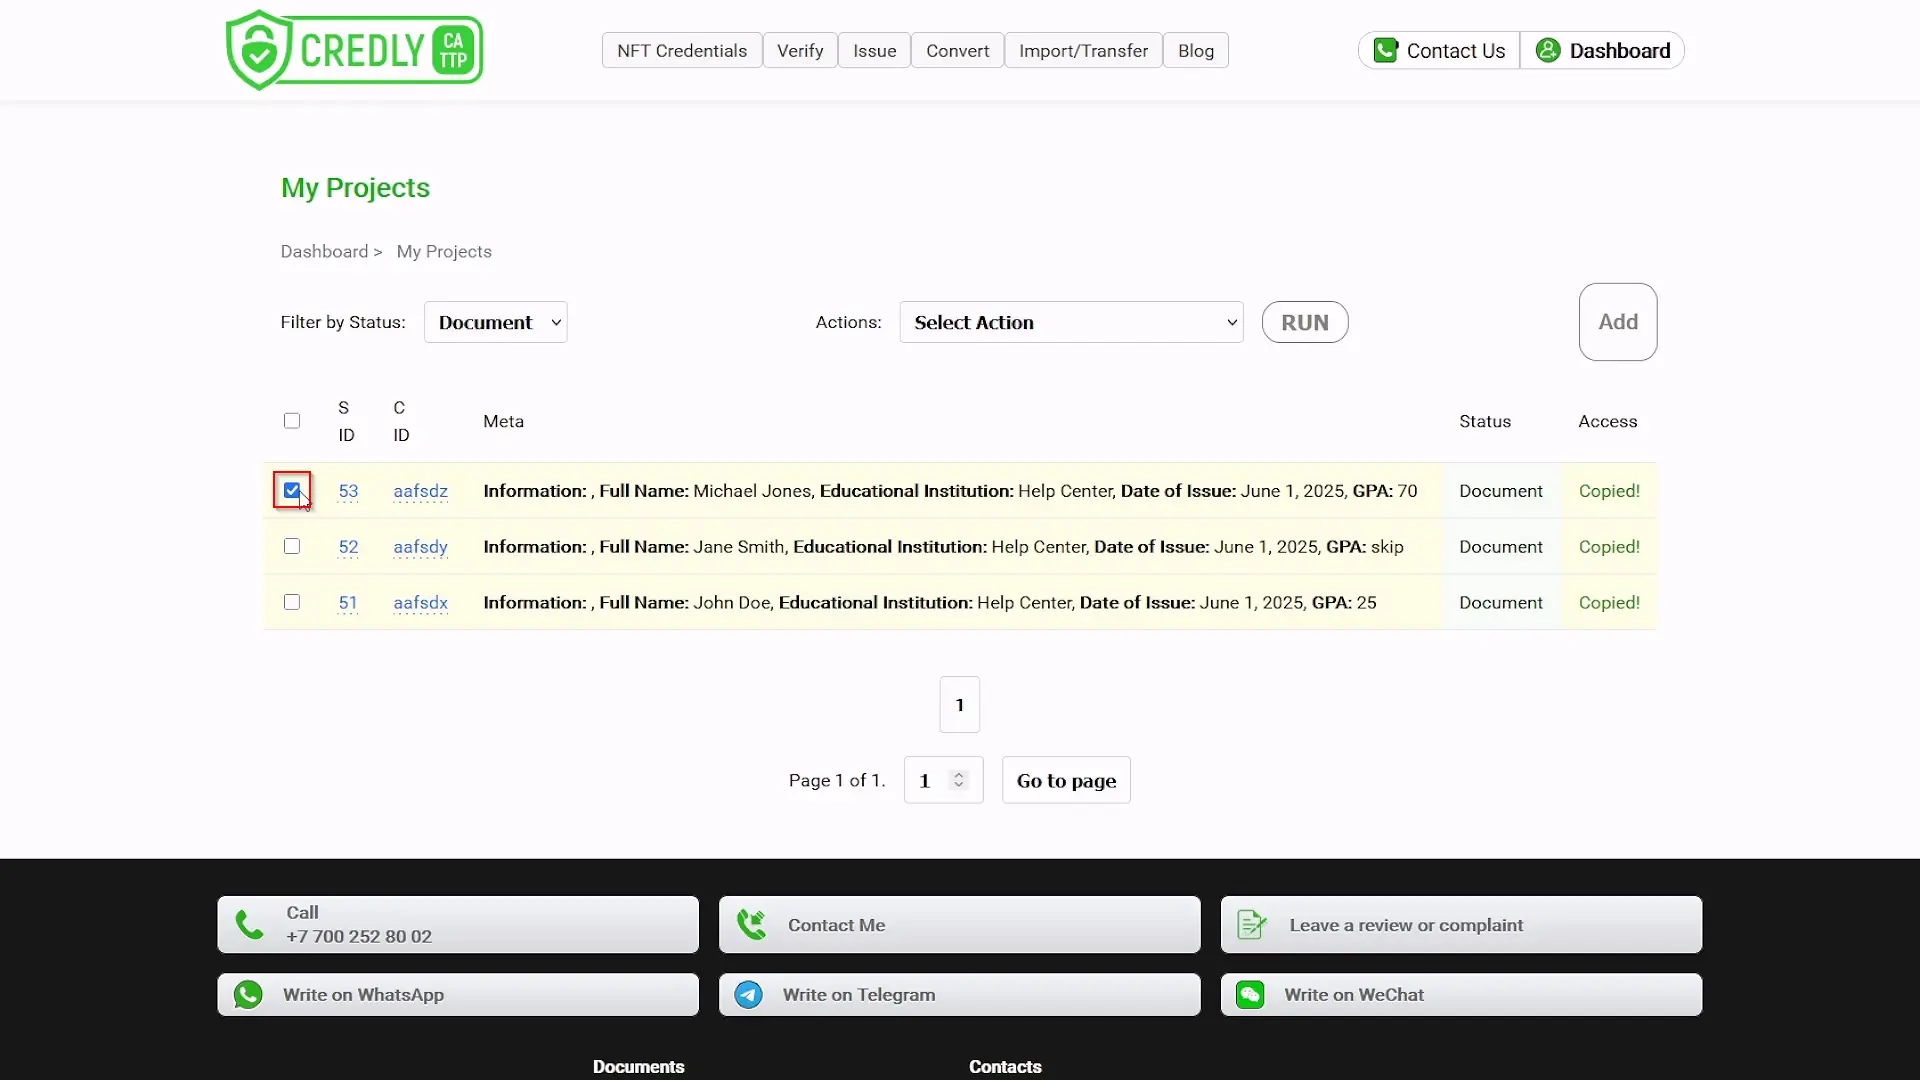
Managing Access Levels:
- You can control who can view an issued credential:
- On the "My Projects" page, select the desired
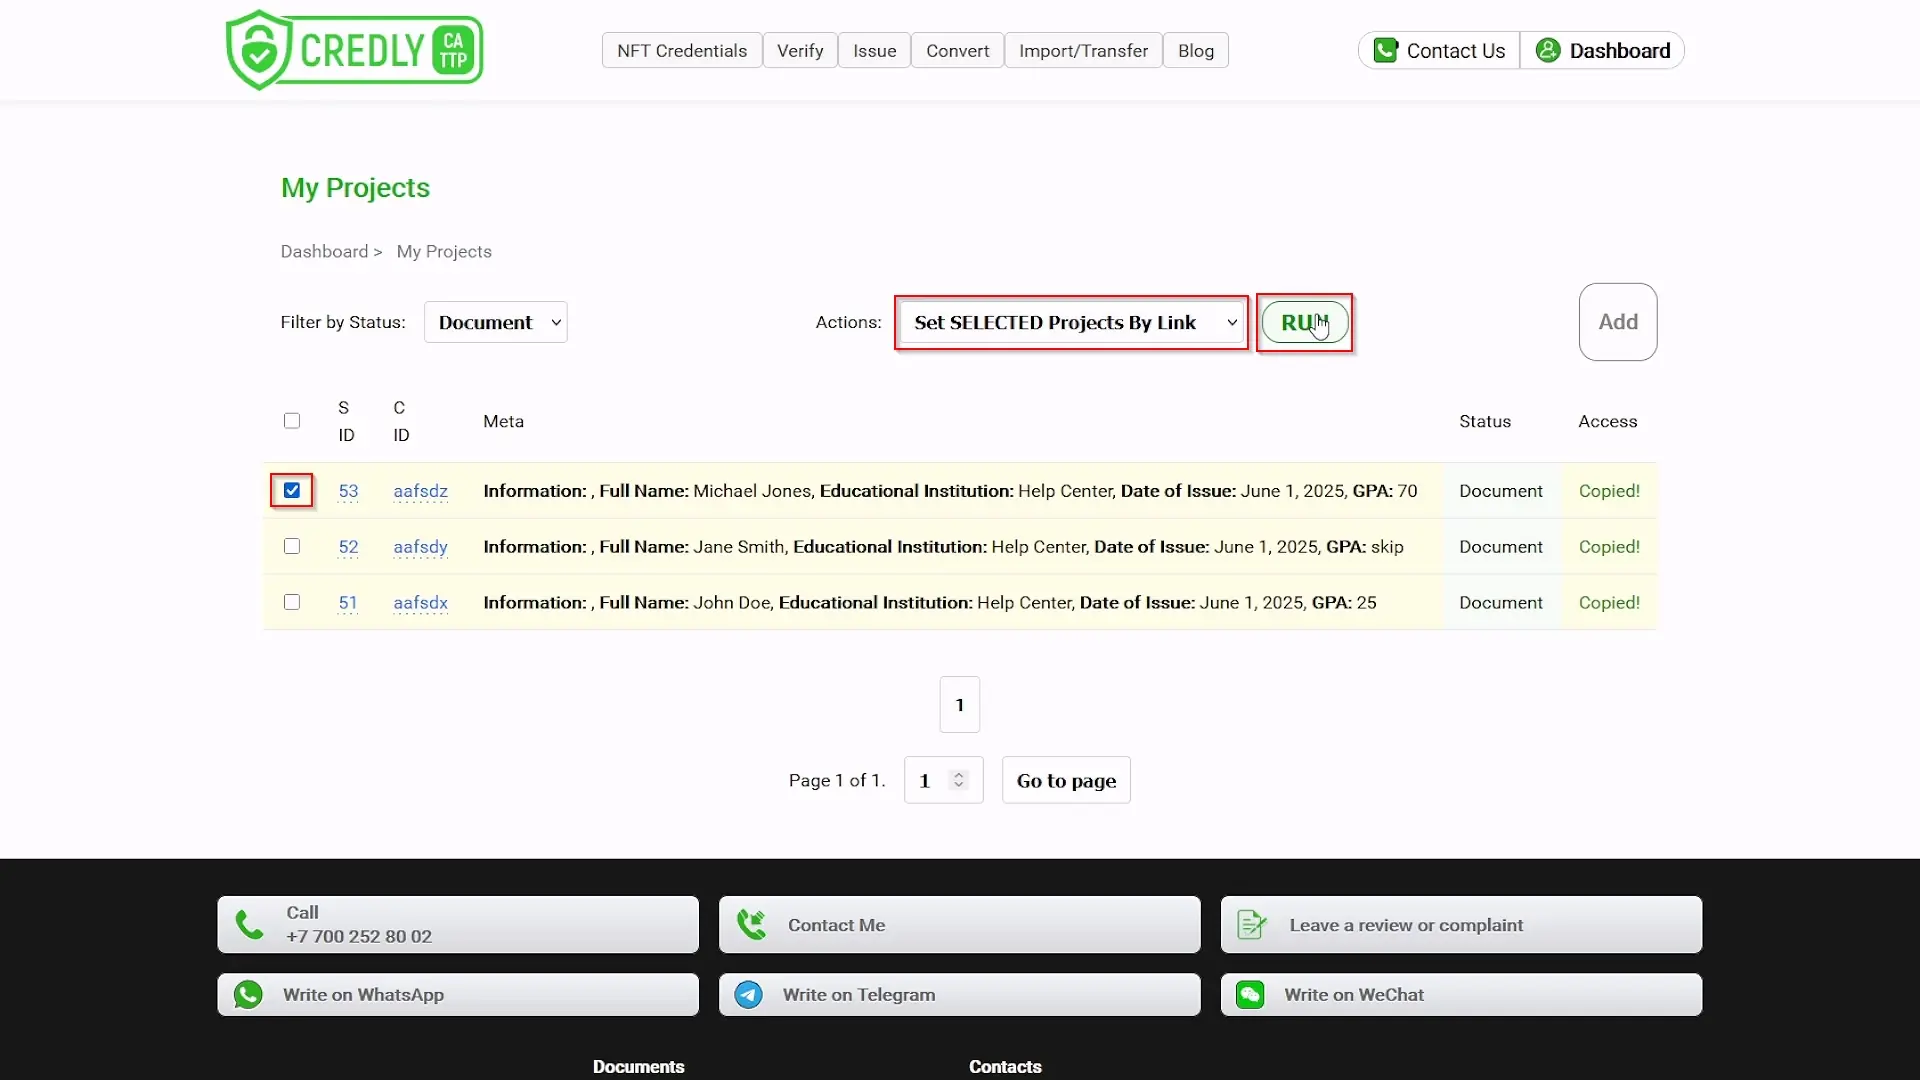
Document(s) using the checkboxes. - In the "Actions:" dropdown, choose an option like:
- "Set SELECTED Projects By Link": The credential will only be accessible to those who have the unique, tokenized URL. This is useful for controlled sharing.
- "Set SELECTED Projects Private": The credential will not be accessible to anyone publicly. This might be used if a document was issued in error and needs to be effectively hidden (though it remains on the blockchain).
- "Set SELECTED Projects Public": (Often the default) Anyone can view the credential if they have its direct C ID link or find it through public listings if applicable.
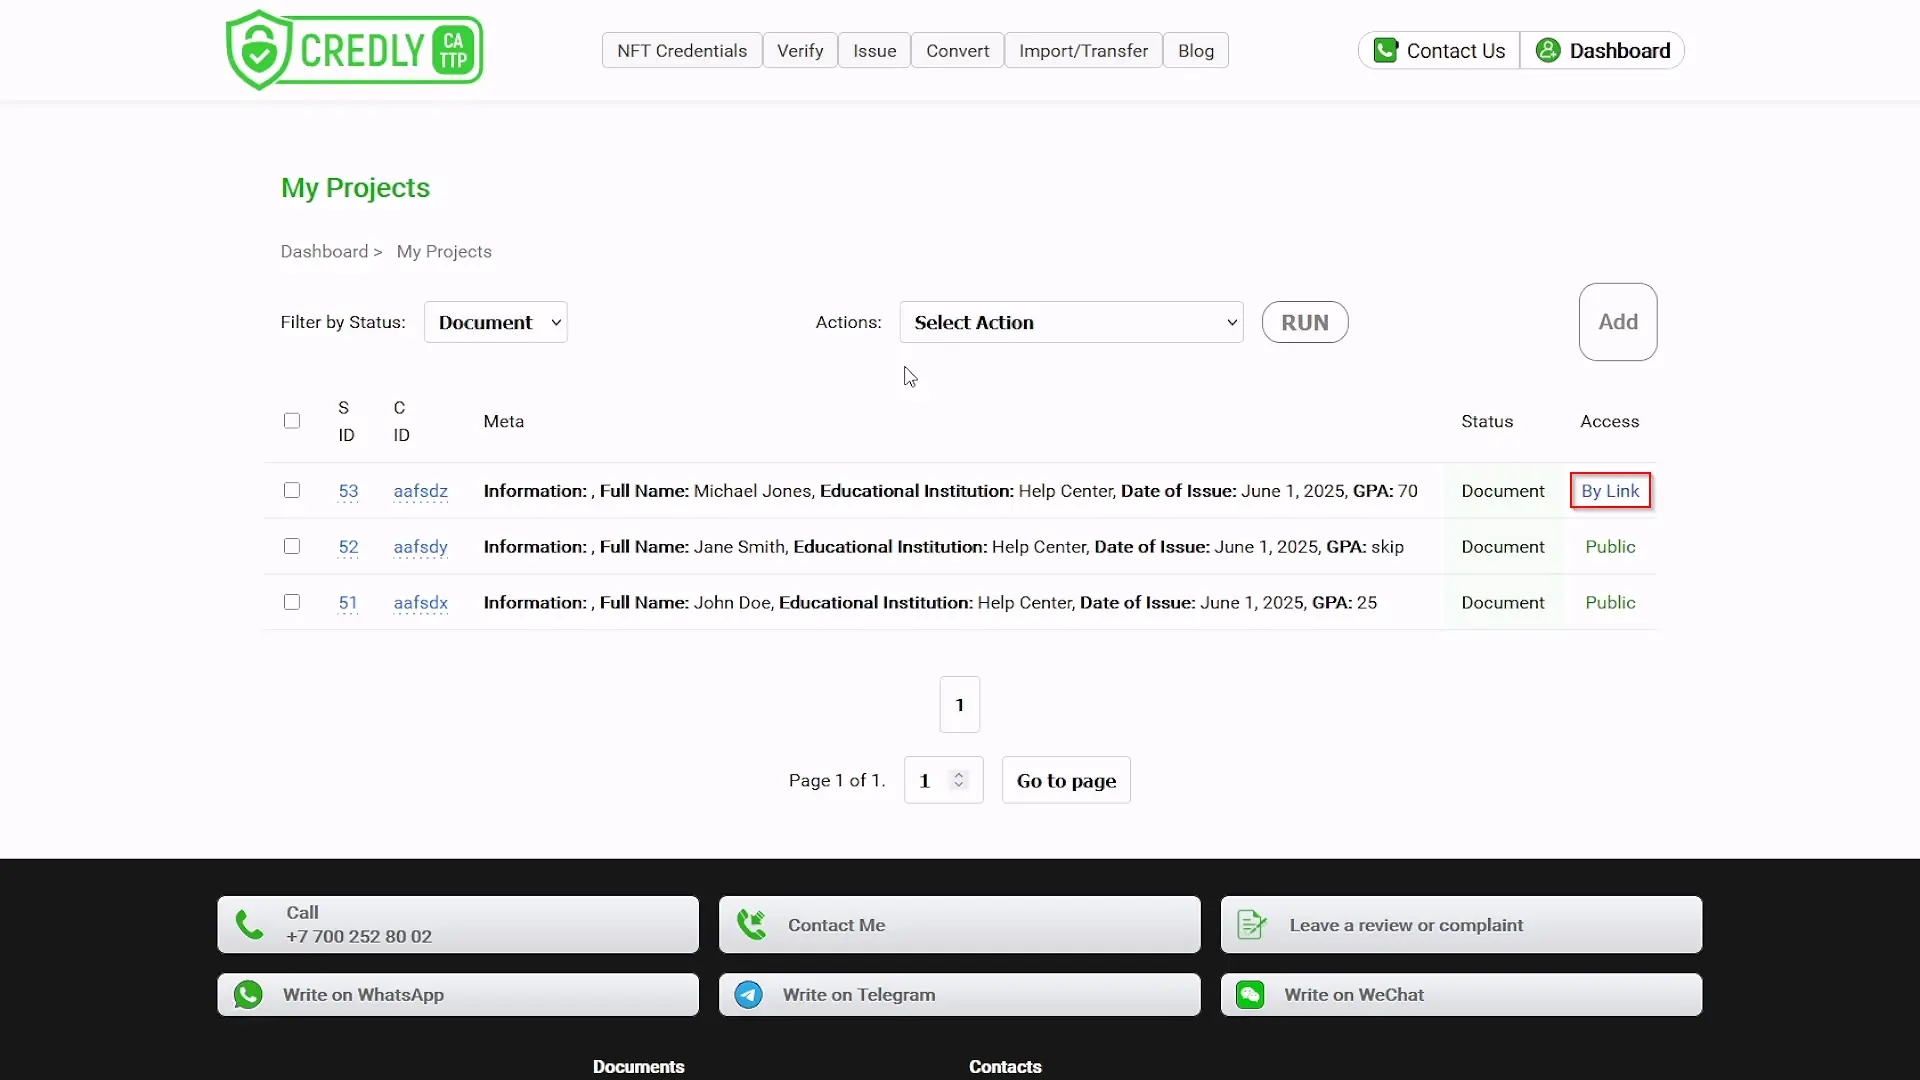
- Click the "Run" (or "Apply") button.
- The "Access" column for the selected project(s) will update. If you changed to "By Link", try copying the link again (by clicking on "By Link" in the Access column). You'll notice the URL is now longer and includes an access token, different from a simple public link.
- On the "My Projects" page, select the desired
- You can control who can view an issued credential:
Congratulations! You've successfully navigated the core process of issuing your first NFT credential on Credly.study. From registration and setting up your institution profile to importing data, customizing with images, signing, and finally managing your issued NFTs, you now have the foundational knowledge to create secure, verifiable digital documents. Your Dashboard provides a central hub for monitoring your project statuses and accessing key functionalities. Remember to consult the detailed on-page instructions for advanced features and explore further to empower your recipients with the future of digital recognition!